In the event that your Blu-ray drive breaks, and you replace it with a new one, you will need to marry it to your console to be able to use it. This can either be done by putting the original console's daughterboard on the new drive, or changing the drive key on the new daughterboard with FSM so that it's paired to your console. Keep in mind that you need to have the same model number of Blu-ray drive for a board swap to work.
In the case where a console's Blu-ray drive daughterboard or drive controller is missing or dead, then the only option is to remarry a new daughterboard. This also applies to the integrated drive controller IC on the CECH-25XX/30XX/4XXX models, though only if they have CFW/qCFW installed, as PS3HEN doesn't have enough access to the system to enable FSM.
CFW Method
- Remove any discs from inside the drive.
- Dump the EID Root Key.
- Rebug CFW: Open Rebug Toolbox, scroll to the "Selector" column and be sure that "Toggle XMB CFW settings" is enabled, then scroll to the Utilities column and select "Dump eid root key". It will dump to your PS3's HDD and reboot. With a USB storage device plugged in, use an FTP Program or MultiMAN's file manager to move the eid_root_key from
/dev_hdd0/game/RBGTLBOX2/USRDIR/to/dev_usb00X/(with X being any number). If you get a black screen while launching Rebug Toolbox, press the eject button on your PS3 or install No-BD firmware. - Evilnat CFW (4.88.2 or newer): Connect your USB storage device. In the XMB, scroll over to the Network column, select Custom Firmware Tools → Dump Tools → "Dump ERK". A notification will show "ERK dumped to /dev_usb00X/eid_root_key" (with X being any number).
- Rebug CFW: Open Rebug Toolbox, scroll to the "Selector" column and be sure that "Toggle XMB CFW settings" is enabled, then scroll to the Utilities column and select "Dump eid root key". It will dump to your PS3's HDD and reboot. With a USB storage device plugged in, use an FTP Program or MultiMAN's file manager to move the eid_root_key from
- Turn off your console, swap out the old Blu-ray drive for the new one, and turn it back on. If you have a No-BD firmware currently installed, you can now install the regular Rebug or Evilnat firmware.
- Go back to the XMB and scroll over to the Network column, select Custom Firmware Tools → Service Tools → Advanced Service Tools, then "Toggle Factory Service Mode" to turn FSM on. It may take a few seconds for it to boot into FSM, and a USB cable is required to use your controller.
- Scroll over to the Network column, select Custom Firmware Tools → Service Tools → Advanced Service Tools → "Remarry Blu-ray Drive". If successful, a notification should pop up saying "CEX_drive_init() succeeded".
- Go back to the XMB and scroll over to the Network column, select Custom Firmware Tools → Service Tools → Advanced Service Tools → "Toggle Factory Service Mode" to turn FSM off.
qCFW Method
For this method, you will need BadWDSD installed on your PS3.
 | qCFW will exit FSM automatically every 5 boots! |
- Extract this zip into root of your USB drive.
- Plug it into the RIGHT MOST USB port of your console.
- Enter FSM using Network -> CFW Tools -> Service Tools -> Advanced Service Tools -> Toggle Factory Service Mode
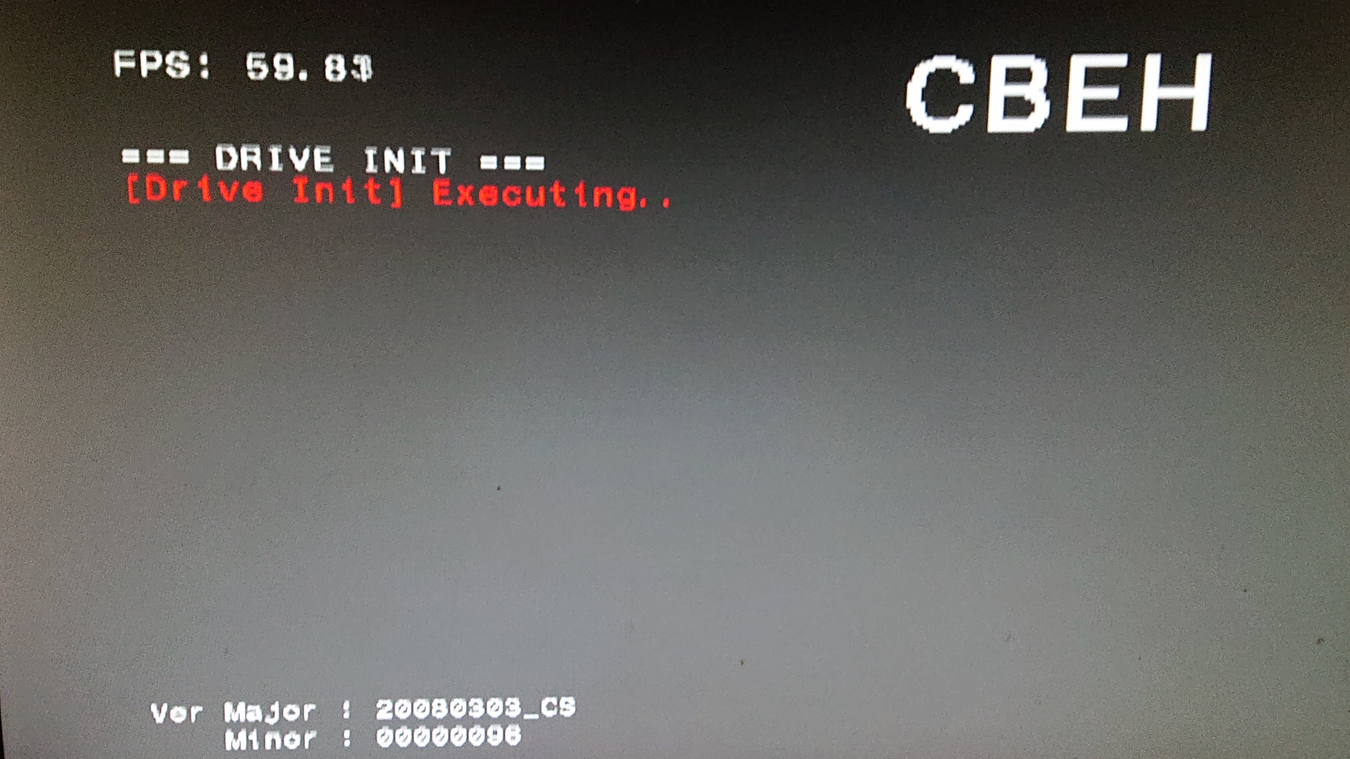
- You should see something like this on the screen:
- Then, the console should turn itself off without any errors.
- Remove USB drive, then turn on the console.
- (Optional) If you want to play BD movies, insert it and play it once while in FSM.
- Exit FSM.
Regaining SACD support
Requirements:
- CEX firmware
- CFW installed
- Compatible drive, see table below
| Drive | Daughterboard | Compatible? |
|---|---|---|
| BD-400 | BMD-001 | Yes |
| BD-400 | BMD-002 | Yes |
| BD-410 | BMD-003 | Yes |
| BD-410 | BMD-006 | Yes |
| BD-410 | BMD-011 | No (Renesas chipset) |
| BD-410 | BMD-021 | UNTESTED, 24 pin SATA connector with Sony chipset and onboard SPI NOR flash, should theoretically work |
| BD-410 | BMD-031 | No (Renesas chipset) |
- Get the latest sacdflagtool release
- Install the .pkg or run the .elf directly depending on your choice
- Scan lv2 for the access check and wait for it to finish
- If you get a
flag is already 0xfferror, This means your drive already got the SACD flag enabled
- If you get a
- Enable SACD
- Reboot and you should be able to run SACD discs