Introduction
This guide is to serve as reference on how to install common hall effect joystick modules on the original Xbox Controller S.
The Xbox Controller S uses the same analog joysticks as the Xbox 360 controller. However, as shown in this guide, while these modules do physically fit, they must be modified to work correctly on the Xbox Controller S.
I take no responsibility for damaged controller PCBs or Xboxes as a result of this mod. While the mod has worked on the controller PCBs I've tested with, it is not guaranteed to work on every PCB revision.
Hall effect joystick module construction
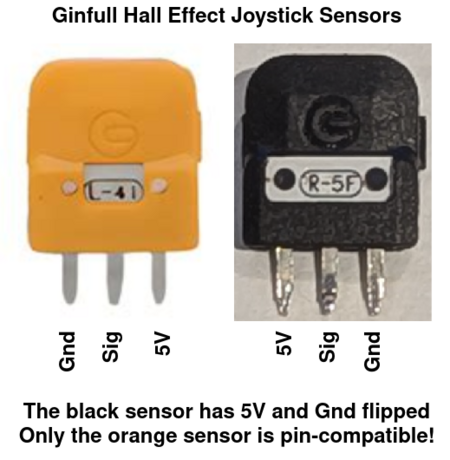
The tested hall effect joystick modules are manufactured by Ginfull. Because they are intended for the Xbox 360, they have a pinout which matches the Xbox 360 PCB. The joystick consists of two sensors modules, black, labeled "R", and orange, labeled "L". When installed in the Xbox Controller S, the orange sensor is the Y axis and the black sensor is the X axis.
Behind each sensor module, there is a permanent magnet which is read by the sensor module and converted to an analog voltage output on the signal pin, which replicates the original function of the analog potentiometers. Because these sensor modules are purely digital, they require 5V and Ground on the correct pin.
The black "R" and orange "L" sensor modules have reversed pinouts from each other.
The Xbox Controller S PCB has the following pinout for the joysticks.
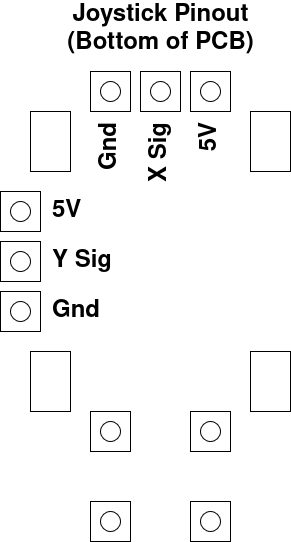
Based on the above pinouts, only the orange sensor module "L" is pin-compatible with the PCB.
WARNING: If the joystick module is installed with both the black "R" and orange "L" modules without modification, the Xbox will perform a hardware reset indefinitely when the controller is plugged in. It is possible to damage your Xbox, please be careful!
Installation Guide
Disassemble the controller
Disassembly of the controller is straightforward. There is a hidden screw underneath the serial number sticker. You can remove this sticker fairly easily by heating up the sticker and slowly peeling it off. Otherwise, just punch a hole through it.
Remove existing joystick modules
Remove the original joystick modules from the controller PCB. The best way to do this is by using a desoldering gun (like the Hakko FR-301), or with a soldering iron and solder sucker. There are also special soldering tips for joystick modules, but I have not tried them. I have had success removing all the solder by using flux and copper desoldering braid.
Ensure that all the holes are open and free of solder.
Prepare the hall effect joystick modules
Some modifications are required on the joystick modules themselves to ensure that they work correctly in the Xbox Controller S.
Reverse the black permanent magnet
It is required that the black permanent magnet be removed and reversed from its original orientation. Without reversing the magnet, the X axis will track reversed from the actual direction being input.
First, remove the black sensor module from the joystick module. There are small clips on either side. Use a small flat head screwdriver and carefully pry the sensor off.
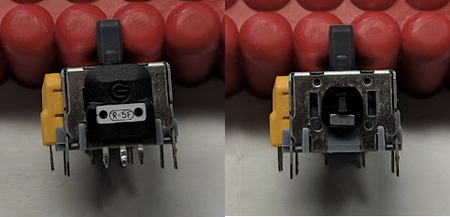
To reverse the magnet, first take a permanent marker and mark one end of the visible side the magnet.
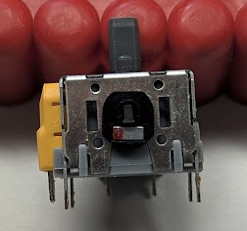
Using a flat head screwdriver, carefully remove the plastic carrier holding the magnet from the joystick module.
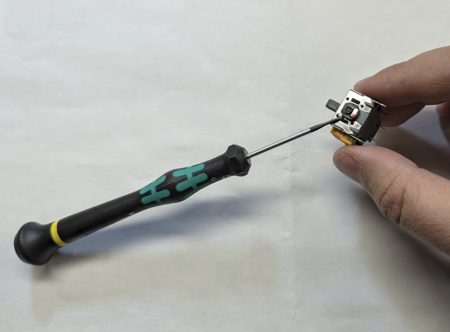
With the plastic piece free, using a flat head screwdriver, pry the magnet out of the carrier.
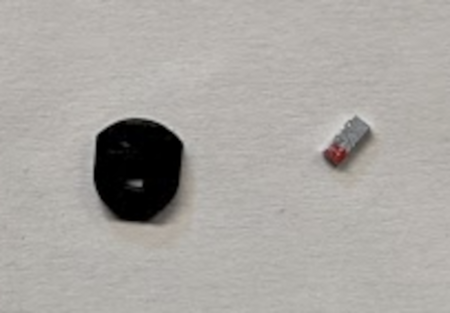
Reinsert the magnet to the carrier in the opposite direction. Reinstall the carrier back on the joystick. Note that the magnet is now installed in the reverse direction!
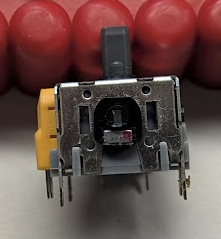
Reinstall the sensor module back on the joystick.
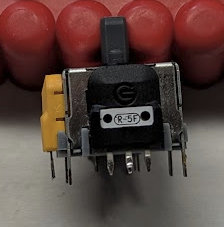
Choose installation method
To make the joystick module compatible with the Xbox Controller S PCB, there are 2 options:
Option 1: Use only orange "L" sensor modules
Since the orange "L" sensor modules are pin-compatible with the Xbox Controller S PCB, they can be harvested from other hall effect joysticks. If you are looking for a pure drop-in replacement, harvest another orange “L” sensor from another joystick.
You also don't need to reverse the black magnet if you simply swap both the orange magnet carrier and orange sensor from another joystick module. The downside is that this essentially halves the amount of joystick modules that you'll yield, so be sure to buy double what you need if you want to use this method.
Option 2: Rewire pins on black "R" sensor modules
Because the "R" modules have 5V and Ground reversed from the Xbox Controller PCB, wires must be run from the pads on the PCB to the correct pins on the black “R” sensor module. Start by soldering in wires for 5V and Ground as shown below.
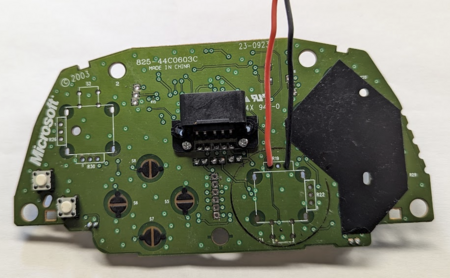
On the black “R” sensor module, carefully bend the outer pins outwards so they do not go through the holes in the PCB.
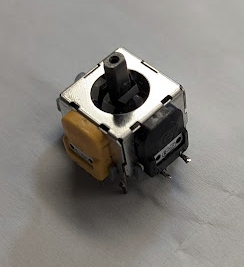
Insert the joystick module into the PCB. Start by soldering the two anchors closest to the black “R” sensor module. Reflow the anchors to ensure the joystick module is sitting flat against the PCB.
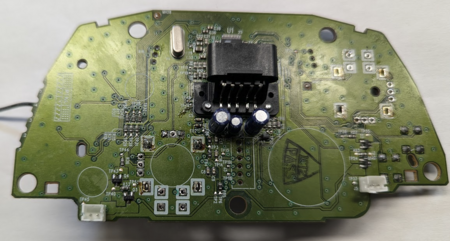
The pinout for the black “R” sensor is backwards from what we need. Shorten the wires and loop them around to the opposite pin on the black “R” sensor module.
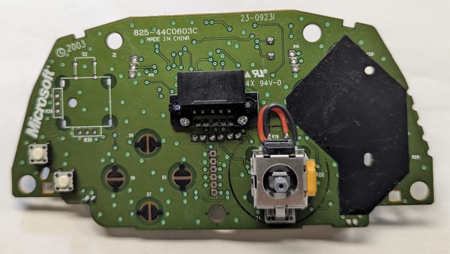
Solder in 5V and Ground wires for the left joystick as shown.
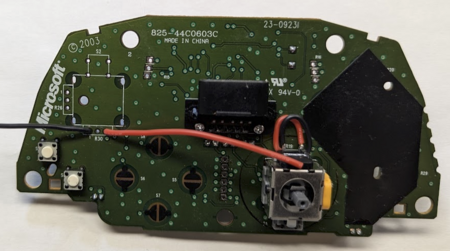
Repeat the installation process for the left joystick module.
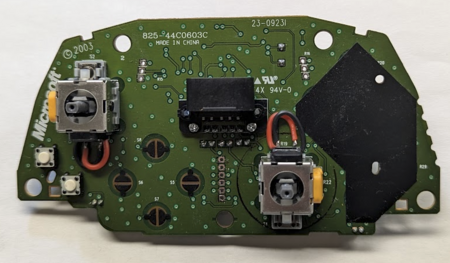
Reassemble the controller
Reassemble the controller and try out your new hall effect joysticks.
Some adjustment may be required to get the joysticks perfectly centred. This can be done by inserting a pin into one of the holes in the sensor module and manually moving the joystick. There are multiple videos on YouTube that demonstrate adjustment.