The System-Specific Settings page is all about highlighting how you can use the RetroTINK's various features to improve the experience of using your video game systems beyond just plugging them in. This can range from setting 1:1 pixel aspect ratio for Super Game Boy on the SNES, to dovetailing with the Sharpscale Plugin on the PlayStation TV. While the RetroTINK will always provide a great experience right out of the box, the tips in this section will help remove quirks and annoyances from the original platform, or present the games more accurately.
 | Every section will have a section with a chart that lays out how to achieve the optimal and sharpest settings for that console. For analog consoles that utilize the RGB/Component ADC Setup, you will need to use Enhanced S-Video, YPbPr Component, RGBS, or RGBHV. These will not work with S-Video or CVBS Composite, as those do not have sampling settings. |
For general information about the Next Generation RetroTINKs, please visit this page.
Automatic Sampling Detection vs Manual Sampling Detection
At the start of your console's section, you may see "Sample Rate Detection" noted in the optimization graph. This means the console cam make use of the Automatic Sampling Detection feature of the RetroTINK for 15KHz signals. If your library regularly uses multiple horizontal resolutions for their 15KHz signals, consider taking advantage of Automatic Sample Rate Detection. If your console uses multiple horizontal resolutions but your library only makes use of one, consider using the Manual Sample Detection settings instead. One example would be Super NES: an overwhelming majority of games use 256px for their horizontal resolutions and very few use 512px. Even if you do have a game that uses 512px, you may find operating the RetroTINK easier by forcing 512px.
Cable Recommendations
When this page recommends cables, it will recommend the simplest possible connection the console natively supports that gives the best results. For most retro consoles, this means RGB SCART cables. YPbPr cables that transcode RGBS to YPbPr will work as well. Remember to disable the RetroTINK's Low Pass Filter for HD RetroVision cables, which have their own Low Pass Filter.
Defeating Dithering
Dithering is a technique many games used in tandem with the blurring effect of a video cable (like Composite) and a CRT. The idea is that the video cable and display blend the dither patterns together, to accomplish tricks like transparency or higher color depth. When using high-quality cables like RGB-SCART and Component, dithering can become very apparent, and many users may find them unsightly. The RetroTINK has an option that can help:
- Go to Advanced Settings > Processing / Effects, then set Hori. Kernel and Vert. Kernel to "Bilinear Soft" as needed. This blurs the edges of the pixels to disguise the dithering.
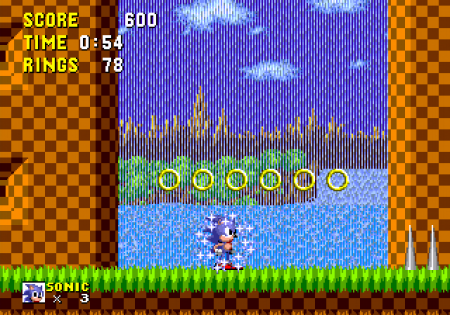
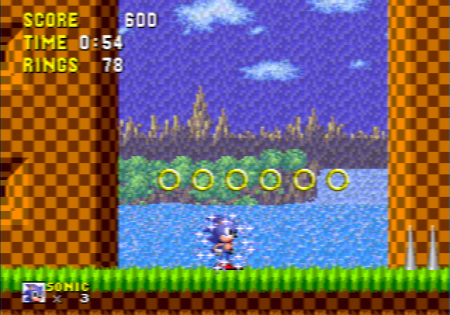
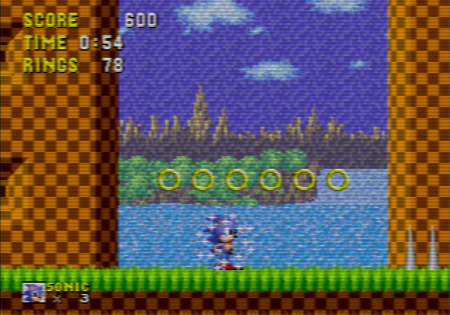
The cost of applying this effect is that the image will of course be rather blurry. Adding some scanlines (also in the Processing / Effects menu) can help alleviate this somewhat; don't forget that HDR will help brighten the image back up. If the dithering is only vertical stripes (like the waterfalls in Sonic the Hedgehog or the water in Kirby's Dream Land 3), you could alternately use Bilinear Sharp on the Hori. Kernel, for a slightly sharper appearance.
| Sonic the Hedgehog - Bilinear Sharp Vert. and Hori. | Sonic the Hedgehog - Bilinear Soft Hori. | Sonic the Hedgehog - Bilinear Soft Hori. with Scanlines |
|---|---|---|
 |
 |
 |
Nintendo Entertainment System / Family Computer
The NES (Famicom in Japan) is commonly thought of as a composite-only console, though RGB modifications are available. This section assumes an RGB mod was made to the NES.
Sample Rate
| RGB/Component ADC Setup (256) | ||
|---|---|---|
| Samples per Line | 3410 (2861 Act) | |
| Decimation Factor | 10 (341.000) | |
Connections
The AV Famicom, model number HVC-101, and the NES, model number NES-001 are the only models that output composite. Use two simple male-to-male RCA cables to connect these consoles to the RetroTINK.
Some NES systems use RF output; in this case, a demodulator (such as a VCR) is required to convert RF to composite.
Audio is mono only.
Settings
Use the Input Swap setting in the Audio Input Setup menu to assign a single audio connection to both channels. The correct setting depends on your audio configuration.
Profiles
Unmodified NES units should use composite connections. Use the \profile\Composite Video Only\Mike Chi 3D Comb Profiles\CVBS_3D_Comb_Game.rt4 profile for a sharp picture, or a CRT profile for color blending.
For RGB-modded NES systems, start with the \profile\Nintendo NES + FC\_Start Here SCART + RGBS.rt4 profile. Note that sharp scaling profiles for PAL content may not yet be available.
Super NES / Super Famicom
This section covers Super NES (model SNS-001) and Super Famicom (model SHVC-001). Units with model number SNS-101 or SHVC-101 (Super NES Jr / Super Famicom Jr) require a hardware RGB modification. For simplicity, Super NES will refer to the Western Super Nintendo and the Japanese Super Famicom.
Sample Rate
| RetroTINK Settings | ||
|---|---|---|
| Sample Rate Detection | ||
| Auto Dec. Factor | Yes | |
| Audo Dec Phase | Yes | |
| ADC Sample Rate | 3410 | |
| Progressive Detection | 341.000 | 682.000 |
| Interlaced Detection | 341.000 | |
Connections
All Super NES 001 models support RGBS Sync-on-Luma and RGBS Sync-on-Composite signals. RGBS Sync-on-Luma SCART cables are recommended.
Most models also support RGBS CSync, except the revision with the 1-Chip-03 motherboard.
Warning: Do not use PAL RGB cables on NTSC consoles and vice-versa. The pins are incompatible.
Cable Recommendations
Here are a few recommended cables to connect the Super NES to the RetroTINK. These recommendations apply to all SHVC-001 and SNS-001 models.
RGB
- The RetroTINK Super NES HD15 Dongle in conjunction with the RetroTINK HD15 to HD15 cable or the https://www.retrotink.com/shop/hd15-to-scart-cable cable. This works for NTSC and PAL consoles.
- The Insurrection Industries SCART cable for NTSC consoles.
- The RetroGamingCables SCART cable for both NTSC and PAL consoles.
- The RetroAccess SCART cable for NTSC Consoles.
S-Video
1-Chip vs Non-1-Chip
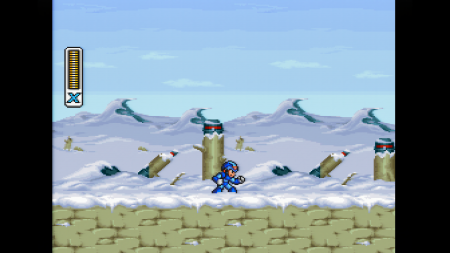
The 1-Chip revision consolidates several chips into one and can produce sharper video, though sometimes overly bright for the RetroTINK's ADC, leading to color clipping.
Non-1-Chip models output slightly smeared video to the right but maintain proper brightness.
This section does not favor one over the other; it is provided for identification and troubleshooting.
| Non-1-Chip | 1-Chip |
|---|---|
 |
 |
Profiles
For sharp video, use \profile\Nintendo SNES + SFC\_Start Here [REGION].rt4. This profile uses sample rate detection for games that switch between 341 and 682 samples per line, providing the sharpest possible output.
Super Game Boy
The Super GameBoy and Super GameBoy 2 allow GameBoy and certain GameBoy Color games to play on a TV via a Super NES, including a graphical border overlay. GameBoy games render in a 160x144p window within a 256x223p canvas.
Profiles
For the sharpest, largest possible video of GameBoy games in 4K:
\profile\Nintendo SNES + SFC\Wobbling Pixels NTSC [REGION] Super Gameboy - Razor Sharp\Super Gameboy + - Razor Sharp.rt4. This profile fills the full height of the screen and fits the border completely on a 16:9 4K display.
To display more of the border, use the profile \profile\Nintendo SNES + SFC\Wobbling Pixels [REGION] RGBS Super Gameboy - Razor Sharp\Super Gameboy - Razor Sharp.rt4.
Nintendo 64
This section covers the Nintendo 64, assuming, at minimum, an S-Video capable model and Enhanced S-Video are available.
Sample Rate
| Sample Rate Detection | |||
| Auto Dec. Factor | Yes | ||
| Auto Dec. Phase | Yes | ||
| ADC Sample Rate | NTSC: 3094 (2596 Act.)
PAL: 3176 (2646 Act.) | ||
| Progressive Detection | NTSC: 386.750
PAL: 397.000 |
NTSC: 773.500
PAL: 794.000 | |
| Interlaced Detection | NTSC: 386.750
PAL: 397.000 |
NTSC: 773.500
PAL: 794.000 | |
Connections
All N64 units can output composite.
All NTSC N64 units output S-Video; some PAL N64 units do as well.
No N64 outputs RGB natively, but all units can be modified for RGB.
For Enhanced S-Video, use the HD-15 input on the rear of the RT4K Pro.
Cable Recommendations
S-Video (NTSC)
Retro Verse S-Video (Compatible PAL models only)
Settings & Considerations
Ensure cartridges and the cartridge slot are clean; the N64 outputs nothing if cartridges are not properly seated into the slot and either are dirty.
N64 output resolution is fixed. Games can render at a different resolution internally, but all consoles will scale the image to 640 horizontal pixels. Only games that internally render at 320 pixels wide can use different settings to help adjust for sharpness.
Expansion Pak
Some games output higher resolutions or interlaced signals when an Expansion Pak is installed. Using the higher, default sample rate is recommended for consistent input video quality. Consider removing the Expansion Pak when using Gen or Frame sync lock for a smoother experience.
RGB Mod Considerations
Some RGB mods offer deblur by halving the sample rate. This decimates the image and is unnecessary with your RetroTINK. Disable this feature and let the RetroTINK handle deblurring.
Profiles
Sharp Picture: \profile\Nintendo N64\_Start Here [REGION].rt4 — utilizes sample rate detection and N64 deblur features.
If the game renders at half the N64 sample rate but the RetroTINK does not automatically adjust, create a profile that forces deblur sampling.
Nintendo GameCube
This section covers both DOL-001 and DOL-101 models and assumes, at minimum, the availability of Enhanced S-Video, YPbPr, RGB SCART, or HDMI via GCVideo.
Sample Rate (Analog Only)
| RGB/Component ADC Setup | |
|---|---|
| Samples per Line | NTSC: 3432 (2880 Act.)
PAL: 3456 (2880 Act.) |
| Decimation Factor | NTSC: 4 (858.000)
PAL: 4 (864.000 |
Connections
DOL-001 and the Digital Video Port
All DOL-001 models have a “Digital AV Out” port. The Insurrection Industries Carby HDMI adapter with GCVideo HDMI firmware 3.1 installed is the recommended video output to pair with a RetroTINK. These models are also compatible with OEM component or D-Terminal cables. Third-party component cables are not recommended.
The RetroTINK-6X CE does not have HDMI input. A DAC combined with a GCVideo HDMI adapter or a RetroTINK model with HDMI input is recommended
GCVideo HDMI and YPbPr cables allow for 31kHz mode for sharper output.
DOL-101 and the Analog AV Port
All models output composite via the “Analog AV Out” port. NTSC models support composite and S-Video, but not RGB. PAL models support composite and RGB, but not S-Video. 31kHz modes are typically unavailable without a hardware modification.
Warning: Enhanced S-Video is only available on the RT4K Pro model.
Cable Recommendations
GCVideo HDMI Adapter
S-Video (NTSC only) (cannot access Progressive Scan mode)
RGB SCART (PAL only) (cannot access Progressive Scan mode)
Settings
Alternate Video Modes:
Alternate video modes are activated by holding B after the GameCube startup screen. Not all games support these modes out of the box. These are available on stock GameCube settings. There are two types:
Progressive Scan Mode (480p) – NTSC titles output double vertical resolution
PAL60 – PAL titles output 60fps in progressive mode
GCVideo HDMI 3.1 Settings
These settings only apply if you are connecting a GameCube to a RetroTINK via a GCVideo HDMI adapter. If you are using any of a RetroTINK's analog inputs, disregard this section.
Adjust these settings to get the best compatibility with the RetroTINK.
- Linedoubler: Off
- Scanline Profile: Off
- Picture Settings: Reset
- Output Settings:
- Allow 480p Mode: On
- Crop 486 to 480: Off
- Enhanced DVI Mode: On
- Display as 16:9: Off
- Volume: 255
- Mute: Off
- View All Modes → All Modes: Linedoubler Off
- Advanced Settings:
- Chroma Interpolation: Off
- Fix Resolution: On
- Regenerate CSync: Off
- Digital Color Format: YC422
- Report 240p as 480i: Off
- Sample Rate Hack: Off
RetroTINK Settings
Adjust this setting in the RetroTINK:
HDMI Receiver Setup
- Input Range: YCbCr 601 (Full)
Profiles
If you're using Enhanced S-Video, RGB, or YPbPr use the following profile: \profile\Nintendo GameCube\_Start Here Analog [REGION].rt4 and switch input accordingly.
If you're using GCVideo HDMI, use the following profile in conjunction with these settings: \profile\Nintendo GameCube\_Start Here HDMI.rt4
Swiss and GCVideo HDMI
Swiss is homebrew software for the GameCube that can disable stock settings which may soften video. When using Swiss with the RetroTINK and a GCVideo HDMI adapter, follow these settings for the sharpest picture.
Settings
Per-Game Width Adjustment: Swiss + Analog Video (Advanced)
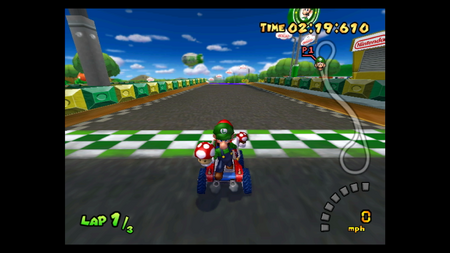
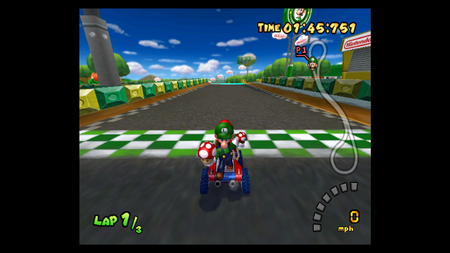
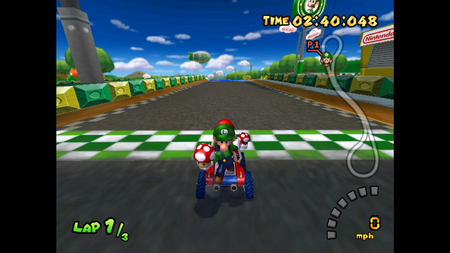
For analog video, setting the "Force Horizontal Scale" setting to "1:1" will give the sharpest possible video, but users need to adjust the width of the game back to an appropriate aspect ratio. There is no list of these aspect ratios and this should be considered an advanced function, given every game may have a different aspect correction ratio.
| Default output | Force Horizontal Scale - 1:1 | 1:1 horizontal + aspect ratio correction
GCVideo Fix Resolution set to off RetroTINK set to Aspect Correction: 4:3 |
|---|---|---|
 |
 |
 |
GCVideo HDMI Settings
These settings only apply if you are connecting a GameCube to a RetroTINK via HDMI. If you are using any of a RetroTINK's analog inputs, disregard this section.
The settings from the previous GCVideo HDMI section still apply. Make one additional adjustment:
- Advanced Settings → Fix Resolution: Off
Swiss Settings with GCVideo HDMI
Adjust the following setting in Swiss:
- Global Settings
- Screen Position: +0
- Swiss Video Mode: Auto
- AVE Compatibility: GCVideo
- Optimise for RetroTINK-4K: Yes - This setting may be named "RetroTINK-4K HDMI Input."
- Global Game Settings
- Force Video Active: No
- Disable Video Patches: None
- Pause for resolution change: No
- Default Game Settings
- Force Video Mode: Auto
- Force Horizontal Scale: Auto
- Force Vertical Offset: +0
- Force Vertical Filter: Auto
- Force Field Rendering: Auto
- Current Game Settings
- Force Video Mode: Auto
- Force Horizontal Scale: Auto
- Force Vertical Offset: +0
- Force Vertical Filter: Auto
- Force Field Rendering: Auto
If it seems daunting to adjust all of these, then do the following. This erases all other Swiss customizations you've made, including network configurations, but makes setting the RetroTINK specific setting easier:
- Erase the
\swiss\settings\global.inifile from the SD Card on a file browser. - When you start swiss up again, set the following
- Global Settings
- Optimise for RetroTINK-4K: Yes - This setting may be named "RetroTINK-4K HDMI Input."
- Global Settings
Once configured, most games loaded through Swiss will run at their internal render resolution, and the RetroTINK will adjust the size for the correct aspect ratio.
RetroTINK Settings
Adjust this setting in the RetroTINK:
HDMI Receiver Setup
- Input Range: YCbCr 601 (Full)
Per-Game Width Adjustment: GCVideo HDMI
The following games require horizontal scaling adjustment under this configuration. If there is a game you do not see on this list that has a major change, please report it to the RetroTINK Discord
- The Legend of Zelda: Wind Waker has aspect ratio 1.28:1
- Star Wars: Rogue Squadron
- Super Smash Bros: Melee has an aspect ratio of 40:33
Profiles
For the sharpest picture with GCVideo HDMI: \profile\Nintendo GameCube\_Start Here HDMI.rt4
For the sharpest picture with analog video: \profile\Nintendo GameCube\_Start Here [REGION] Analog.rt4
Game-specific Profiles and Settings
As noted in the Per-Game Width Adjustment: GCVideo HDMI section, certain games use horizontal scaling factors that the RetroTINK and the GCVideo HDMI settings cannot automatically detect, including:
- The Legend of Zelda: Wind Waker
- Super Smash Bros. Melee
- Star Wars Rogue Squadron
Profiles to adjust these scales correctly can be found in: \profile\Nintendo GameCube\Mr Moro Game Specific HDMI\
Game Boy Player + Game Boy Interface
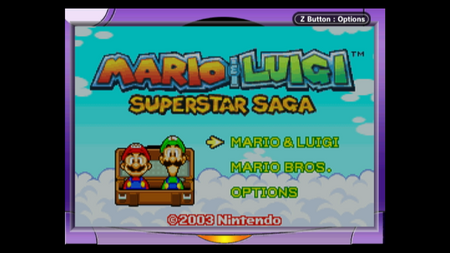
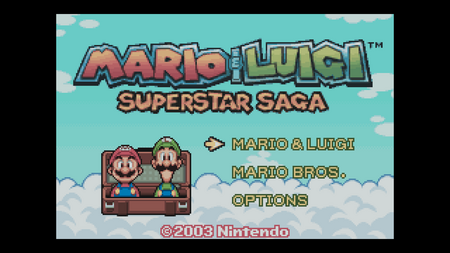
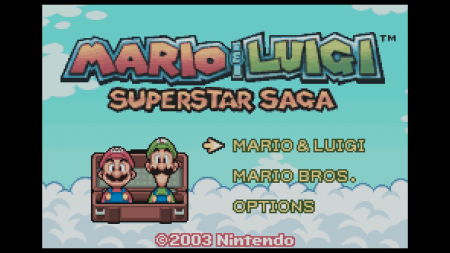
This section covers the GameBoy Player hardware using the GameBoy Interface (GBI) homebrew software.
For unmodded use of the GameBoy Player disk, use the \profile\Nintendo GameCube\_Start Here Analog [REGION].rt4 profile. Progressive Scan is supported, but LCD effects may not display correctly.
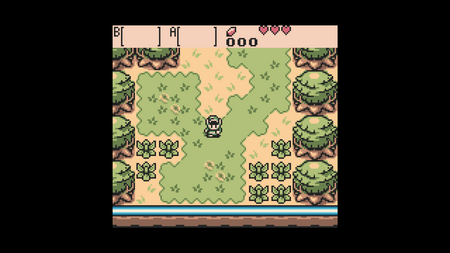
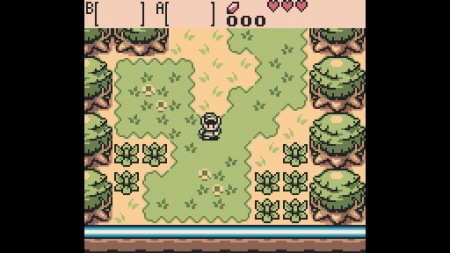
| GameBoy Player Disk | Old RetroTINK-5X Method using
GBIHF-OSSC at 1080p |
GBIHF-RT4K-HDMI |
|---|---|---|
 |
 |
 |
 |
 |
 |
Connections
Optimal settings require a GCVideo HDMI adapter or YPbPr component cables for all consoleswith the digital output port. If you own a PAL console, you can use RGB SCART cables on the analog output port.
This section does not use S-Video in any capacity. Use the GBP disk or different settings on GBI to use S-Video. The community has yet to find a configuration for S-Video or composite that works with LCD effects, which is why those connections are not covered.
Settings
Analog Connection
For YPbPr or RGB cables, use GBIHF-OSSC.dol+cli with the accompanying GBIHF-OSSC.cli file. No Swiss modifications are required.
Use this version of GBIHF with the profiles noted below in the Analog Connections section.
GCVideo HDMI
Ensure Swiss and GCVideo are configured as described previously. Use GBIHF-RT4K-HDMI.dol+cli with GBIHF-RT4K-HDMI.cli.
Use this version of GBIHF with the profiles noted below in the HDMI Connections section.
Profiles
Analog Connections
Use the settings and files described in the analog section above.
GameBoy Advance: \profile\Nintendo GameCube\Mr Moro GBIHF-OSSC HDMI + YPbPr\GBIHF-OSSC GBA.rt4.
GameBoy / GameBoy Color: \profile\Nintendo GameCube\Mr Moro GBIHF-OSSC HDMI + YPbPr\GBIHF-OSSC GBC.rt4.
HDMI Connections
Use the settings and files described in the HDMI section above.
GameBoy / GameBoy Color: \profile\Nintendo GameCube\Wobbling Pixels HDMI GCVideo GBIHF (GB GBC GBA) - Razor Sharp\GB GBC - Razor Sharp.rt4.
GameBoy Advance: \profile\Nintendo GameCube\Wobbling Pixels HDMI GCVideo GBIHF (GB GBC GBA) - Razor Sharp\GBA - Razor Sharp.rt4.
These profiles deliver the sharpest picture. Other profiles may include LCD effects or mimic the original DMG GameBoy screen. Instructions for these are found in \profile custom instructions & Info\.
Nintendo Wii
This section covers Wii models from all regions, except the RVL-101 Wii Mini, which only outputs composite without mods. GameCube software played on Wii hardware is included here, as they share the same settings. Later sections cover homebrew, Virtual Console software, and HDMI-modded consoles with GCVideo.
Sample Rate
| RGB/Component ADC Setup | |
|---|---|
| Samples per Line | NTSC: 3432 (2880 Act.)
PAL: 3456 (2880 Act.) |
| Decimation Factor | NTSC: 4 (858.000)
PAL: 4 (864) |
Connections
All RVL-001 Wii consoles support YPbPr component cables, which are easy to source and allow 480p output. This manual assumes component cables are connected to the RetroTINK.
Cable Recommendations
- RetroTINK Wii Dongle in conjunction with the RetroTINK HD15 to HD15 cable or the HD15 to SCART cable.
- HD Retrovision Wii Component Cables
Settings
GameCube Software
480p and aspect ratio must be set within the GameCube software, not at the system level. See the “Alternate Video Modes” part of the GameCube section for more details.
Wii Software
Setting 480p (NTSC Wii)
This setting results in the sharpest output from Wii Software.
- From the main Wii menu, select Wii Options
- Select Wii Settings
- Select Screen Select TV Resolution
- Choose EDTV or HDTV (480p)
- Select Confirm
Setting Widescreen or Standard Width:
This setting is up to user preference and may also be software dependent. Some games render best in widescreen, some games can render in both.
- From the main Wii menu, select Wii Options
- Select Wii Settings
- Select Screen
- Select Widescreen Settings
- Choose Standard (4:3) or Widescreen (16:9)
- Select Confirm
- Ensure the Aspect Correction setting in the RetroTINK Scaling/Crop Setup menu matches the Wii setting.
Note on Aspect Correction: Games that only support 4:3 or 16:9
In general, the "Aspect Correction" setting should be set to either 4:3 or 16:9 depending on your Wii's system settings and preferred display mode. Most games support both modes natively, however some titles only support one or the other, and pad the unused area with black bars. "16:9-only" titles will display as letterboxed when the Wii is set to 4:3, with black bars on the top and bottom of the screen. "4:3-only" titles typically pillarbox the image when the Wii is set to 16:9, with black bars on the left and right of the screen- some 4:3-only games, such as Wario Land: Shake It!, will pillarbox with border artwork or game information, while the active "playing area" will remain roughly 4:3 after the image is stretched.
Due to the nature of anamorphic widescreen, it is recommended that you change your Wii's system setting (and the RetroTINK's Aspect Correction setting) if it doesn't match one of these games, so that you aren't losing resolution to letterboxing or pillarboxing. Most known titles are listed in this thread
There are some other options if you don't want to change your settings back and forth for these titles, but still want the full resolution:
- If you use USBLoaderGX, you can change the aspect ratio setting per-game, so that the Wii will automatically switch settings when the game is launched. Keep your general setting in the Wii's menu on the aspect ratio you prefer and only change it per-game in USBLoaderGX if they do not match.
- Some Gecko codes are available to force popular 16:9 only titles into 4:3 if you prefer, usually by expanding the visible vertical area. These may have varying degrees of success to various widescreen hacks, with potential issues such as object pop-in, stretched or misplaced UI elements, and framerate issues from the increased rendering load. These codes are generally available on the Dolphin Wiki , with some screenshot examples in this thread
Profiles
Use \profile\Nintendo Wii\_Start Here.rt4 for Wii software. This profile defaults to 4:3, so adjust the RetroTINK aspect ratio as needed. This profile also works for GameCube software played on the Wii.
Wii + USB Loader GX
This section covers advanced settings for getting the sharpest picture from a Wii using homebrew, namely the Homebrew Channel and USB Loader GX.
Settings
Deflicker Filter
A deflicker filter is designed to soften 480i and reduce motion caused by interlaced resolutions, but developers often left this setting on for 480p games.
To turn off the deflicker filter globally:
- From the USB Loader GX main menu, select the cogs
- Select Loader Settings
- Scroll to Deflicker Filter and set to OFF (Extended)
To turn off the deflicker filter per-game:
- From the USB Loader GX main menu, select the game
- Select Settings → Game Load
- Scroll to Deflicker Filter and choose a setting that works (e.g., Off (Safe))
480p Pixel Fix Patch
Fixes a low-pass video filter glitch affecting all modes, including 480p. Only some Wii consoles are compatible.
To test whether your console is compatible with the fix:
- Launch Wii 240p Test Suite
- Enable 480p Modes → ON
- Select Video → 480p mixed 480p/240p assets (1:1)
- Go back to Checkerboard and press the PHA button
If compatible, the checkerboard appears as black/white squares; if it's not, the checkerboard appears as light/dark grey.
To enable the 480p Pixel Fix Patch safely regardless of compatibility:
- From the USB Loader GX main menu, select the cogs
- Select Loader Settings → 480p Pixel Fix Patch → ON
Video Width: Framebuffer (Advanced)
This setting renders games at their original size inside a 720x480p canvas. Width varies by title, so per-game Scaling/Crop Setup adjustments are required.
To enable Video Width: Framebuffer
- From the USB Loader GX main menu, select the cogs
- Select Loader Settings → Video Width → Framebuffer
Once enabled, profiles may need per-game adjustments using the RetroTINK Scaling/Crop Setup menu to restore proper width.
This setup ensures the sharpest video for Wii software while using USB Loader GX and homebrew enhancements.
Virtual Console
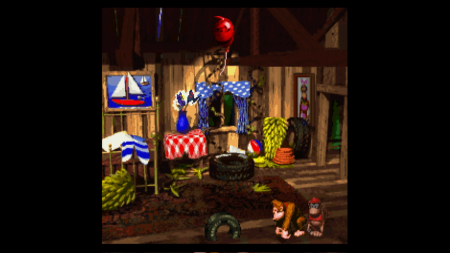
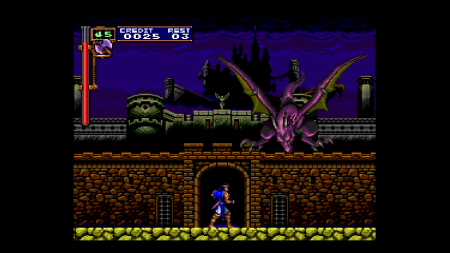
| NES Virtual console games are rendered many shades darker than an original console, as an anti-epilepsy measure. |
| Console | Original Console Optimized | Virtual Console Default Settings |
|---|---|---|
| NES | [pending Screenshot
Castlevania NES] |
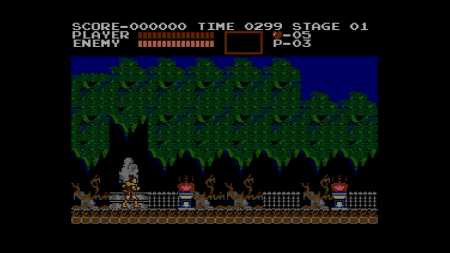 |
| Super NES | 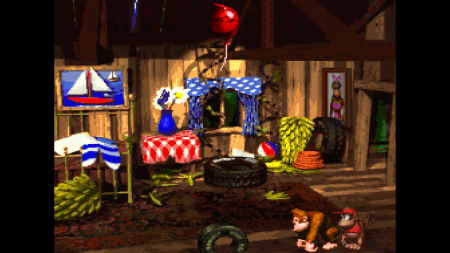 |
 |
| Sega Genesis | [Pending Picture of Ristar on Genesis 10x DAR] | 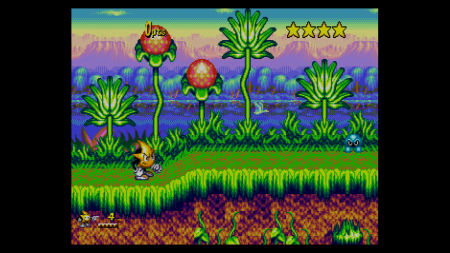 |
| Turbo Grafx-16 | 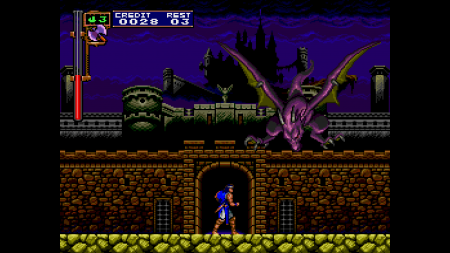 |
 |
| NEO GEO | NEO GEO Game | NEO GEO Game |
This section covers Virtual Console software. Most titles run in 15kHz progressive mode, except later releases and all N64 games the latter of which natively renders games in progressive mode.
Settings
Wii Settings
Set the Wii to 15kHz:
- From the main Wii menu, select Wii Options → Wii Settings → Screen → TV Resolution → Standard TV (480i)
- Select Confirm
- Virtual Console games will now run in 15kHz, their native resolution.
Force a Virtual Console game to 240p:
Some games may default to 15kHz interlaced. Use these steps to force progressive mode:
- Start a Virtual Console game
- Press the Home Button
- Attach the Nunchuck
- Press A + Z + 1 simultaneously
- A sound indicates success; confirm with the RetroTINK status menu that input is 15kHz progressive.
Profiles:
CRT profiles require no adjustments.
For sharp video, use \profile\Nintendo Wii\MrMoro YPbPr\480p Wii + 15kHz VC Primary.rt4. This profile uses sample rate detection for the sharpest picture at the correct aspect ratio. It works for most titles, except Neo Geo games or 512x240p modes.
The \profile\Nintendo Wii\_Start Here.rt4 profile still works but does not provide optimal sharpness.
Super NES games in 512x240p:
Some titles (e.g., Secret of Mana) render at 512x240p, which the RetroTINK may misdetect as 640x240p.
Wii Settings
Setting output to Framebuffer
- From USB Loader GX, select the game → Settings → Game Load → Video Width: Framebuffer
- Save changes
Profile:
Load \profile\Nintendo Wii\MrMoro YPbPr\480p Wii + 15kHz VC Secondary.rt4 to enable correct sample rate and scaling.
Virtual Console + EDTV (480p) Considerations
Using EDTV with the Vert. Pre-Scale feature can work for select titles but may break others:
- Some Super NES games use bilinear scaling at 480p, causing uneven scaling
- Some titles (like Sonic 2 2-player mode) run in 480i, forcing the Wii’s single deinterlacer instead of the RetroTINK’s options.
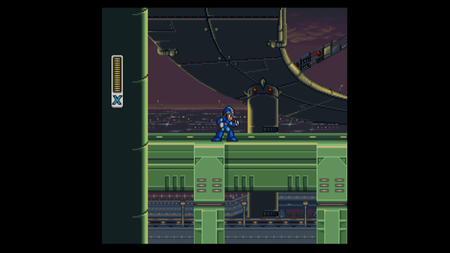
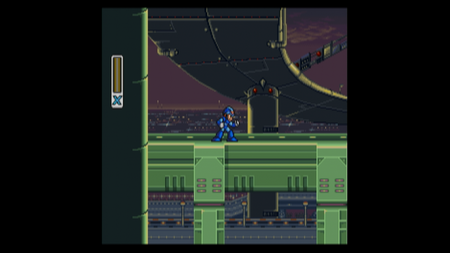
- Sample rate detection is unavailable at 480p; sharpest picture requires manual decimation and scale adjustments.
| 480p | 480p with Prescale 1/2 | ||
|---|---|---|---|
 |
 |
Wii GCVideo Based HDMI Devices (WiiDual, etc.)
These are some recommended settings. Please remember to select "Store Settings" in the GCVideo menu to save your settings or not. These settings are based on the WiiDual but should be similar for AVE-HDMI. Wii GCVideo based devices are not affected by the 480p LPF issue. If you are using system specific profiles, please refer to the instructions included with the profiles.
WiiDual firmware 3.1
- Output Settings:
- Allow 480p Mode: On (Please make sure in the Nintendo Wii settings menu that 480p is enabled)
- Enhanced DVI Mode: On (or else there won't be audio)
- Display as 16:9: On or Off (Make sure this setting corresponds with what is in the Nintendo Wii video settings menu.)
- View all Modes:
- 240p, 288p, 480i, 576i Linedoubler: Off (Lets the RetroTINK handle all upscaling and deinterlacing)
- Advanced Settings:
- Chroma Interpolation: Off (Safe to set to off, as it has no effect if you're using YC422, see below)
- Fix Sync Timing & Regenerate Csync: Off (Safe to leave as off, turn on if it fixes your issues)
- Fix Resolution: Off (Safe to set to off if you are using default RetroTINK profile, otherwise please see txt on sdcard of specific profile maker)
- Digital Color Format: YC422 (This matches what the Wii internally uses)
- Report 240p as 480i: Off
- (Audio) Sample Rate Hack: Off (Safe to keep off, this tries to fix audio issues when enabled)
Nintendo Wii U
It is highly recommended to use the Wii U's HDMI® output instead of its Component output. This is because the analog video is duller, and has less sharpness (even compared to Component from the PS3 and 360).
[Insert Picture: HDMI Vs YPbPr]
- The Wii U's HDMI® only outputs in limited range. To account for this, go to Advanced Settings > HDMI® Receiver, then set Input Range to "RGB Lim.".
Wii Backwards Compatibility
The Wii U is backwards compatible with Wii and offers HDMI Output. There is a 1% scale of wii games, even outputting 480p. While you can use custom firmware to reverse this, it currently results in an offset chroma. If you can find a Wii that works with the 480p patch, it is recommended to use that over a Wii U.
[Insert Picture: Wii YPbPr vs Wii U 480p]
Nintendo Switch
Connections
The Nintendo Switch only outputs via HDMI, so use an HDMI cable.
Settings
Adjust the following settings to optimize the Switch for use with the RetroTINK.
Video Settings
Set Video Output (720p / 1080p)
To change the resolution:
- From the Home Menu, select System Settings (the cog icon).
- Scroll down to TV Settings.
- Select TV Resolution.
- Choose your desired resolution.
Adjust Screen Size
To disable the Switch’s internal scaler:
- From the Home Menu, open System Settings.
- Go to TV Settings.
- Select Adjust Screen Size.
- Set the value to 100%.
HDMI Range
The Switch correctly flags HDMI color range automatically, but to change it manually:
- From the Home Menu, open System Settings.
- Scroll to TV Settings.
- Select RGB Range.
- Choose your preferred option.
Audio Settings
Stereo is recommended unless you use a surround system. Avoid “Automatic,” as it forces 5.1 output and can cause missing audio.
To set audio:
- From the Home Menu, open System Settings.
- Go to TV Settings.
- Scroll down to TV Sound.
- Select your preferred audio mode.
Profiles
No profiles are required or provided for Nintendo Switch when using the settings above.
Nintendo Classics
To use profiles with Nintendo Classics (formerly known as Nintendo Switch Online classic game libraries) software, apply the adjustments below. If you prefer not to adjust settings, treat NSO software like standard Switch software and use the default profile.
Settings
In addition to the settings noted in the Nintendo Switch section, configure the apps as follows:
NES, Super NES, and Sega Genesis
- On the game selection screen, press Left and select Settings.
- Under Game Screen, select Pixel Perfect.
- Under Control Display, deselect Show controls in game.
Game Boy Advance and Game Boy
- On the game selection screen, press Left and select Settings.
- Under Game Screen, ensure Reproduce classic feel and Display with small screen are deselected.
- Under Control Display, deselect Show controls in game.
- Selecting a specific Game Boy model under Game Screen is user preference.
Nintendo 64
Set Resolution
N64 games render at 720p. To prevent scaling to 1080p:
- From the home menu, select System Settings (cog icon).
- Scroll to TV Settings and press OK or Right.
- Select TV Resolution and choose 720p.
In-App Settings
- On the game selection screen, press Left and select Settings.
- Under Control Display, deselect Show controls in game.
Profiles
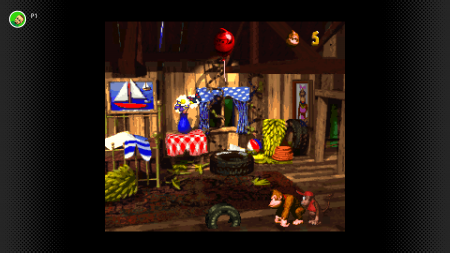
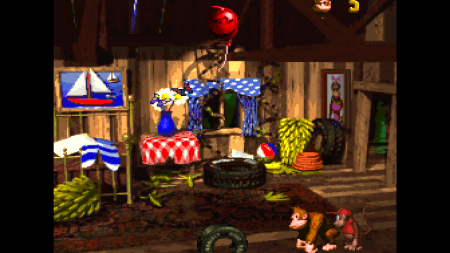
For optimal video quality with proper scaling and removal of the NSO border, use profiles from: \profile\Nintendo Switch\Mr Moro NSO HDMI\.
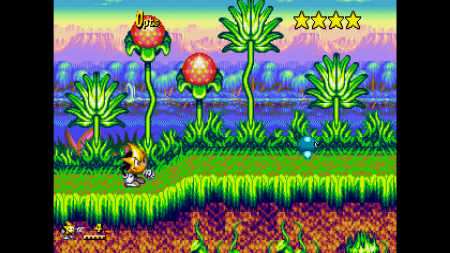
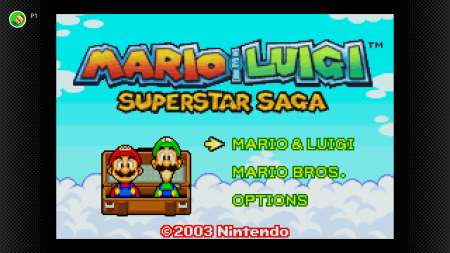
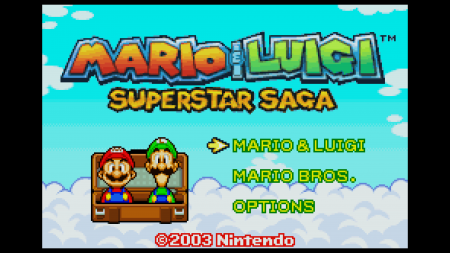
| Console | Original Console DAR 10x | NSO No Changes | NSO Optimized |
|---|---|---|---|
| NES | |||
| Super NES | |
 |
 |
| Sega Genesis | [Pending Ristar Genesis DAR Screenshot] | 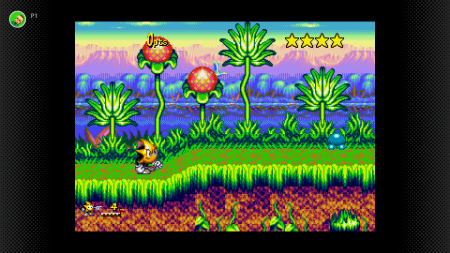 |
 |
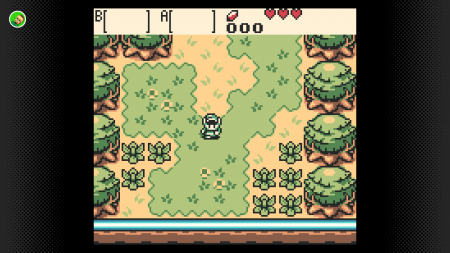
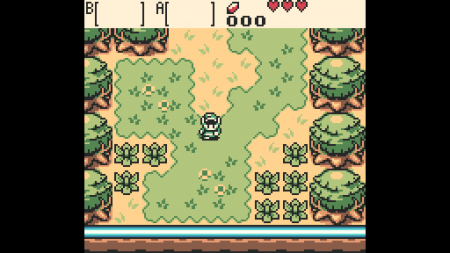
| GameBoy Advance | |
 |
 |
| GameBoy Color | |
 |
 |
SEGA Master System
The original model of the Master System supports Composite and RGB output (S-Video is not supported without mods). The second model, the "Master System II", cannot be used with the RetroTINK without modding, as it only supports RF output.
- Master System games are infamous for having borders of solid colour around the game graphics. These can be removed by using the Input Crop trim tools, but be mindful! Master System games can use two horizontal resolutions: 248 pixels and 256 pixels, and some games will use both of them. The safest option is to crop to a 256 pixels wide screen, which will leave a column on the left-hand side of 248 pixels wide screens. You could also have an additional profile just for 248 pixels wide screens.
- The Auto Crop tools will not work here, as they will consider the colored border to be part of the image (it technically is, if still unsightly).
- The Master System also has rather dim video output compared to other systems. You can fix this by going to Advanced Settings > RGB/Component ADC and adjusting the Gain while using the 240p Test Suite. You can also use the Auto Calibrate Gain feature, which works best if there's a patch of solid, pure white somewhere on the screen.
Recommended Cable
SEGA Genesis / Mega Drive
This section covers the Sega Genesis (Mega Drive outside the U.S.), including all models and add-ons like the Sega CD and 32X. Mods are optional and do not affect RetroTINK usage.
Sample Rate
| Sample Rate Detection | ||
|---|---|---|
| Auto Dec. Factor | On | |
| Auto Dec. Phase | Auto | |
| ADC/Sample Rate | 3420 dots/line | |
| Progressive Detection | 342.000 | 427.5 |
| Interlace Detection | 427.5 | |
Connections
All Genesis consoles output RGBS Sync-on-Composite and CSync.
The first model outputs stereo audio only through the front 3.5mm port, requiring a unique cable.
Later models use a cable that pulls stereo audio from the same port as video.
Cable Recommendations
RGB
- RetroTINK HD15 Dongle (Genesis 2) in conjunction with the RetroTINK HD15 to HD15 cable or the HD15 to SCART cable.
- For use with a Model 1 Genesis: add the HD RetroVision Genesis 1 to Genesis 2 adapter.
- Also for use with a Model 1 Genesis, connect the 3.5mm connection on the cable to the 3.5mm port on the Genesis.
- Insurrection Industries SCART cable for Model 1 and Model 2 Genesis
- RetroGamingCables SCART cable for Model 1 and Model 2 Genesis
- RetroAccess SCART Cable for Model 1 (Mono only) and Model 2 Genesis
Profiles:
Use \profile\Sega Genesis & Mega Drive\_Start Here [REGION].rt4 for sharp 4K scaling. This profile accounts for games using 256x240 and 320x240 resolutions.
SEGA Saturn
Sample Rate
| Manual Sample Detection (320) | |
|---|---|
| RGB/Component ADC Setup | |
| Samples per Line | 3416 (2866 Act.) |
| Decimation Factor | 8 (427.000) |
| Manual Sample Detection (352) | |
| Samples per Line | 3640 (3054 Act.) |
| Decimation Factor | 8 (455.000) |
| Manual Sample Detection (640) | |
| Samples per Line | 3416 (2866 Act.) |
| Decimation Factor | 4 (854.000) |
| Manual Sample Detection (704) | |
| Samples per Line | 3640 (3054 Act.) |
| Decimation Factor | 4 (910.000) |
Connections:
All Sega Saturn models output RGBS Sync-on-Luma and Sync-on-Composite.
SCART cables are widely available for Saturn connections.
Cable Recommendations
- RetroTINK Saturn HD15 Dongle in conjunction with the RetroTINK HD15 to HD15 cable or the https://www.retrotink.com/shop/hd15-to-scart-cable cable.
- Insurrection Industries RGB SCART Cable
- RetroGamingCables RGB SCART Cable
- RetroAccess RGB SCART Cable
Profiles:
Use \profile\Sega Saturn\_Start Here [REGION].rt4 for most games.
If this primary profile fails to lock onto a sample rate, try \profile\Sega Saturn\Wobbling Pixels [REGION] [CONNECTION] - Sharp\Saturn 4-3 - Secondary - Sharp.rt4.
For games that don’t work with the above profiles, use \profile\Sega Saturn\Wobbling Pixels [REGION] [CONNECTION] - Sharp\Saturn 4-3 - Tertiary - 640x480 only - Sharp.rt4.
The Saturn uses two video chips capable of outputting up to eight different resolutions, which the sample rate detection menu is configured to handle.
Sega Dreamcast
Sample Rate
| RGB/Component ADC Setup | |
| Samples per Line | NTSC: 3432 (2880 Act.)
PAL: 3456 (2880 Act.) |
| Decimation Factor | NTSC: 4 (858.000)
PAL: 4 (864.000) |
Connections
Dreamcast supports 31kHz via RGBHV and 15kHz on all other signals. Detection is hardware-based at startup.
Specialty SCART RGBS and YPbPr cables with switches exist to convert 31kHz RGBHV to RGBS or YPbPr.
Some games require additional modifications to function at 31kHz.
Cable Recommendations
- RetroTINK Dreamcast HD15 Dongle in conjunction with the RetroTINK HD15 to HD15 cable. Do not use the HD15 to SCART cable with this dongle.
- RetroGamingCables Sega Dreamcast RGB 480p SCART cable Powered by RetroTink
- RetroAccess Dreamcast RGB SCART Fortraflex Cable 15 / 31 kHz
240p Games
Certain games can be forced into 240p using a startup button combination: Start + L. You may want to consider using this feature on the dreamcast instead of using the prescale feature. You can find a list of compatible games here.
Profiles
Use \profile\Sega Dreamcast\_Start Here [REGION].rt4 for all Dreamcast resolutions.
DCDigital/DCHDMI (first gen/HW1)
These settings are for first gen DCDigital/DCHDMI only. Second gen and GEM versions may not match the following or have expanded capabilities. Also, this assumes the default RetroTINK profile. If you are using specifically made profiles, please refer to the instructions included with those profiles.
- Firmware 4.7std: for games with native VGA support or can be forced for VGA
- Output Resolution: VGA
- Advanced Video Settings:
- Deinterlacer 480i & 576: passthru
- 240p adjust position: off
- VGA adjust position: auto
- RGB color space: full
- Video Mode Settings: Force VGA/Switch Trick VGA
- Firmware 4.7std: for games that can't be forced into VGA such as Marvel vs Capcom, JoJo, Plasma Sword, Last Blade 2, etc.
- Output Resolution: 480p
- Advanced Video Settings: (same as above)
- Video Mode Settings: Cable Detect
Sony PlayStation
This section covers all PS1 hardware, including original models and PSOne models.
Sample Rate
| Sample Rate Detection | |||||
| Auto Dec. Factor | On | ||||
| Auto Dec. Phase | Auto | ||||
| ADC Sample Rate | NTSC: 3413
PAL: 3406 | ||||
| Progressive Detection | NTSC: 341.300
PAL: 340.600 |
NTSC: 426.625
PAL: 425.750 |
NTSC: 487.571
PAL: 486.571 |
NTSC: 682.600
PAL: 681.200 |
NTSC: 853.250
PAL: 851.500 |
| Interlace Detection | NTSC: 341.300
PAL: 340.600 |
NTSC: 426.625
PAL: 425.750 |
NTSC: 487.571
PAL: 486.571 |
NTSC: 682.600
PAL: 681.200 |
NTSC: 853.250
PAL: 851.500 |
Connections
Use RGB Sync-on-Luma SCART cables. These are inexpensive, widely available, and safe for direct connection to the RetroTINK.
RGB Composite Sync cables are available, but these use a sync stripper and should only be used if your setup requires CSync. Even if it does, make sure your cable has safe sync levels to keep from damaging your RetroTINK.
Recommended Cables
RetroTINK PS1 Dongle in conjunction with the RetroTINK HD15 to HD15 cable or the RetroTINK HD15 to SCART cable. These safely use a sync stripper as described above.
Insurrection Industries SCART Cable
Profiles
Use \profile\Sony PS1\_Start Here [REGION].rt4 for sharp 4K scaling.
The PS1 can output up to 20 different resolutions, so the Sample Rate Detection feature is heavily used.
Horizontal Resolution Switching + Automatic Sample Detection
The PlayStation utilizes up to 5 horizontal sample rates and many games will consistently change sample rates between scenes, usually between gameplay and menus. Depending on your setup, you may need to turn off certain sample rates if your games do not use them. Though incomplete, consider consulting with and contributing to this growing list of PS1 games and their horizontal resolutions to see if your library can work with a trimmed down sample rate list.
Vertical Resolution Switching
There are some PlayStation games that will switch between 240p and 480i during regular gameplay. On these games, consider making your way to the RetroTINK HDMI Output menu and switching Sync Lock to "Triple Buffer" mode so you do not lose out on gameplay during these switches. Included profiles are usually set to Triple Buffer by default.
Sony PlayStation 2
This section covers all PS2 hardware, including original models and PS2 Slim models.
Sample Rate
| Sample Rate Detection | |||||
| Auto Dec. Factor | On | ||||
| Auto Dec. Phase | Auto | ||||
| ADC Sample Rate | NTSC: 3432
PAL: 3456 | ||||
| Progressive Detection | NTSC: 343.200
PAL: 345.600 |
NTSC: 429.000
PAL: 432.000 |
NTSC: 490.286
PAL: 492.714 |
NTSC: 686.400
PAL: 691.200 |
NTSC: 858.000
PAL: 864.000 |
| Interlace Detection | NTSC: 341.300
PAL: 340.600 |
NTSC: 426.625
PAL: 425.750 |
NTSC: 487.571
PAL: 486.571 |
NTSC: 682.600
PAL: 681.200 |
NTSC: 852.250
PAL: 851.500 |
Connections
Use YPbPr component cables for the best experience. Avoid cables that convert RGBS to YPbPr, such as HD Retrovision Genesis Cables with the PS1 adapter.
RGB SCART is also supported, but YPbPr simplifies switching between 15kHz and 31kHz signals. In fact, it’s recommended to use YPbPr output with a SCART cable if SCART is necessary for your setup.
Consider getting a TOSLink optical audio cable for the PS2. Enabling this feature is described below.
Recommended Cables
- HD Retrovision YPbPr Component Cables
- RetroGaming Cables YPbPr Component cables
| For the following cables, the RetroTINK works best when the PS2 is set to YPbPr mode as described below, and using the YPbPr input that corresponds to the connection that you are using. For more information, see the Input Section of the main wiki. |
- RetroTINK PS2 Dongle in conjunction with the HD-15 to HD15 cable or the HD15 to SCART cable
- Insurrection Industries SCART Cable
- RetroGamingCables SCART Cable
- RetroAccess SCART Cable
Settings
Enabling YPbPr Output:
Set the output to Component video on PS2:
- Power on the PS2 without a game or memory card (enters BIOS).
- Press Down → X to enter System Configuration.
- Press Down three times → X to open the Component Video Out menu.
- Press Left or Right → X to enable “Y Cb/Pb Cr/Pr” output.
RGB SCART Considerations:
If, instead of using YPbPr output as described above, you set the PS2 video output to RGB, the PS2 switches from RGBS Sync-on-Luma at 15kHz to RGsB Sync-on-Green at 31kHz. The RetroTINK supports both signals but cannot automatically switch between them. Setting the PS2 video output to YPbPr avoids the need for manual switching.
Digital Audio (Optical):
Optical Audio is optional on PS2 and provides high-quality digital sound. Analog audio is excellent as well, and some games (like Parappa the Rapper 2) do not support optical output.
Enable Optical Audio on PS2:
- Power on to BIOS.
- Enter System Configuration
- Go to DIGITAL OUT (OPTICAL) → On.
Enable Optical Audio on RetroTINK :
- Connect TOSLink from PS2 to RetroTINK optical port.
- Press MENU → Advanced Settings → Audio Input → Input Override → select S/PDIF.
- Press PROF → Save Current → Confirm.
Profiles
Use \profile\Sony PS2\_Start Here [REGION].rt4 for sharp 4K scaling.
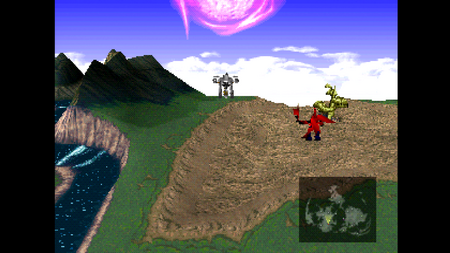
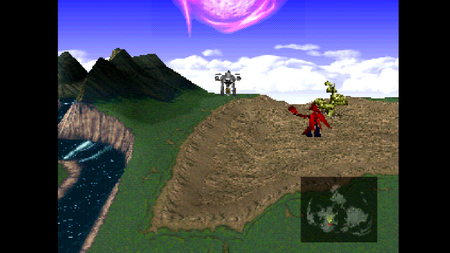
PS1 Backwards Compatibility
This section covers settings and connections for running PS1 software on PS2 hardware.
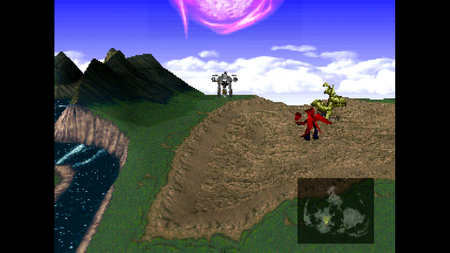
| PS1 Optimization on PS1 | PS1 on PS2 using PS1's Optimization Settings | PS1 on PS2 optimized using PS2's Optimization Settings |
|---|---|---|
 |
 |
 |
Connections
The PS2 can output PS1 games in both YPbPr and RGB formats. Two common misconceptions are worth clarifying:
- YPbPr compatibility: Some users believe PS1 games cannot run in YPbPr on the PS2. This confusion often stems from displays that have trouble with 240p (the PS1’s primary resolution).
- RGBS vs. YPbPr: While PS1 consoles only support RGBS natively, the PS2 hardware itself converts correctly to YPbPr, making it a fully valid output option.
Settings
The PS2 includes a feature that applies a bilinear filter to textures when running PS1 games. To adjust this setting:
- Start the PS2 with no game or memory card inserted (enters BIOS).
- Press Triangle for the Version Menu.
- Highlight PlayStation® Driver and press Triangle for Options.
- Adjust Texture Mapping to your preference.
- Standard for a sharp, unfiltered picture.
- Smooth for use with CRT-style profiles.
Other considerations from the PS2 section still apply to PS1 software on the PS2.
Profiles
For the sharpest picture, use the \profile\Sony PS2\Wobbling Pixels PS1 on PS2 [REGION] YPbPr - Sharp\PS1 on PS2 4-3 - Sharp.rt4 profile.
Sony PlayStation Portable
This section covers using the PSP-2000, PSP-3000, and PSPGo models with the RetroTINK.
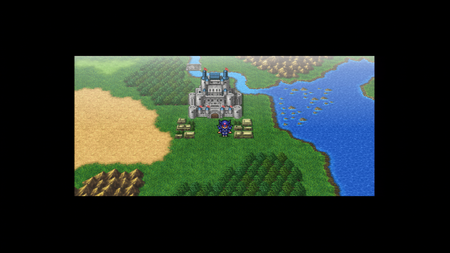
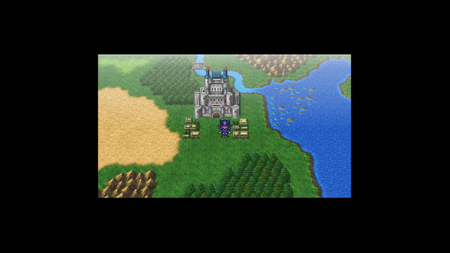
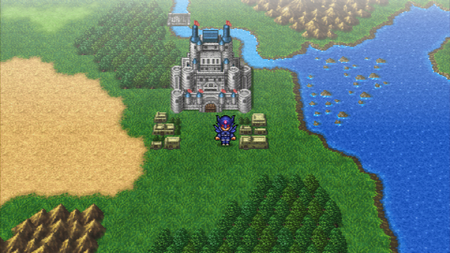
| PSP 16:9 | PSP 1:1 | PSP Optimized |
|---|---|---|
 |
 |
 |
Sample Rate and Scaling Settings
| RGB/Component ADC Setup | |
|---|---|
| Samples per Line | 3432 (2880 Act.) |
| Decimation Factor | 4 (858.000) |
| Scaling/Crop Setup | |
| Top & Bottom Trim | Edge of game picture minus 2 pixels from top or bottom |
| Left & Right Trim | Edge of game picture |
| Aspect Correction | 1:1 (Sq Pixel) |
| Scaling mode: | Auto Fill Integer |
Connections
The PSP can connect to the RetroTINK using YPbPr component cables, which allow full 480p output. Composite and S-Video cables are also available but do not support 480p, so they will not provide the sharpest picture.
Settings
PSP Output Settings
Adjust these settings to optimize PSP output to the RetroTINK :
- Turn on the PSP and go to the XMB menu.
- Navigate to Settings → Connected Display Settings → Component/D-Terminal Output → Progressive.
- Navigate to Flicker Reduction → Off.
Enable Video Output to the RetroTINK
Here are the methods to output video from the PSP:
- Using the XMB: Go to Settings → Connected Display Settings → Switch Video Output → Yes.
- Without using the XMB: Hold the screen button until output appears on the RetroTINK.
Profiles
Start a PSP game before applying a profile. Once the game opens, select \profile\Sony PSP & PSP Go\_Start Here.rt4.
Selecting the profile too early may cause loss of vital information because the PSP menu renders at the full 720x480p resolution, while games render at 480x272p within the 480p canvas.
With this profile, two rows of pixels may be missing. Adjust scaling and trim to display the full resolution at the expense of slightly softer scaling.
PSone Classics on PSP
This section covers playing original PlayStation games on PSP hardware through the RetroTINK. It includes connection tips, output settings, and recommended profiles.
| PS1 via PS1Digital DV1 and RetroTINK Scaled 9X | PSP |
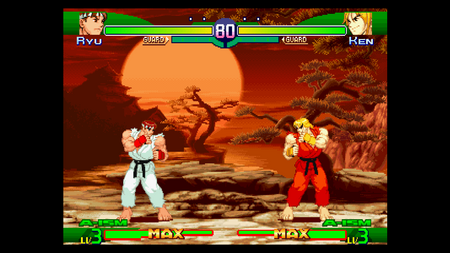
|
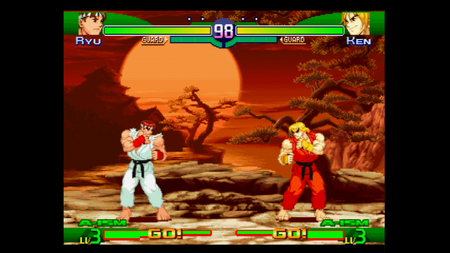 |
Connections
PS1 games on PSP can use S-Video or Composite cables. YPbPr component cables can also be used for PS1 games and provide consistent sharp sampling. Keep in mind:
- The RT4K-Pro needs Enhanced S-Video for sharp sampling.
- No other RetroTINK model can sharply sample S-Video.
- No RetroTINK model can sharply scale Composite.
Settings
PSP Output Settings
Adjust these settings to optimize PSP output for PS1 software to the RetroTINK:
- Turn on the PSP and go to the XMB menu.
- Navigate to: Settings → Connected Display Settings → Component/D-Terminal Output → Interlace.
- Navigate to Flicker Reduction → Off.
Progressive vs Interlaced
This setting is actually a 15kHz vs 31kHz switch, not progressive vs interlaced. Correct settings preserve the original vertical resolution of PS1 games.
Using Progressive can cause problems:
- 240p games can use the prescale feature.
- 480i content may trigger incorrect deinterlacing or prescale behavior.
- Sample rate detection won’t work at 480p, requiring manual or generic sampling.
Profiles
Once the PSP is outputting to the display, start the PS1 game first. Apply the profile \profile\Sony PSP & PSP Go\MrMoro PSP+PS1 Basic Profile.rt4
This profile enables sharp sampling for most PS1 games on PSP.
Some games may require per-game profiles if they use one or more unusual resolutions.
| Decimation Factor 5 | Decimation Factor 8 | Decimation Factor 10 | |
|---|---|---|---|
| Default 640 | 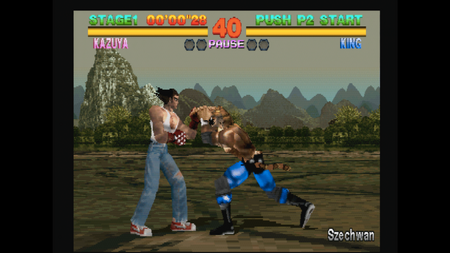 |