This guide will walk you through flashing a DG-16D2S drive to play burned media.
Prerequisites
Before beginning, check the sticker on the the DVD drive to verify that it says Phillips & Lite-On, as shown in the picture to the right.
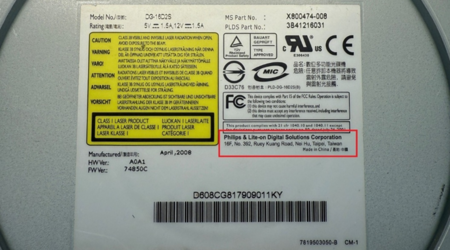
Also for flashing you need following devices:
- Flashing device: X360USB Pro /V2, SATA card, or Maximus Lizard
- DVD power device: CK3 or Xtractor; it's not recommended to power the drive with the Xbox 360!
- Probe: self-made, Xecuter Probe 3, or Maximus Scorpio
- Molex power: A power brick or a PC power supply Molex cable
- JungleFlasher or the Lizard toolbox
The easiest method is to get a X360USB Pro V2 and a Xecuter Probe 3 on AliExpress. It combines the reading/flashing and the power for the DVD drive.
Disassembly
This guide assumes that you disassembled your Xbox 360 and have removed your DVD drive.
- Disassemble the DVD drive by unscrewing the 4 screws on the bottom and lifting up the metal shell.
- For safety reasons, disconnect the ribbon cable from the laser.
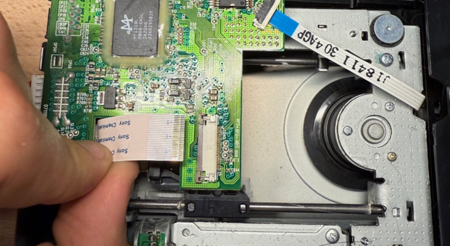
- Hook up your flashing device and power device to the drive
X360USB / SATA Card
- Connect your devices to the DVD drive.
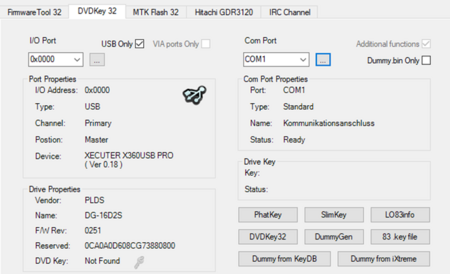
- Open JungleFlasher and go to the "DVDKey 32" tab and choose Your I/O Port and Com port. It should look like this:
- Click on the “Phat Key” button and this message should pop up.
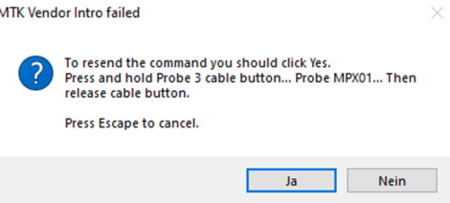
- Before clicking on “Yes”, make sure you have located the MPX01 point on the DVD PCB.
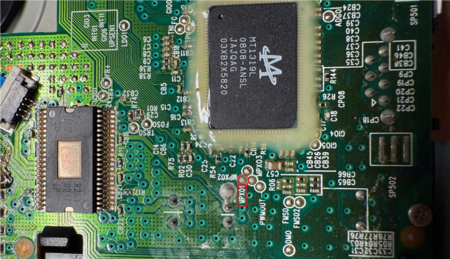
- Select "Yes" at the prompt, push down the button on the probe cable, probe the MPX01 point and release the button. If the extraction is successful, this prompt should pop up.
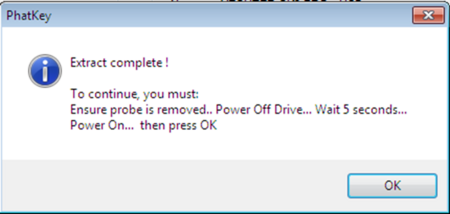
- Make sure the probe isn't attached to the point anymore, power off the drive via the power adapter for five seconds, then turn it on again and select “OK”. If everything worked, it will ask you to save five files. It is highly recommended to save them in a backup folder. Once you saved all files, JungleFlasher should auto switch to the “Firmware Tool 32” tab and a prompt will pop up.
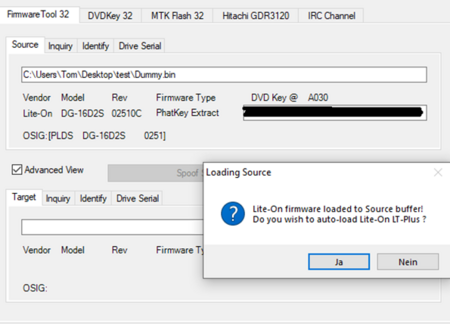
- If you want to flash the drive with LT+, select "Yes".
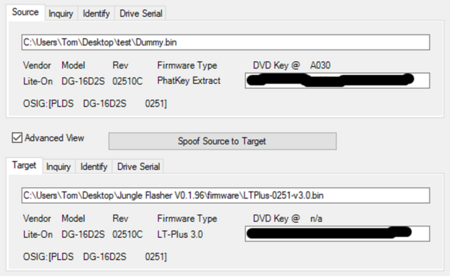
- Press "Spoof Source to Target" 2 times for safety reasons. The Source box and Target box should now reflect information as shown below. Ensure that the DVD-Key is the same.
- Select the "MTK Flash 32" tab and choose "Lite-On Erase". Click "Yes" to the first pop-up. The second pop-up looks like this:
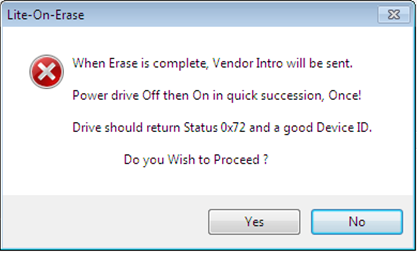
- Once you select "Yes", wait for 2-3 seconds, power off the drive, and turn it back on immediately. Once JungleFlasher finishes, it should look like this:
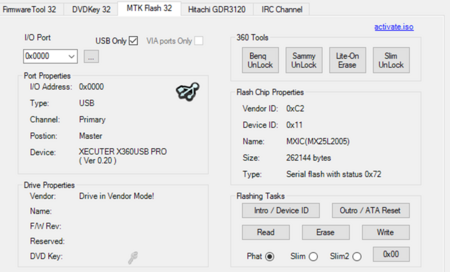
- If it does not look like the above, select the "Intro / Device ID" button. This will bring the drive into correct Vendor mode. A pop-up should open, choose “Yes”, power off the drive, and power it on again directly. It should now look like the above.
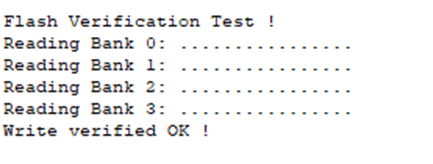
- Select the "Write" button and JungleFlasher should write the LT+ firmware to the drive and verify it. After it is done verifying, the box at the bottom will say the following:
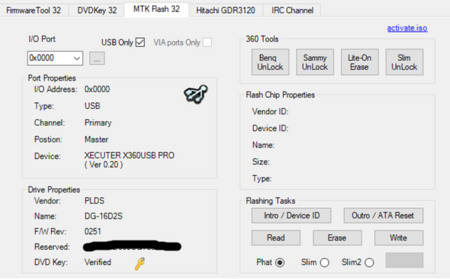
- Select "Outro / ATA Reset" to get the drive out of vendor mode. Once JungleFlasher is finished, your screen should look like this with verified DVD Key:
- Check that your drive ejects and closes. If it does successfully, power off the drive and unplug all the cables. Put the laser cable back on and assemble the drive. Test the drive with the console and ensure that it reads a normal game and a backup.