The Sonus360 is a device that allows the user to use different sounds for pressing the power and eject buttons on a original phat console, like on an Xbox 360 S or Xbox One. The ISD2130 sound chip on an Xbox 360 S can also have its sounds edited with the right flashing tool. You can either use the current stock sounds that are included in the limited edition slims (Gears of War 3, Modern Warfare 3, Star Wars, Halo Reach and Halo 4) or your own custom sounds.
No JTAG or RGH is required for this modification, however it is incompatible with Barracuda motherboards due to them not having any circuitry for the ISD2130 sound chip.
The following instructions have been provided from Ruby's tutorial on Se7ensins.
UPDATE 2026/06: User "buddyjojo" aka. JoJo Autoboy developed a LibXenon homebrew application to flash the ISD-soundchip purely via software.
Requirements
- An audio program like Audacity or Adobe Audition if you are adding your own sounds.
- J-Runner with Extras
Hardware flashing
- Sonus360 Add-on (Only on Phat), or an Xbox 360 S (Not an Xbox 360 E)
- Compatible programmer, such as:
- PicoFlasher
- JR Programmer
- Depending on where you buy your JR Programmer, it will come with headers on the SPI cable so it can be quickly disconnected with NAND or Sonus360 QSBs.
- A soldering iron, solder, flux, and isopropyl alcohol with cotton swabs.
- 30 AWG or smaller wire; solid core preferred.
Software flashing an Xbox 360 S
- Xbox 360 S (Not an Xbox 360 E) that can run homebrew with RGH or Bad Update
- Any Xbox 360 S motherboard (Trinity/Corona/Waitsburg) is natively compatible.
- While this can technically also work with the Stingray motherboards on the Xbox 360 E, they do not come with the ISD2130 sound chip by default. It can be acquired from DigiKey or Nuvoton, but it will require soldering in order to attach it to the motherboard.
- Either Xbox360-ISD by buddyjojo (requires XeLL or Aurora to boot), or SonusGUI by Byrom90
- XeLL-compatible FAT32 USB flash drive
Creating Compatible Sound Files
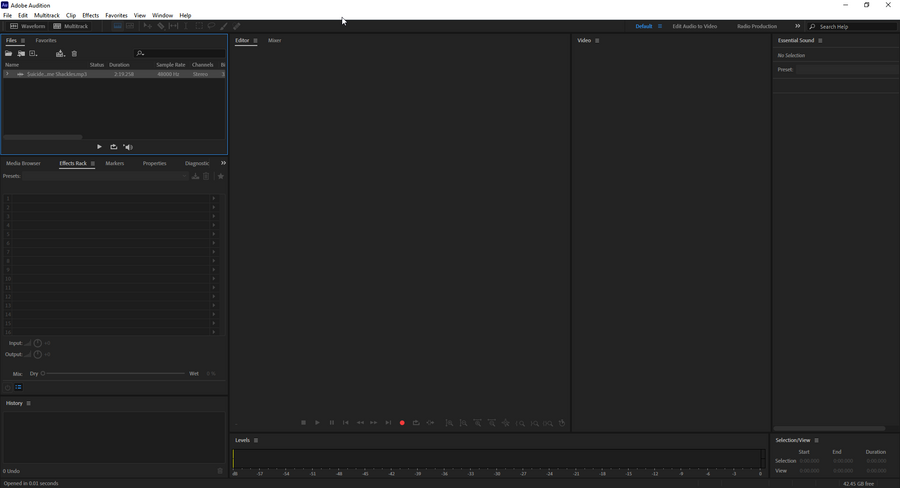
- Open your audio program.
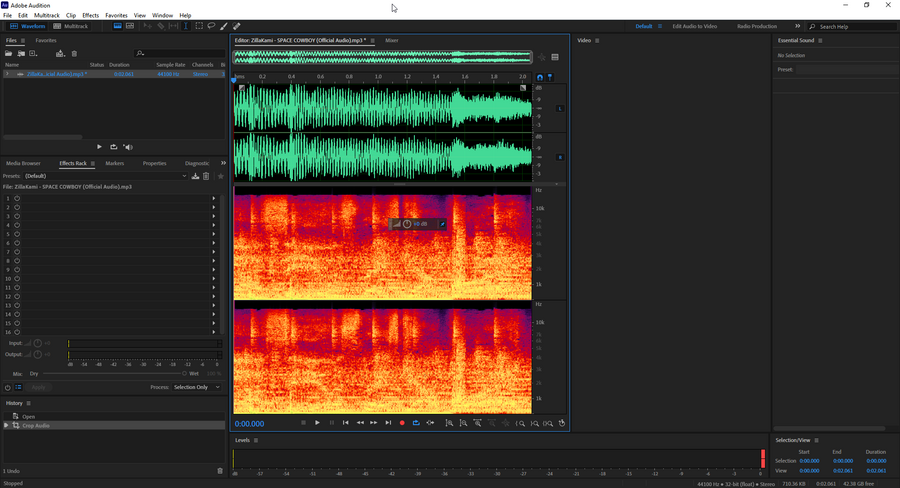
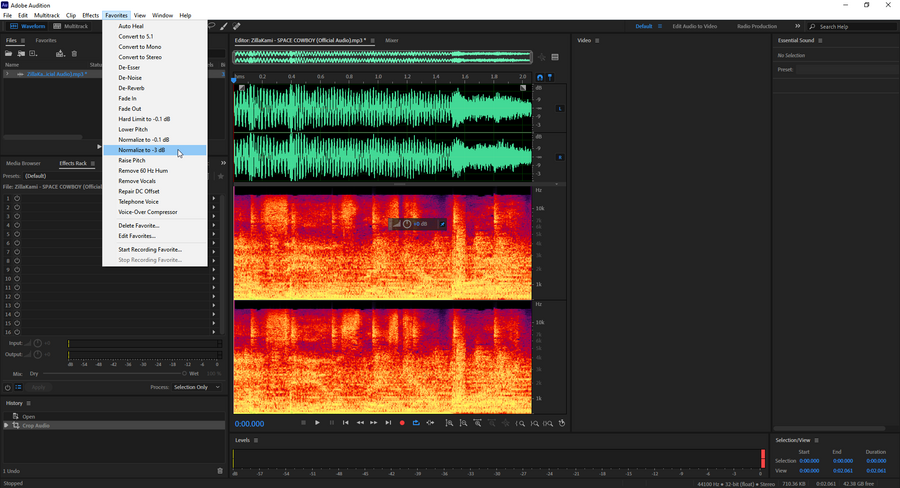
- Put in your desired sound file. You can optionally boost the audio as much as possible without any peaking.
- Export it as a .wav with a sample rate of 8000hz and a bit depth of 16. If the file size is over 44kb, then you can set it to mono instead of stereo which cut the file size in half.
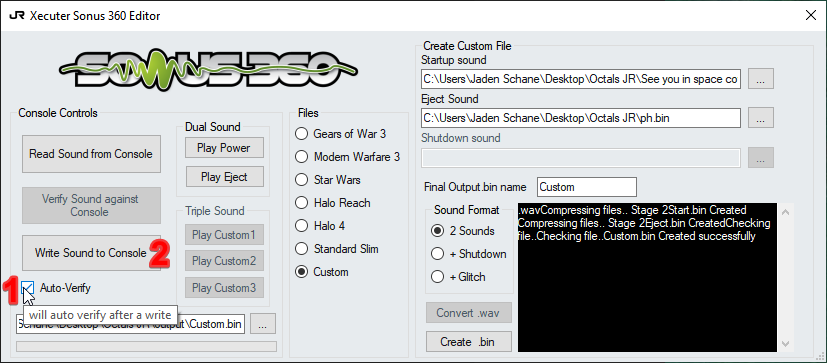
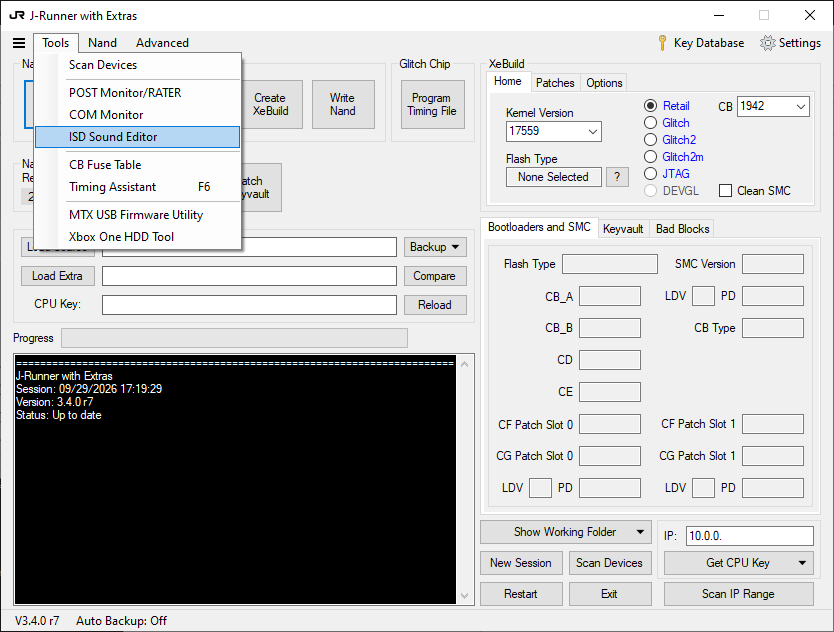
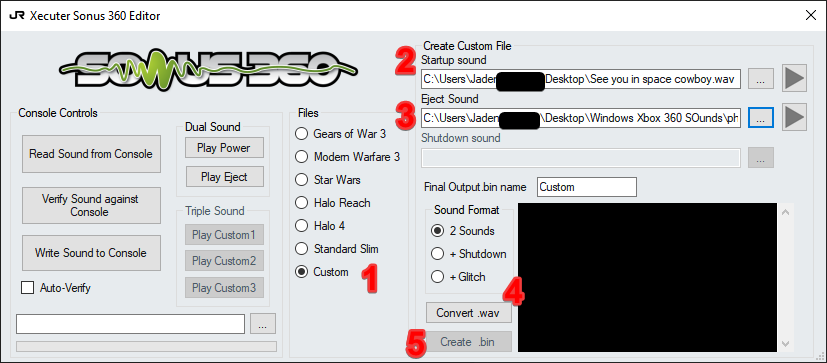
- Open the latest J-Runner with Extras and access its ISD sound editor.
- Select
Custom, load your start and your eject sounds, then clickConvert.wav, thencreate .bin. - Your custom .bin file will now autopopulate on the bottom left of the window. You will now be ready to flash your ISD chip with the desired sounds. However, now it is time to connect the flasher to the console's Sonus360 or ISD chip in order to change the sound.
Softmod Installation (Only for Xbox 360 S)
Xbox360-ISD
- Download the tool archive, read the README
- Copy xenon.elf executable to the root of a FAT32 USB flash drive
- Copy your to-be-flashed sound-firmware next to it
- Plug in the USB flash drive to the console
- Boot into XeLL with either the eject button (if you have RGH installed), or the XellLaunch app.
- Follow the instructions on screen
Hardmod Installation
Phat
MrMario2011 has a great video tutorial on how to install the Sonus360. Element18592 also created an open source clone of the Sonus 360 for anyone to make their own.
Written guide here is TBD.
Xbox 360 S ("Slim")
Trinity Methods
PicoFlasher
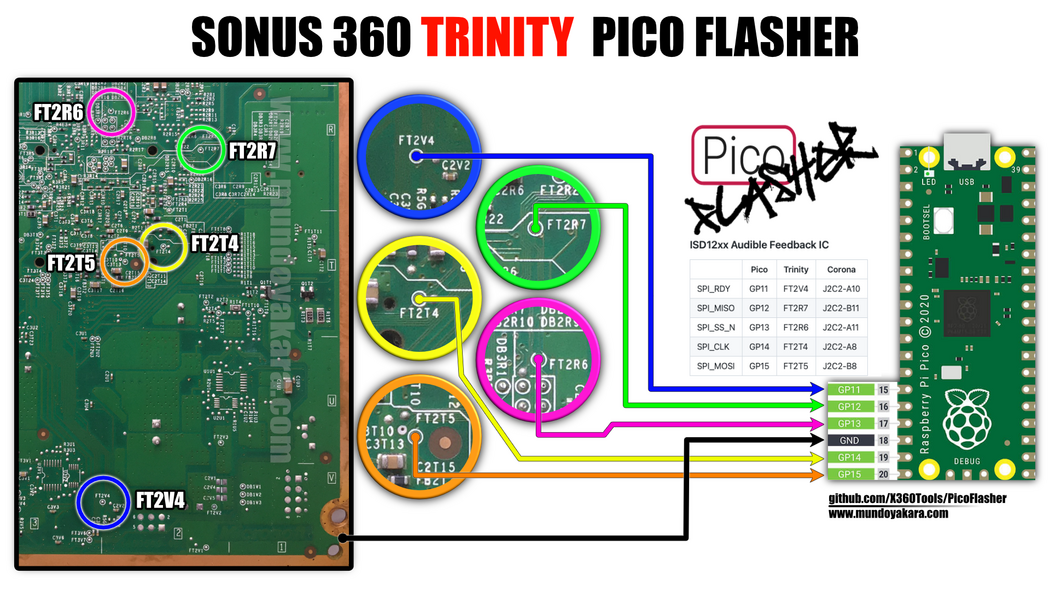
Corona/Waitsburg Methods
PicoFlasher
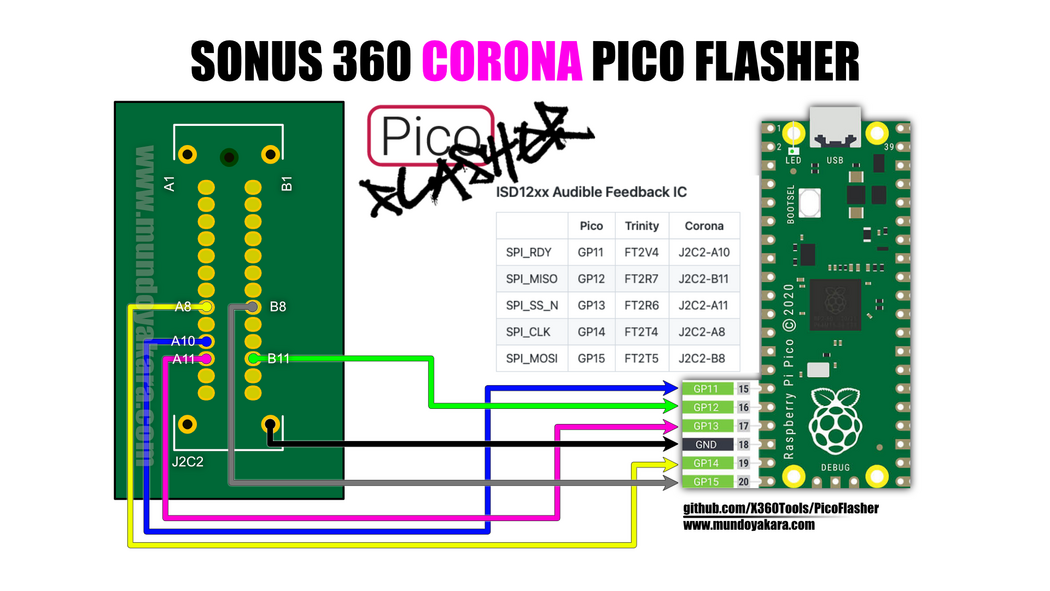
Universal Methods
The wiring on these methods can be used on both Trinity or Corona/Waitsburg. It is not recommended to try using these points, as they are much harder to solder to compared to the board specific ones without a QSB. Treat these as alternate points.
| Wire Color | Pico GPIO | Motherboard Point (Universal Method) |
|---|---|---|
| Green | GP11 | R2G6 (Top Side) |
| Orange | GP12 | R3G18 (Right Side) |
| Brown | GP13 | R3G20 (Right Side) |
| Yellow | Between GP13 & GP14 | C3G14 (Right Side) |
| Red | GP14 | R3G3 (Left Side) |
| Black | GPIS | R3G19 (Left Side) |
PicoFlasher
No QSB
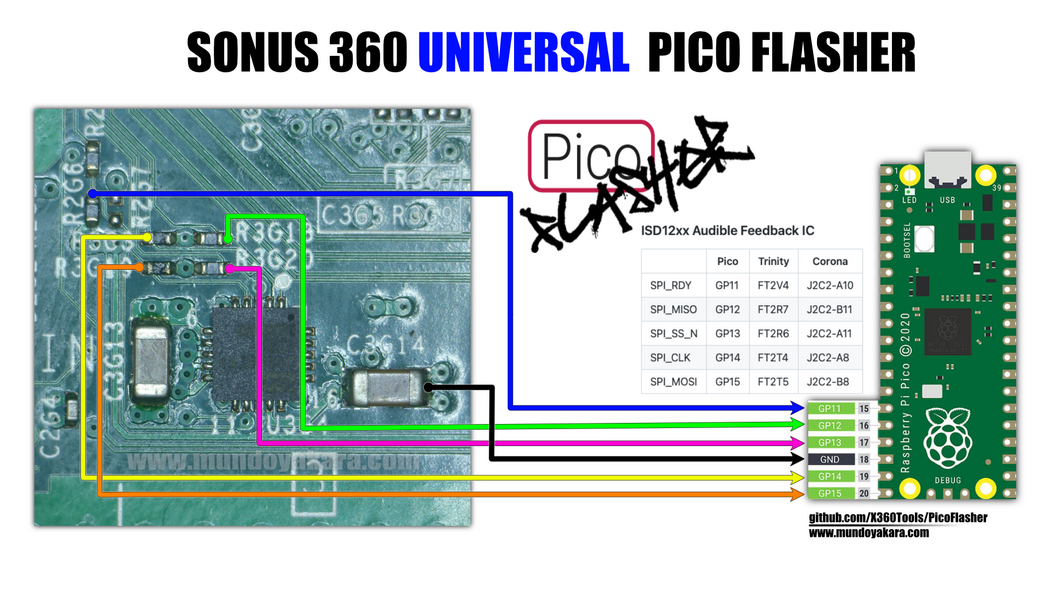
QSB
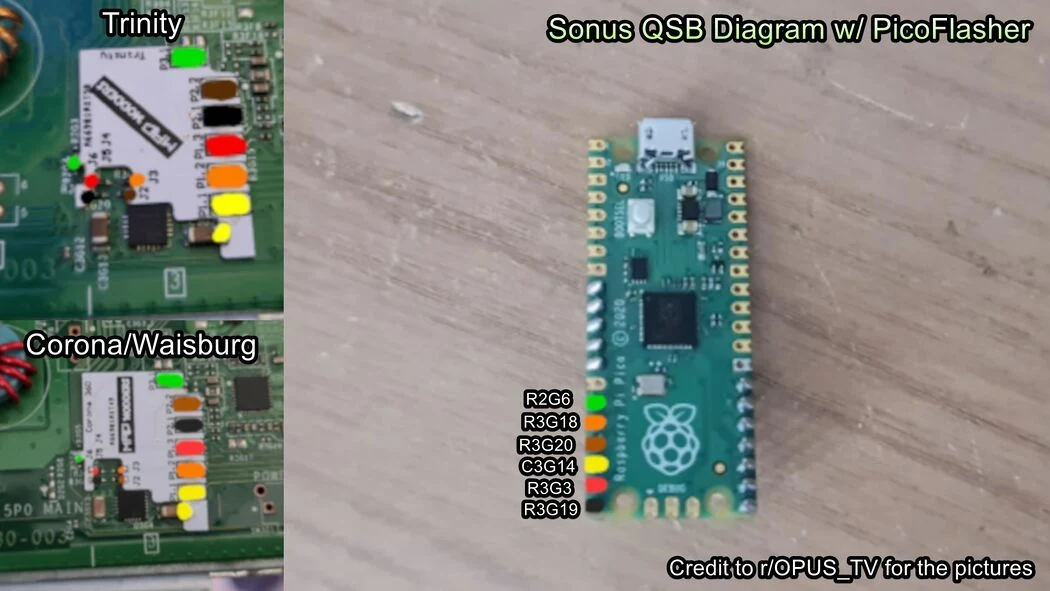
JR Programmer
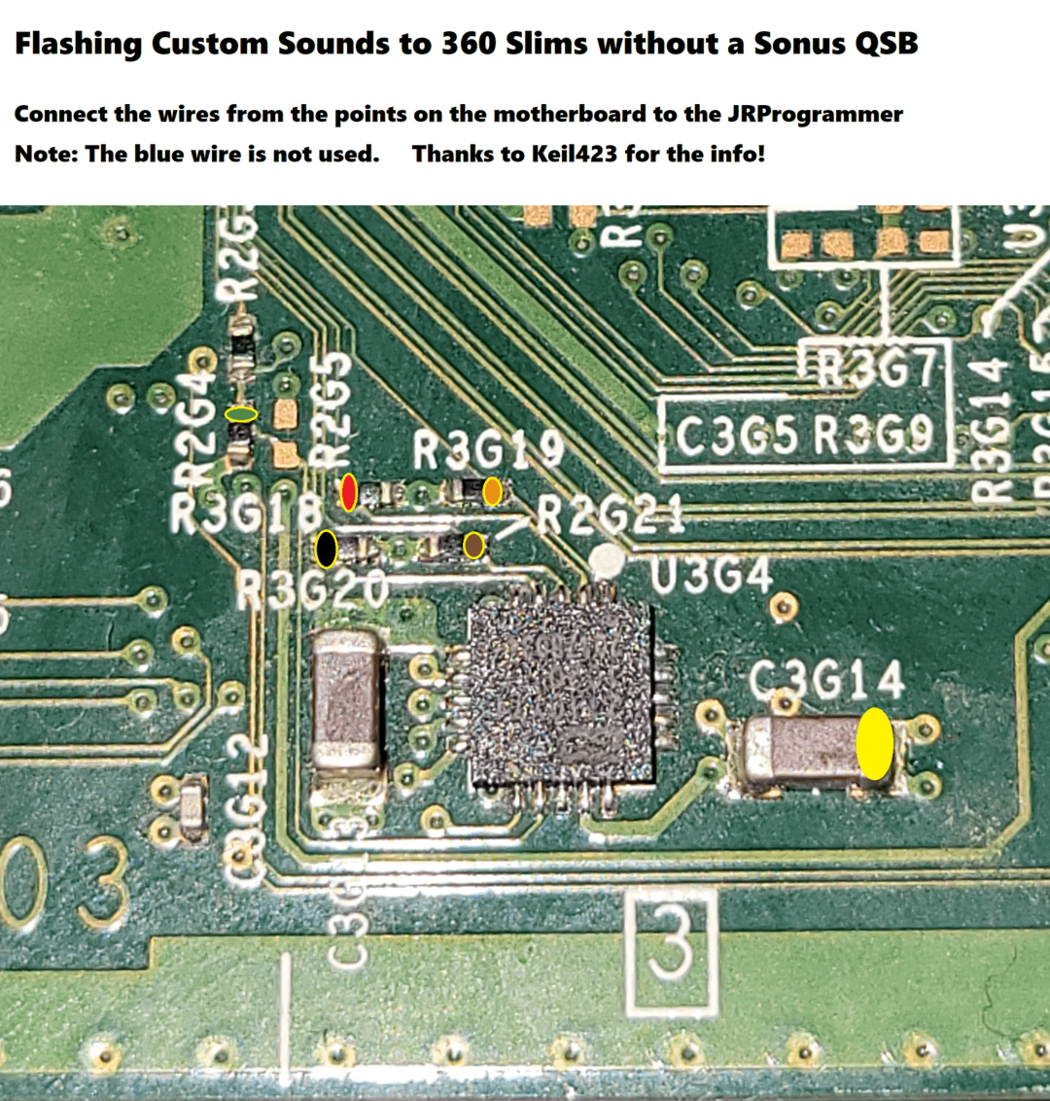
Upgrading the Speaker (Optional)
If you are swapping the sounds of an S console that isn't from a special edition bundle, they will sound quite poor due the motherboards coming with a poor sounding beeper speaker. Thus, it is recommended to replace the speaker if you want to use sounds more complex than the stock boot chimes.
The speaker can be found on the bottom left of the motherboard above the Microsoft logo and below the NAND.
Xbox 360 E (Stingray)
Since the Stingray motherboards don't have the ISD2130 installed, but still have the circuit for one, you can solder it onto the motherboard to get button sounds back. An example is shown in the following video.
After the ISD2130 is soldered onto the motherboard, you can flash it the same way as a normal Xbox 360 S. It can be done with either one of the softmod apps, or the Corona/Waitsburg hardmod method.
Changing Sounds
Once the wires to program the sound chip have been properly connected, you can now get ready to convert a sound file of choice to be compatible with the Xbox 360.
If you're flashing the sound chip of an Xbox 360 S, make sure its power supply is connected to the motherboard, so it has standby power.
- Open the latest J-Runner with Extras and access its ISD sound editor. (If it's not open already)
- Once your JR Programmer or PicoFlasher is connected, you can click
Auto-Verifyjust to ensure the file transfers successfully. Select the sound file of your choice and click "Write Sound to Console". - If everything was done correctly, your console will now have custom sound effects! You are now ready to desolder and remove the programmer from the motherboard or Sonus360 and reassemble the console.