| The steps on this page are considered risky for your console, as there is a chance you can brick it. Please have someone else repair your console if you are not experienced in soldering! |
Some Xbox motherboards may develop issues communicating with the front panel buttons as they age. This failure is caused by the traces that connect to the front panel IO header corroding and degrading over time. It is believed that corrosive compounds used during manufacturing are not always adequately removed from the front edge of the motherboard where these traces reside.
Common symptoms of this type of failure include:
- The Power and/or Eject buttons do not work, or only work intermittently.
- The console immediately boots up when connected to power, and will not power off normally.
- The console suddenly shuts off after being powered on for a period of time. The time it takes for this to happen can vary greatly.
Repair
Quick Fix
It may be possible to restore normal functionally by simply cleaning the affected traces, if they have not degraded too severely. However this fix is unlikely to work, and should be considered temporary if it does. Traces that have begun to corrode will almost always continue to do so over time.
Trace Bypass
A permanent fix requires that the affected traces be bypassed with wires. This repair is roughly the same difficulty as installing an Xbox 360 RGH mod, and should only be attempted by those who are very experienced with soldering.
Equipment Needed
- A soldering iron, solder, and flux
- Isopropyl alcohol with cotton swabs
- Wire (30 AWG or finer recommended)
- Insulated tape
- A microscope or magnifying glass
- Good lighting
Identifying Affected Traces
The area most commonly affected by corrosion is a thin strip along the front edge of the motherboard. The IO panel traces run along the underside of the board, so it must be fully removed from the console before proceeding
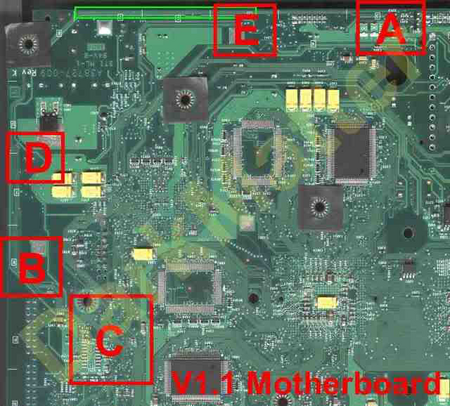
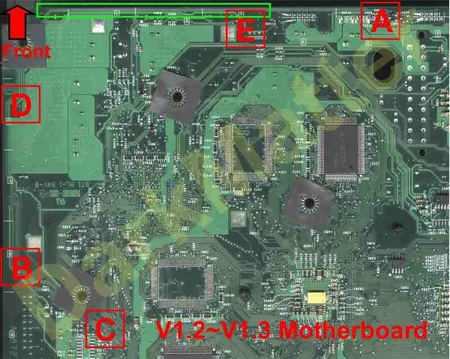
With the motherboard oriented so that the front edge is facing up, six traces can be seen running across the top edge of the board.
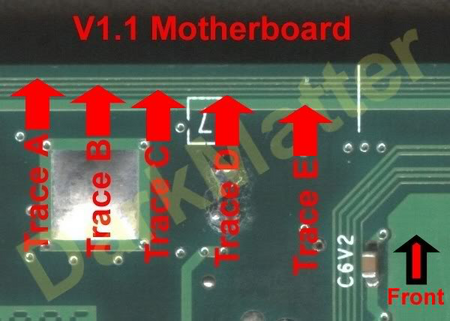
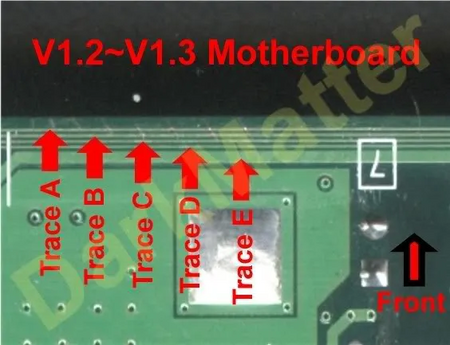
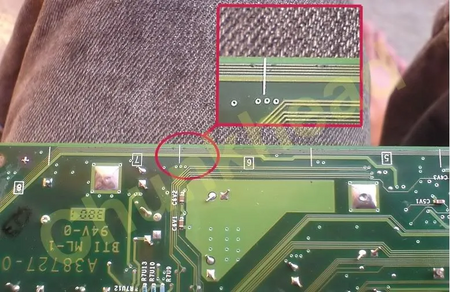
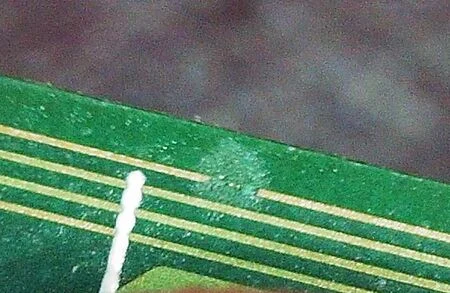
Carefully inspect the entire length of the traces from the IO header to the top-left corner of the board. Look for any gaps or dark spots similar to those shown below, and note which ones are damaged.
Soldering Wires
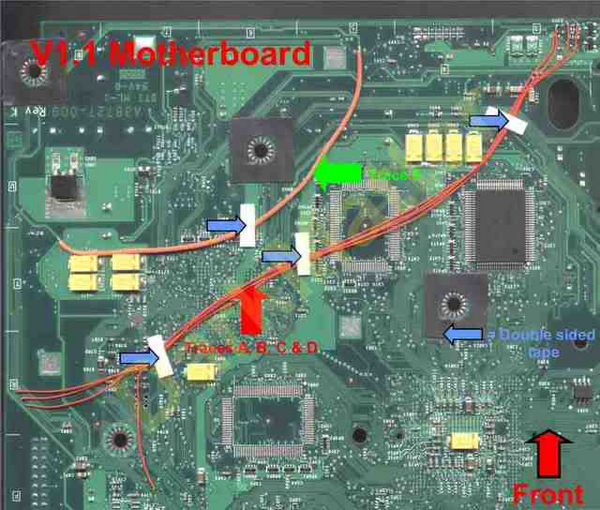
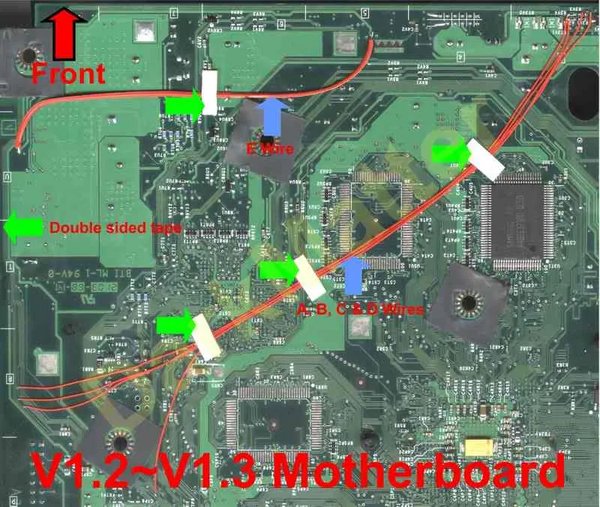
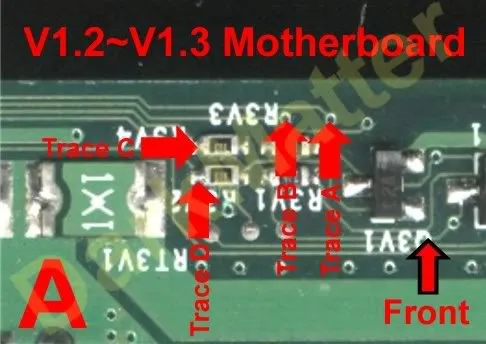
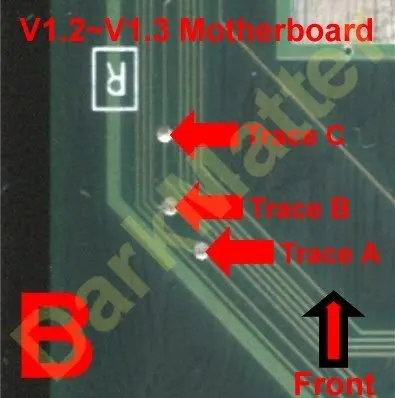
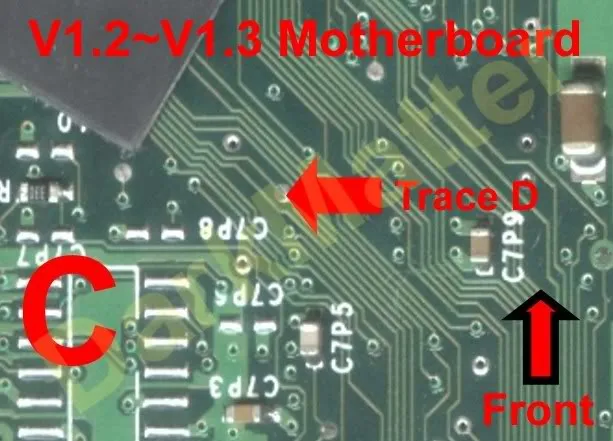
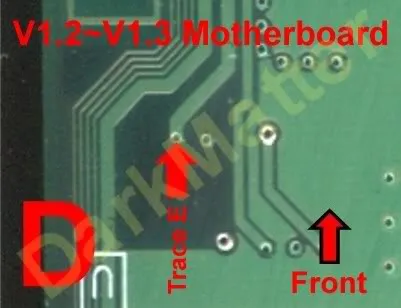
For each damaged trace, you will need to solder a length of wire between it's two endpoints. Note that the connection points are extremely tiny, and most are under solder mask, which must be carefully scraped away before they can be connected. Take the time to check all connection points, and secure your wires to the board before soldering to avoid making mistakes. Some recommend bypassing all six traces regardless of how many are damaged to prevent future issues, however additional soldering increases the risk of damaging the motherboard.
V1.1 Solder Points
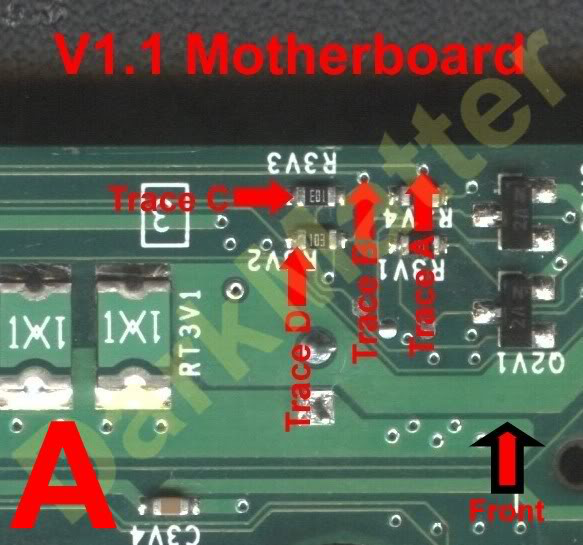
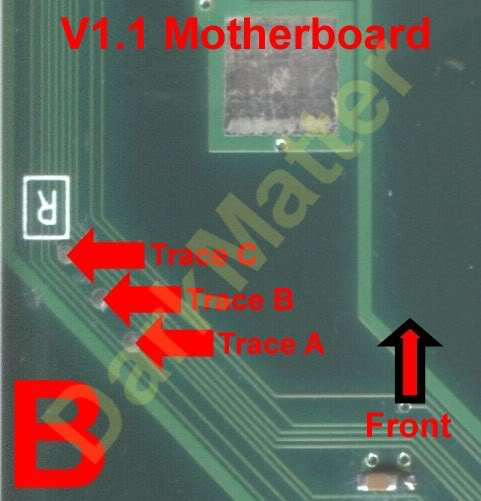
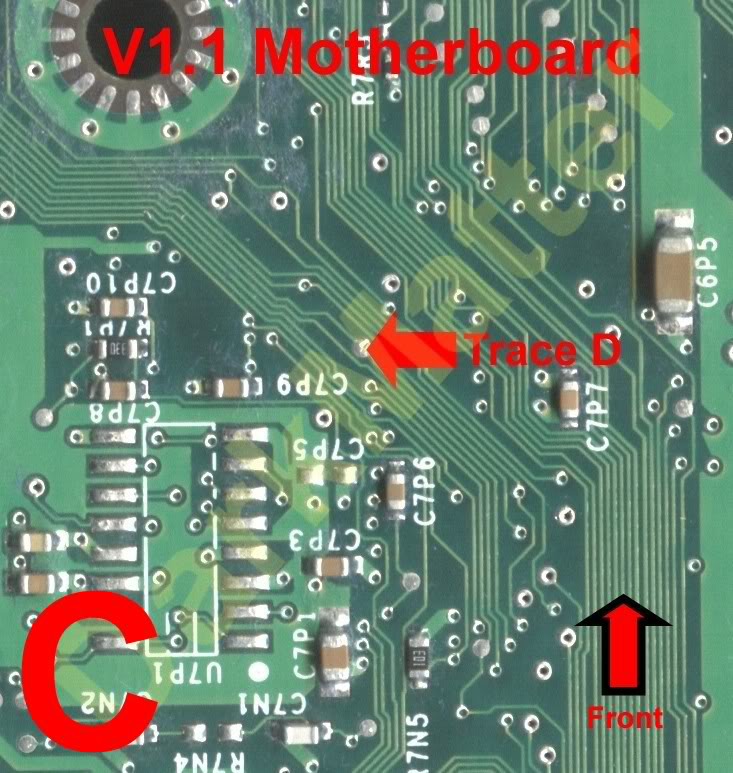
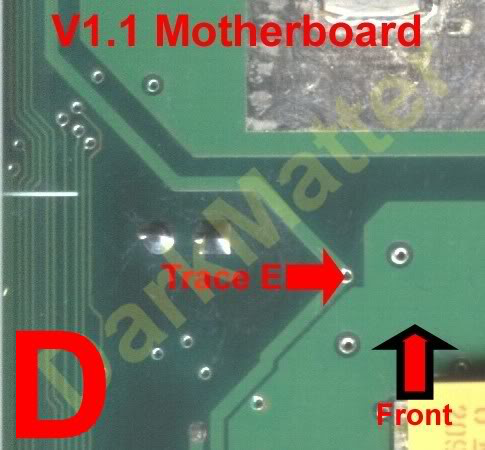
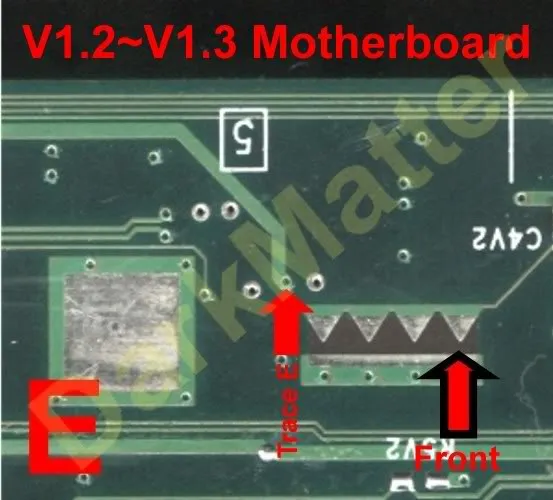
V1.2 & 1.3 Solder Points
When complete, the trace bypass should look something like this: