- English
- português
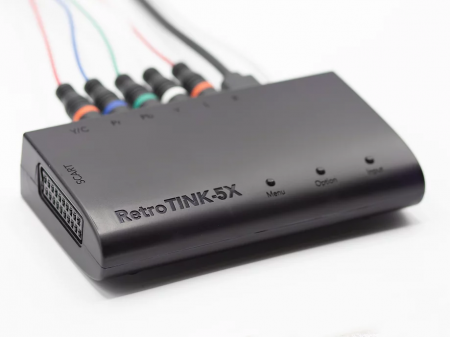
The RetroTINK-5X Pro is an advanced video upscaler designed by Mike Chi released on April 29th 2021. It is from the RetroTink line of upscalers and line-doublers.
The RetroTINK community has united to create this wiki document as a resource for users looking to better understand the TINK-5X Pro, as well as the growing complexities and capabilities that have been added with ongoing firmware updates. Because of this, The RetroTINK-5X Pro Wiki assumes you are on the latest firmware version unless otherwise specified, and it is highly recommended that you upgrade your firmware to the latest public release. Please see the Upgrading Firmware section for instructions and more info.
How to Use the RetroTINK-5X Pro - A Beginner’s Guide
The RetroTINK-5X Pro is a product designed to solve the problem of using retro video game consoles with modern flat panel displays. If you’ve arrived at this guide, you’re probably aware of some problems when trying to play older video game systems on a newer TV:
- HDMI vs Analog - In many situations, the cables that came with your game system will not be compatible with the modern digital HDMI inputs on your TV. One of the main features of the RetroTINK-5X Pro is to convert these signals into an HDMI format your modern display can understand.
- Correct Image Processing - In the cases that your display does have the correct hookups to connect your console, there’s still a good chance that the resulting output will be blurry, distorted and laggy. This is because most displays are designed with Movie or TV Show content in mind, and the video processing typically used to handle that isn’t a good fit for retro consoles. Features like minimal and consistent latency, sharp scaling and proper handling of 240p are almost always missing when using a flat panel’s included analog inputs.
- Input Lag - Because of the image processing described above, many TVs will introduce input lag (aka latency), which is the delay between a controller input and when the action actually occurs on the screen for the player to see. Having too much lag in a setup can make gameplay feel sluggish, unresponsive, and in extreme cases unplayable. In the context of gaming, input lag can also introduced by upscalers and splitters, the game console, and even the game itself. This is why enthusiasts seek devices (controllers, displays, upscalers, etc.) that minimize latency. While every electronic device takes a little bit of time to do its job, devices that do it as quickly as possible are often referred to as "low lag" or "virtually no lag".
The RetroTINK-5X Pro by design is an extremely low lag device, and with includes advanced modes to operate even more quickly (see Triple Buffer vs Frame Lock And Gen Lock for more info). When seeking products that are low latency, it's helpful to know that anything less than a frame in a 60 FPS signal is colloquially considered very low lag. Often milliseconds (ms) are used to measure lag. One frame of a standard 60 FPS signal is equal to approximately 16.7ms.
Just Play the Damn Game™
Thanks to Mike Chi’s research and engineering, the RetroTINK-5X Pro is one of the best products on the market specifically built to address the peculiarities of retro video game analog signals. While a complex engine of tweakability lies under the hood for enthusiasts, the RetroTINK-5X Pro prioritizes ease of use so anyone can get their console up and running.
Here are the basic steps anyone can take to get a great experience with their retro video game console:
- Connect the RetroTINK-5X Pro to your display using an HDMI cable.
- Connect your video game console’s video and audio to the RetroTINK-5X Pro using a supported cable.
- Power on the RetroTINK-5X Pro using the included micro USB cable and a discrete power supply that outputs ~5V and at least 1.5A.
- Using the included remote, select the appropriate input from the "Input Source" menu (this choice depends on the cable you are using to connect your video game console to the RetroTINK-5X Pro, see the Supported Inputs section for more information).
- Using the included remote, select the appropriate output from the "Output Res." menu. For most TVs, 1080p (Fill) is a great “all around” choice.
And that’s it! You don’t have to be an A/V engineer to get remarkable results from the RetroTINK-5X Pro, all the hard work is done behind the scenes. Understanding jargon such as automatic phase detection, polyphase scaling or motion adaptive deinterlacing isn’t required for you to gain the benefits and enjoy your retro consoles on a flat panel with great results.
Supported Inputs
The TINK-5X supports nearly every major analog video format used by retro video game consoles. Please see the Inputs Source and Determining Video Modes sections for more information about supported resolutions and modes.
When selecting a cable, note that the original manufacturer's cables (Nintendo, Sega, Sony, etc.) are typically high quality options. When available, trusted third-party cables that meet or exceed the quality of OEM cables are noted in the following sections.
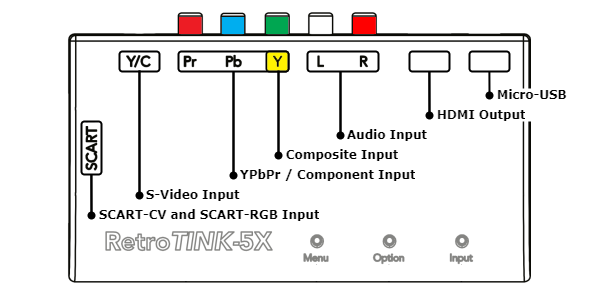
The table below covers all of the TINK-5X's compatible inputs, listed by relative picture quality in ascending order.
Composite | |
|---|---|
|
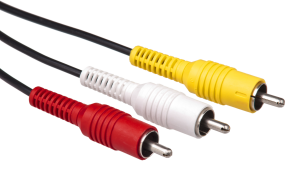
This is the “standard yellow video cable” most people are familiar with. Composite video cables were found on consoles ranging from the NES all the way through the Xbox 360/PS3 era of gaming.
To use composite video: plug your cable’s video RCA plug (typically yellow in color) into the TINK-5x’s “Y” labeled input, and your left and right audio into the “L” and “R” inputs respectively. Then, select Composite from the TINK-5X’s "Input Source" menu; the front LED will turn orange. |
SCART-CV | |
|
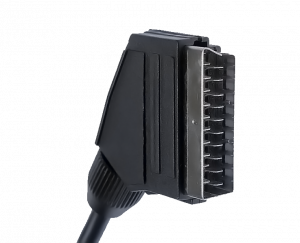
The TINK-5x supports composite video over the SCART connector input. SCART was common in Europe but not widely used outside that region, and video game consoles sometimes featured composite video and audio connections over SCART. Note that S-Video (Y/C) is not accepted through the SCART connector input.
DO NOT confuse SCART-CV with the SCART-RGB option listed further below. To use SCART-CV, plug in an appropriately wired SCART cable or use RCA cables for video/audio with a compatible SCART breakout adapter, and select SCART-CV from the TINK-5x’s "Input Source" menu; the front LED will turn blue. |
S-Video | |

|
S-Video is an iteration of composite video that splits the two parts of the composite signal (luma/brightness with sync and chroma/color) across two separate wires. S-Video is typically regarded as a visual improvement over composite video. Examples of consoles that supported S-Video output include (but not limited to) the PlayStation, Nintendo 64, Saturn and Dreamcast.
To use S-Video with the TINK-5x, plug the S-Video cable into the TINK-5x’s “Y/C” input, and your left and right audio into the “L” and “R” inputs respectively. Then, select S-Video from the TINK-5x’s "Input Source" menu; the front LED will turn white. As of firmware version 3.69, S-Video can also be split into two RCA cables and connected to the Green (Luma) and Blue (Chroma) RCA inputs. |
YPbPr / Component | |
|
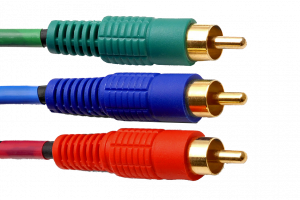
YPbPr or "Component" video is a high quality analog standard that uses three RCA cables to carry separate parts of the video signal (brightness+sync and two color difference signals). Component video was featured on consoles such as PlayStation 2, PlayStation 3, Xbox, Wii, and Gamecube (model # DOL-001 only).
To use YPbPr with the TINK-5X, insert the Y RCA plug (typically colored green) into the Tink 5x’s “Y” input, insert the Pb RCA plug (typically colored blue) into the Tink 5x’s “Pb” input, and insert the "Pr" RCA plug (typically colored red) into the Tink 5x’s “Pr” input. For audio, insert your left and right audio into the “L” and “R” inputs respectively. Then, select YPbPr or YPbPr (SDP) for from the Tink 5x’s Input Source menu; the front LED will turn white. Review the Input Source section of the guide for more information concerning differences between YPbPr and YPbPr (SDP) modes. Recommended YPbPr / Component Cables: |
SCART-RGB | |
|
|
The TINK-5x supports RGB input through the SCART connector input. SCART was not widely used in the United States but was common in Europe, and video game consoles often featured RGB video and audio connections over SCART. To find out if your console supports RGB over SCART, first check the Video Modes Table. Some consoles support RGB only after mods have been installed (such as the Nintendo 64). Other resources for RGB information can be found by choosing your console at the Main Page and seeing if any RGB mods are listed. Additionally, check out RetroRGB's website for detailed information on getting the highest quality RGB picture out of your video game console.
CompatibilityThe TINK-5x is designed to accept RGB over SCART in the "EuroSCART" variant and NOT JP21. Though JP21 uses the same style connector, it is not compatible with the TINK-5x and may damage your hardware. SyncThe TINK-5x accepts sync on luma, sync on composite and c-sync RGB over SCART configurations. Check with your SCART cable manufacturer to ensure compatibility with the RetroTINK-5x Pro. Note that TTL-level sync is not supported by the TINK-5x and may damage your hardware. Note that RGsB (such as the PlayStation 2's RGB output for 480i/480p titles) is not supported. 31 kHz SignalsThe TINK-5x can accept 31 kHz RGB signals with the use of a compatible sync combiner device. This allows for "VGA" input from compatible sources and resolutions. Sync combiner products include the HD15-2-SCART and VGA2SCART. A common implementation of this option is accepting Dreamcast "VGA" output using a compatible VGA cable. Other options include building a sync combiner directly into the SCART cable, such as the Retro Access Dreamcast 15khz/31khz SCART cable. More information about these products as they pertain to the Dreamcast can be found here. Recommended SCART-RGB Cables: |
Remote Control
Premium Remote
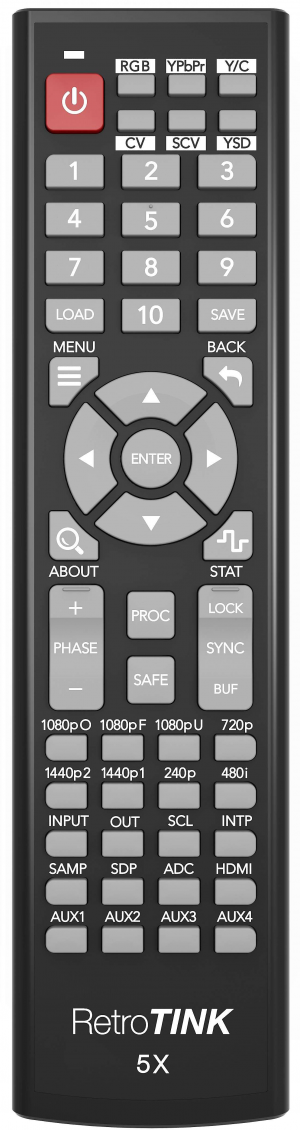
Firmware version 3.61 or later is required to use the RetroTINK 5X premium remote.
| RetroTINK-5X Premium Remote | |||||||||
|---|---|---|---|---|---|---|---|---|---|
 |
Button | Function | IR Code (Addr, Cmd) | Button | Function | IR Code (Addr, Cmd) | Button | Function | IR Code (Addr, Cmd) |
| Power | Powers on / off the RT5X | 0xB3, 0xDC | SAVE | Save Profile menu | 0xB3, 0xB7 | 1080pU | Switches to 1080p Under output | 0xB3, 0xD3 | |
| RGB | Switches to SCART-RGB input | 0xB3, 0xB0 | MENU | Opens the on-screen menu | 0xB3, 0xE2 | 720p | Switches to 720p output | 0xB3, 0xD4 | |
| YPbPr | Switches to YPbPr input | 0xB3, 0xB1 | BACK | Back out to previous menu | 0xB3, 0xC5 | 1440p2 | Switches to 2560x1440p output* | 0xB3, 0xD5 | |
| Y/C | Switches to S-Video input | 0xB3, 0xB2 | △ (Up) | Up | 0xB3, 0xCA | 1440p1 | Switches to 1920x1440p output* | 0xB3, 0xD6 | |
| CV | Switches to composite video (green jack) input | 0xB3, 0xB3 | ◁ (Left) | Left | 0xB3, 0x99 | 240p | Switches to 240p output* | 0xB3, 0xD7 | |
| SVC | Switches to composite video (SCART) input | 0xB3, 0xB4 | ENTER | Enter | 0xB3, 0xCE | 480i | Switches to 480i output* | 0xB3, 0xD8 | |
| YSD | Switches to YPbPr (SDP) | 0xB3, 0xB5 | ▷ (Right) | Right | 0xB3, 0xC1 | INPUT | Input Source menu | 0xB3, 0xD9 | |
| 1 | Loads profile slot 1 | 0xB3, 0x92 | ▽ (Down) | Down | 0xB3, 0xD2 | OUT | Output Resolution menu | 0xB3, 0xDA | |
| 2 | Loads profile slot 2 | 0xB3, 0x93 | ABOUT | Opens the About window | 0xB3, 0xB8 | SCL | Scaling/Cropping menu | 0xB3, 0xDB | |
| 3 | Loads profile slot 3 | 0xB3, 0xCC | STAT | Status menu | 0xB3, 0xB9 | INTP | Interpolation menu | 0xB3, 0xE6 | |
| 4 | Loads profile slot 4 | 0xB3, 0x8E | PHASE + | Optimized sampling phase up | 0xB3, 0xBA | SAMP | Horizontal Sampling menu | 0xB3, 0xDD | |
| 5 | Loads profile slot 5 | 0xB3, 0x8F | PHASE - | Optimized sampling phase down | 0xB3, 0xBD | SDP | Standard Definition Decoder menu | 0xB3, 0xDE | |
| 6 | Loads profile slot 6 | 0xB3, 0xC8 | PROC | Post-Processing menu | 0xB3, 0xBB | ADC | Video ADC menu | 0xB3, 0xDF | |
| 7 | Loads profile slot 7 | 0xB3, 0x8A | SAFE | Hold for 1 second to load default profile (1080p) | 0xB3, 0xBE | HDMI | HDMI output menu | 0xB3, 0xE0 | |
| 8 | Loads profile slot 8 | 0xB3, 0x8B | SYNC-LOCK | Gen Lock | 0xB3, 0xBC | AUX1 | Video ADC-2 menu | 0xB3, 0xE1 | |
| 9 | Loads profile slot 9 | 0xB3, 0xC4 | SYNC-BUF | Triple Buffer | 0xB3, 0xBF | AUX2 | 0xB3, 0xE5 | ||
| 10 | Loads profile slot 10 | 0xB3, 0x87 | 1080pO | Switches to 1080p Over output | 0xB3, 0xD0 | AUX3 | 0xB3, 0xE3 | ||
| LOAD | Load Profile menu | 0xB3, 0xB6 | 1080pF | Switches to 1080p Fill output | 0xB3, 0xD1 | AUX4 | Pause the screen | 0xB3, 0xE4 | |
* Only available if advanced resolutions is turned on.
Standard Remote
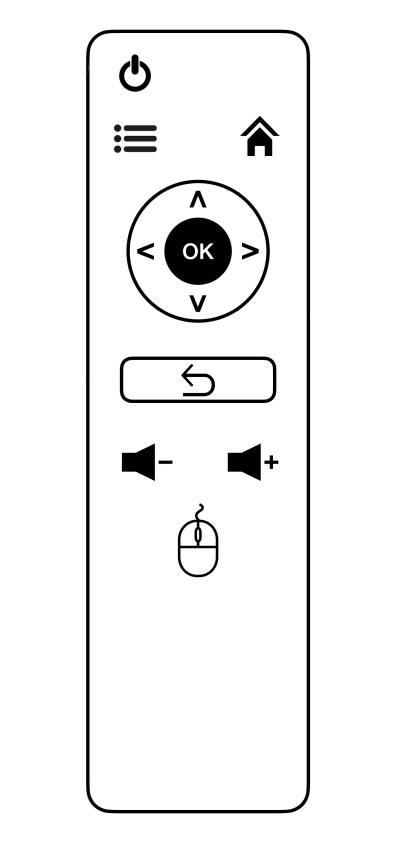
The RetroTINK-5X Pro comes shipped with a IR remote control. For Post-2.0 firmware revisions, it is required to navigate the menu system, as the face buttons on the unit itself are no longer able to navigate the new, more sophisticated GUI. In the following chart, both the Pre-2.0 and Post-2.0 remote functions are listed. IR blaster codes are provided for users interested in their own programmable remotes or home automation systems. Compatible universal remotes can be programmed with Disney DVD player codes for basic functions.
Note: GUI Window "shortcut" buttons (Mouse, Volume Up, etc.) will only open their respective menu when the GUI is fully closed.
|
|
Symbol | Name | Function | Pre-2.0 Firmware Function | IR Code (Addr, Cmd) |
|---|---|---|---|---|---|

|
Power |
|
Power button and save settings | 0x80, 0x81 | |

|
Menu |
|
Cycle to Next Output Resolution | 0x80, 0x83 | |

|
Home |
|
Cycle to Next Input | 0x80, 0x73 | |

|
Up Arrow |
|
Shift Image Up (1080p over) | 0x80, 0x38 | |

|
Down Arrow |
|
Shift Image Down (1080p over) | 0x80, 0x40 | |

|
Left Arrow |
|
Previous OSD option | 0x80, 0x37 | |

|
Right Arrow |
|
Next OSD option | 0x80, 0x39 | |

|
OK |
|
Cycle through items within option | 0x80, 0x13 | |

|
Back |
|
Exit OSD | 0x80, 0x27 | |

|
Volume Down |
|
Cycle to next scan line option | 0x80, 0x89 | |

|
Volume Up |
|
Cycle to next horizontal interpolation mode | 0x80, 0x87 | |

|
Mouse |
|
Cycle to next horizontal sampling mode | 0x80, 0x48 |
Upgrading Firmware
Since debuting in May, 2021, the RetroTINK-5X Pro has received vast upgrades to its features and functionality, as well as numerous bugfixes and tweaks. Mike Chi originally provided an excellent manual that detailed the stock firmware features thoroughly. However, with each iteration, that manual fell out of step and does not cover many of the options found on the RetroTINK-5X Pro today.
The RetroTINK community has united to create this wiki document as a resource for users looking to better understand the TINK-5X Pro, as well as the growing complexities and capabilities that have been added with ongoing firmware updates. Because of this,
The RetroTINK-5X Pro Wiki assumes you are on the latest firmware version unless otherwise specified, and it is highly recommended that you upgrade your firmware to the latest public release.
The instructions below covers how to update a RetroTINK-5X on a Windows PC, which can also be found on the Official RetroTINK-5X Firmware Repository.
- Download and install the CDM21228_Setup FTDI D2XX Drivers.
- Download the RetroTINK Firmware Tool. Install it by unzipping and running RT_FWUP.
- Download the firmware you need via the RetroTINK-5X Firmware Repository.
- Hold down the 'Menu' button on the RetroTINK-5X unit, while plugging it into your computer via the USB cable normally used for power. When you do this, the LED on the 5X should be RED, indicating that it is in update mode.
- Run the RetroTINK Firmware Tool. The installer will have left a shortcut on your desktop.
- In the Firmware Tool, hit "Search": You should see "FT232R USB UART" appear in the box, indicating that the tool has detected the RetroTINK-5X.
- Hit "Load HEX" and select the .hex firmware file you downloaded and unzipped in Step 3.
- Hit the "Flash" button to update the 5X.
- During the update, the Firmware Tool may freeze. This is completely normal! The tool is still running as it should, and it will complete the firmware update after a minute or two. Be patient!
- If you accidentally interrupt the process, start over from Step 4.
- The RetroTINK-5X should reboot and be ready to use.
Multiplatform
An unofficial Python update tool called tinkup, developed by Ryan Mullen, can be used to update a RetroTINK-5X on Windows, Linux and Mac (including M1). The browser based RetroTINK Firmware Flasher, created by Nahuel Cirocco, can be used as an easy-to-use alternative.
As of Firmware Update 2.00, the Menu and Option buttons on the front of the unit no longer have functionality paired to them. The Input button will still cycle through the various input sources.
For more help, Bob from RetroRGB has created a video tutorial giving step-by-step details on how to perform a firmware upgrade on the full RetroTINK line of products.
Notable New Features
Below is a list of the most notable features that have been added to the RetroTINK-5X through various firmware updates (for a full list, visit the TINK-5X firmware page). It's worth noting that none of these remove the plug-and-play nature of a stock 5X.
- Hard Resolution Change Masking - Hard resolution changes (i.e. 240p <-> 480i) are detected and masked to provide a smoother experience, as of firmware 3.92.
- Improved S-Video Processing - Significant improvements in S-video quality via firmware 3.93.
- ADC Fine-Tuning - Newly implemented settings and on-screen display indicators allowing for signal-specific analog to digital calibration, improving video dynamic range and color reproduction.
- Inverse Telecine - New inverse telecine mode allows for 3:2 pulldown video content to play back in reconstructed 24 fps. This helps applicable video content play with its intended cinematic framerate.
- 2:2 Deinterlacing - 2:2 deinterlacing mode rebuilds progressive video output from 480i games that run at reliable/stable 30 fps, which can effectively convert 480i into 480p, increasing visual resolution/clarity. Especially useful for PlayStation 2 where much of the library is 480i only.
- Menu-based GUI - A new menu system allows for easy navigation and tweaking of the 5X's features. This comes with a revamp of the remote's button layout (see the Remote section above).
- Global Low Lag Output - While already an incredibly low lag device, all 5X input / output resolution combinations have been reduced to 1-3ms of lag.
- Blue Only - Displays only blue color values, similar to the "Blue Button" on PVMs used for picture calibration.
- HDR Injection - Allows the output to be flagged as either HDR10 or HLG, effectively adding HDR functionality. This can result in more accurate picture luminance when using the CRT overlays, although the Gamma and Color Boost may need to be adjusted.
- On-Screen Display options - Allows you to change the size of the 5X's menus, as well as the background color when no signal is detected through the selected input.
- 480i and 240p output - The 5X can now output 480i. 240p output also returned in firmware 2.98 after being absent since 2.71.
- Advanced Resolutions - Hidden by default, accessing this enables 1440p, 2560x1440p and 1536p ("iPad") output resolutions. These modes are considered experimental and are provided without support or guarantees.
- Profiles - It's now possible to save your settings using 10 Profile slots. The Load Profile menu also allows you to load the Default profile if you wish to start over from scratch. You can also choose to load up a specific Profile on startup.
- Profile Naming - A long-requested feature that allows you to give your Profiles custom names.
- Visible Cropping Fields - Magenta bars are now displayed when using the cropping controls to help visualize where the crop zones are on the output.
- Scaling and 4:3 Ruler - It's now possible to increase the horizontal / vertical size and positioning of the image, even with optimal sampling. When using an H. Sampling preset that isn't Generic 4:3 / 16:9, a number in the bottom-right corner of the menu displays if your V Size setting matches the pixel aspect ratio of the H. Sampling preset you chose. A reading of 1.00 means a match ("dialed in" 4:3 AR).
- Bob Offset - Offsets the Bob Deinterlacer's movement to either exaggerate or even negate the bobbing effect. This is useful for 240p games that were poorly ported to run at 480i, such as Megaman Anniversary Collection on PlayStation 2.
- Bob Scanlines - Adds interlacing scanlines to interlaced content, which enables an appearance closer to 480i on a CRT.
- 360p Optimal Timing - This allows the 5X to correctly upscale video from the Game Boy Interface, a custom firmware for the Nintendo GameCube's Game Boy Player add-on. This feature only appears when the 5X detects 360p video.
- Scanline and CRT Effect Options and Improvements - This includes vertical masks that enable the appearance of consumer CRTs and arcade CRTs.
- Adjustable Post-Processing Profiles - The existing scanline profiles can now be further tweaked by the user, including the specific scanline beam and vertical mask, their strength, the Gamma and Color Boost, and more.
- Lock to 60hz - Locks the output to 60hz, useful for PAL users who switch between 50hz menus and 60hz games on a modded system, and for unforgiving displays and capture devices.
- Status - Displays technical information regarding the signal currently being displayed.
- Remote Button Holds - When adjusting a numerical value, holding down an arrow button now results in a continuous input, removing the need to constantly tap the button.
- Default Profile Shortcut - Press the Back button on the remote 6 times rapidly to load the Default Profile.
RetroTINK-5X Pro Firmware Notes
The current firmware version is 3.98. For older firmware version notes, please see the RetroTINK-5X Pro firmware version history wiki page.
Version 3.98
Originally released June 1st, 2026
Notice: Firmware updates erase saved profiles and reset the device to default settings.
- Consolidation of changes from previous stable release
- Added Edge Adaptive deinterlacing "MA Smoother" in the deinterlace menu to help reduce aliasing when "Bob" is used
- Rolled in revised Inverse 2:2 deinterlacer from RT4K to weave 30 fps games output as 480i
- Improved lock and unlock stability for unstable sources such as VHS
- Added the RT4K "Smooth I/P" function for glitch-less 240p/480i transistions (also helps with VHS capture if turned on)
- Improved S-video quality
Download Here: Link
Version 3.71
Originally released October 9th, 2023
Notice: Firmware updates erase saved profiles and reset the device to default settings.
- DRAM controller bug fixed that glitched high resolution sources.
Download Here: Rt5x 371.zip
Troubleshooting / FAQ
There are many helpful users at the RetroTINK Discord community that can help answer most questions you might have, and help step you through troubleshooting steps if you are experiencing issues. Here are some of the common questions and solutions the the community has collected.
"Why isn't my RetroTINK-5X Pro showing video or displaying distorted video?"
Steps to attempt to resolve "no video" or "strange / distorted video" issues:
Turn the RetroTINK-5X Pro off and on again
Occasionally, leaving the 5X on for an extended period of time (24 hours or more) will cause it to display the picture incorrectly, such as the picture being green, or no picture at all. Turning the 5X off and on again is sometimes all that's needed to resolve this issue.
Plug the RetroTINK-5X Pro into wall power using a dedicated USB power supply.
While in many cases it is okay to plug into your TV's USB port, some TV USB ports do not supply enough amperage and can cause the RetroTINK-5X Pro to run erratically (stuttering, audio distortion) or not at all. Using a dedicated power supply rated for at least 1 amp (1 A) is a simple way to check if this is the issue. Check your TV's documentation to ensure that the supplied USB port is offering at least 1 amp (1.0 A) of power, as the RetroTINK-5X Pro is rated to draw around 800 mA (0.8 A). If you're using one of the higher resolution output modes, like 2560x1440p, the power draw is slightly higher and it is recommended to use a power supply that is rated for at least 1.5A at 5V.
Try Different Cables
Some users have solved their issue swapping their HDMI cables and/or Micro USB cables. The 5X ships with a new, good quality Micro USB cable but it never hurts to try an alternate if you are experiencing issues.
Ensure your Display is 1080p Compatible
When powered on, the RetroTINK-5X Pro outputs 1080p video by default. If you are using an older TV, check your documentation that it can support 1080p. If you find that it does not, there are other video modes that the 5X can output. 720p would be the next lowest standard video mode, but you will have to navigate the selection without seeing the screen.
To Change Output Resolution Without A Working Picture:
1. Ensure your TV is turned on and set to the correct HDMI input, and that the RetroTINK-5X Pro is turned on and connected to that input with a tested, working HDMI cable.

2. Using the RetroTINK-5X Pro's remote, perform the following button presses:
If your RetroTINK-5X Pro is on a firmware before 2.0, simply pressing the "Three Lines" button on your remote to cycle output resolutions, making sure to give a couple seconds between presses for your TV to adjust, until you see a working picture.
| Switching to 720p Mode (Pre-2.0 Firmware) |
|---|
|
|
If your RetroTINK-5X Pro is at the latest firmware, here are the remote control steps to change video output to 720p:
| Switching to 720p Mode "Blind" (Latest Firmware) | ||||
|---|---|---|---|---|
|
|
|
|
|
|
"I cannot change to 1440p after updating my firmware!"
Make sure the "Advanced Res" is set to "Yes" in the OSD menu. These extended resolutions were put behind a toggle to signify that they are experimental / bonus features and not guaranteed to work in all situations.
"I'm not seeing video with PlayStation 2 using Component cables!"
Make sure your PS2 is set to YPbPr output mode. A guide for changing this setting can be found here.
"I've updated the firmware to my 5X but all of my saved profiles are erased!"
This is normal, expected behavior and an unavoidable aspect of updating the firmware of the 5X. However, an Excel/Google Sheets template has now been created where you may save each of your profile's settings for easier restoration after an update. This template will be updated after every stable firmware release to reflect any changes.
"I want to remove my saved profiles!"
The memory of the RT5X can be cleared by holding both the 'Menu' and 'Option' button while inserting the Micro-USB power cord. Another option is to run the firmware update process with the same version that is currently installed.
Cable Comparisons
To view and compare these images, click on one to enlarge it, then use the arrow keys to jump to the next or previous image in the table.
Nintendo Systems | ||||
|---|---|---|---|---|
| System | Composite | S-Video | RGB | Component |
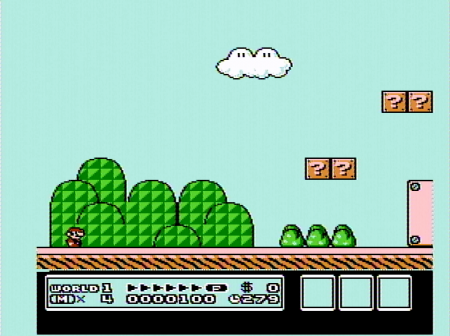
| Nintendo Entertainment System (NES) |
 |
S-Video Unsupported | RGB Unsupported | Component Unsupported |
| SNES "2-Chip" (SNS-CPU-GPM-02) |
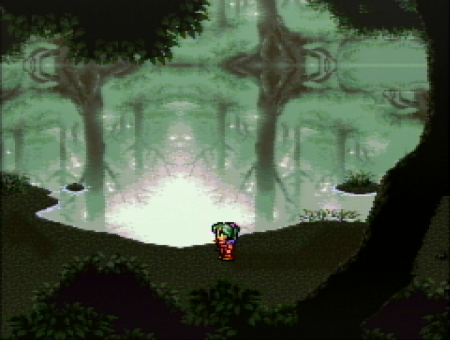 |
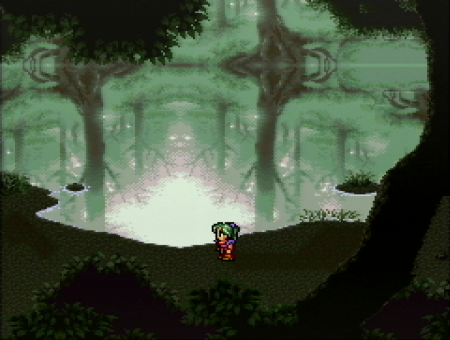 |
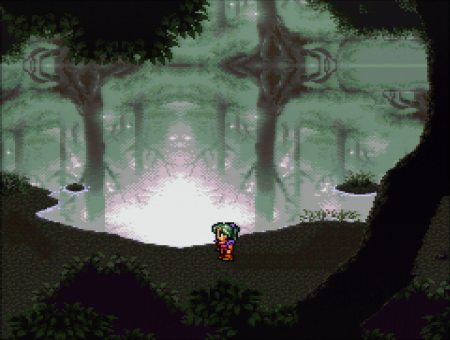 |
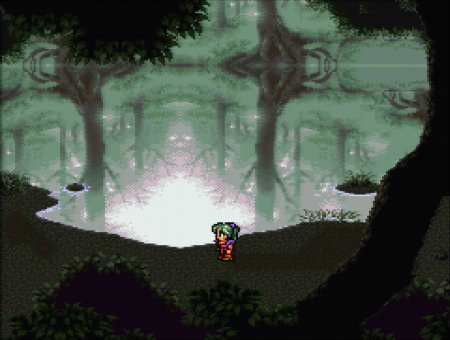 |
| SNES Jr (modded w. Voultar RGB Bypass) |
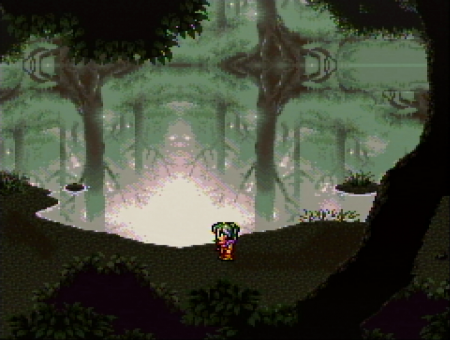 |
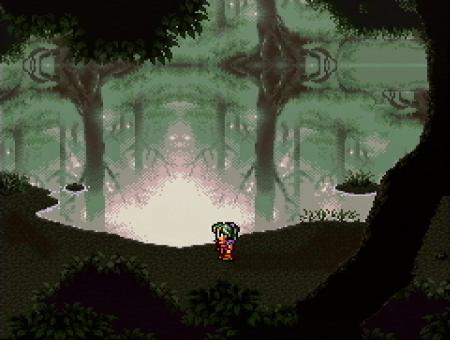 |
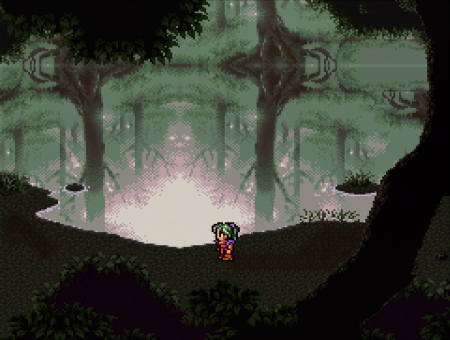 |
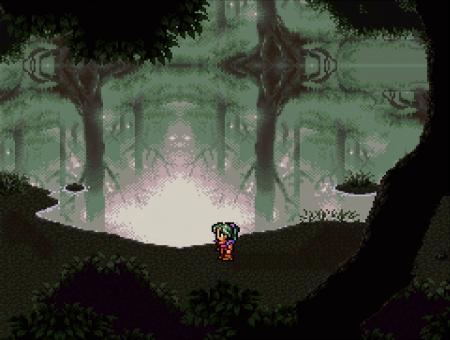 |
| Super Game Boy (SNES "1-Chip") |
 |
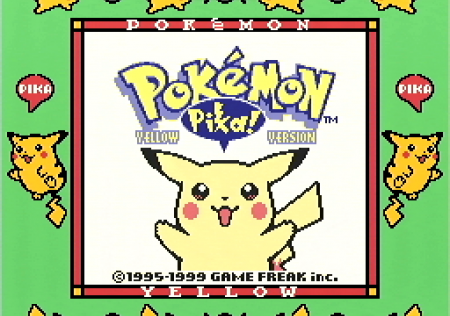 |
 |
Missing image for Super Game Boy Component |
| NTSC Nintendo 64 (modded w. Voultar's N64 RGB Kit) |
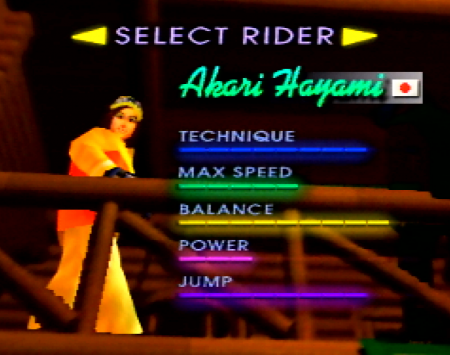 |
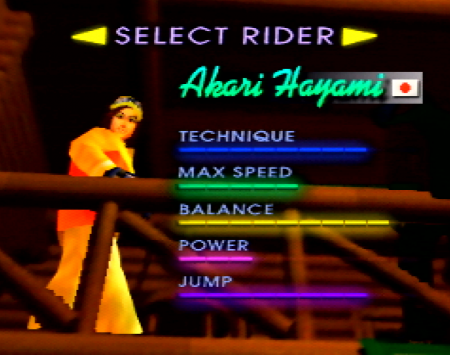 |
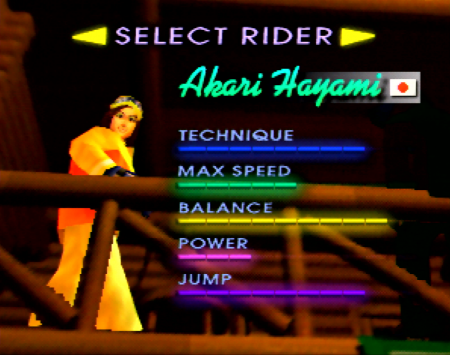 |
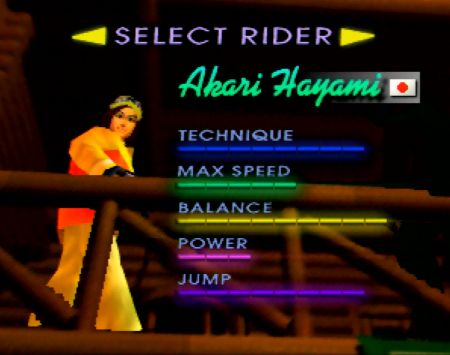 |
| NTSC Nintendo 64 (modded w. Voultar's N64 RGB Kit) |
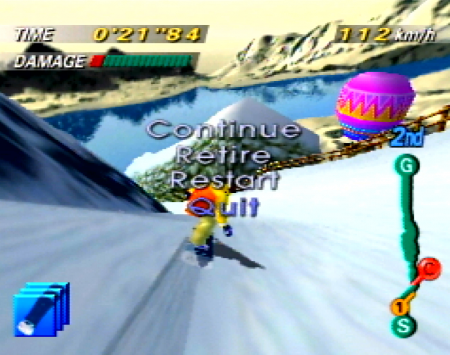 |
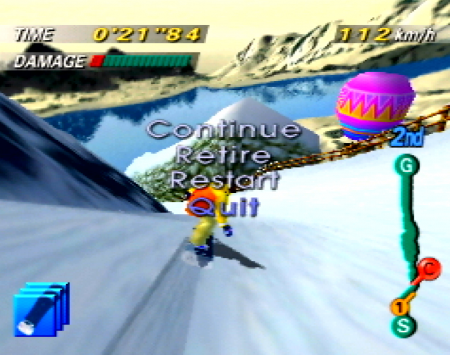 |
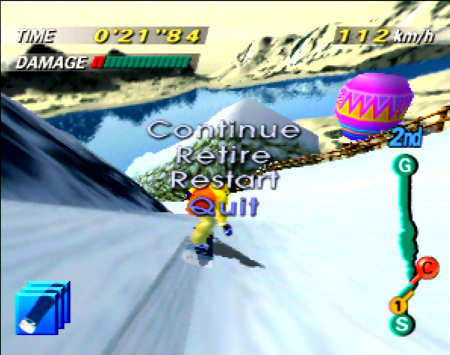 |
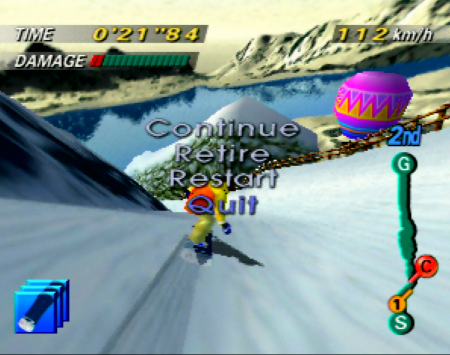 |
Sega Systems | ||||
|---|---|---|---|---|
| System | Composite | S-Video | RGB | Component |
| Sega Genesis | 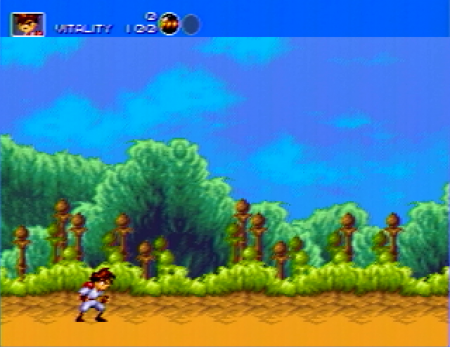 |
S-Video Unsupported | 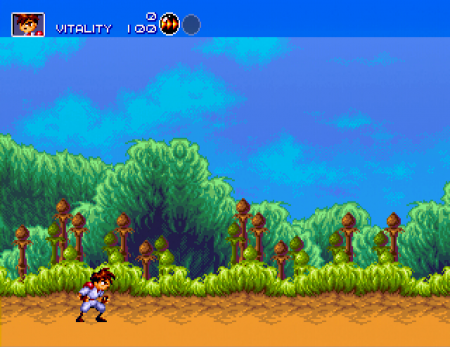 |
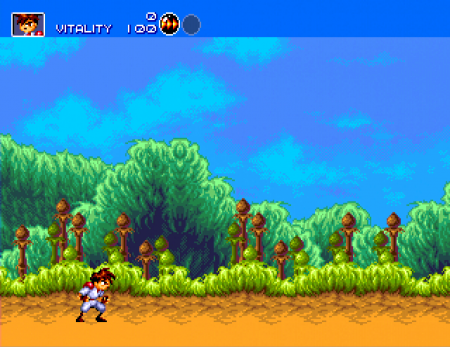 |
| Sega Genesis (modded w. RGB AMP Triple Bypass Mod) |
(3XBP Mod Disables Composite Output Support) | S-Video Unsupported | 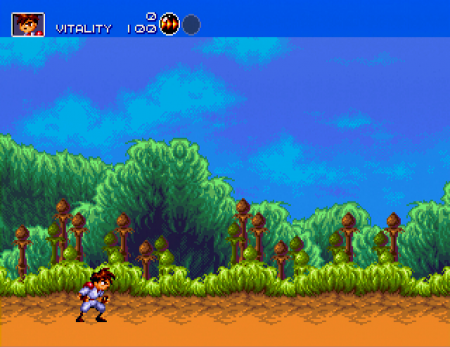 |
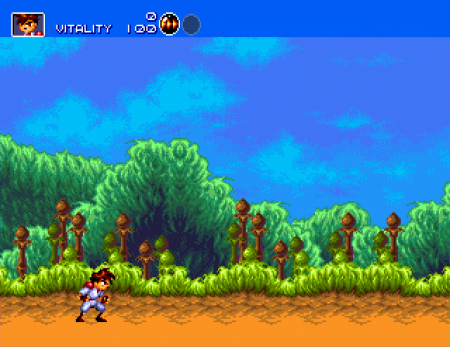 |
| Sega Saturn |
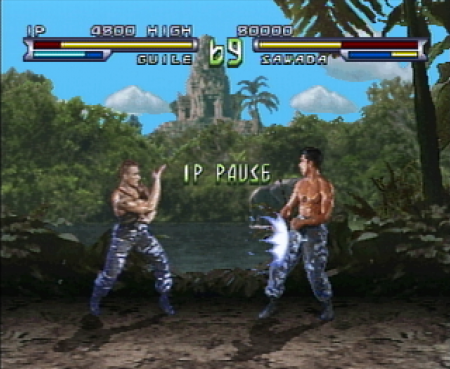 |
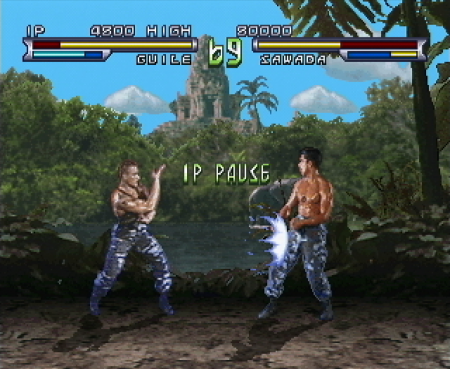 |
 |
 |
| Sega Dreamcast |  |
 |
 |
 |
PlayStation Systems | ||||
|---|---|---|---|---|
| System | Composite | S-Video | RGB | Component |
| PAL Sony PSone |  |
 |
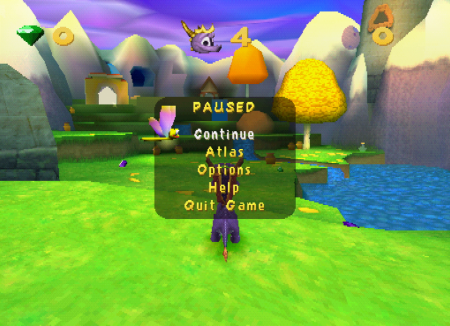 |
Unsupported. However, PS1 games on a PS2 console do support component output. |
| NTSC Sony PlayStation | 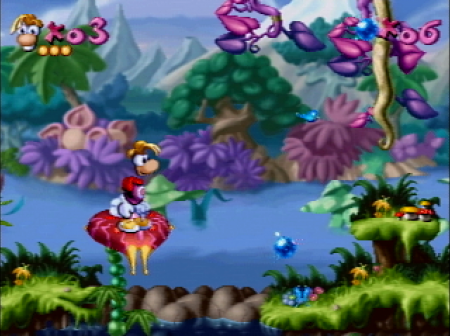 |
 |
 |
Unsupported. However, PS1 games on a PS2 console do support component output. |
| PlayStation 2 | 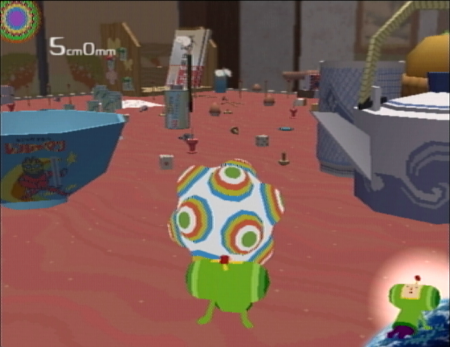 |
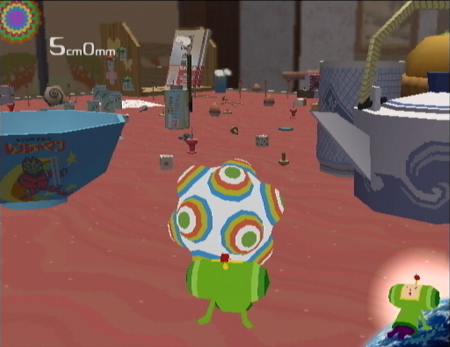 |
(Missing image for PS2 RGsB) |  |
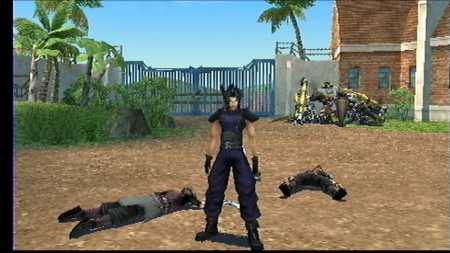
| PlayStation Portable | 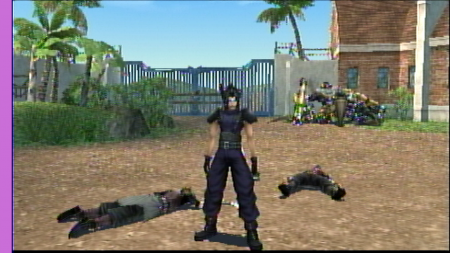 |
 |
Unsupported | 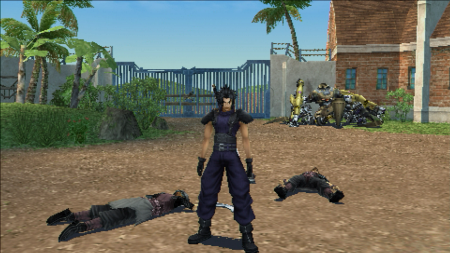 |
Microsoft Systems | ||||
|---|---|---|---|---|
| System | Composite | S-Video | 480i Component | 480p Component |
| Xbox |  |
 |
 |
 |
Microcomputers | ||||
|---|---|---|---|---|
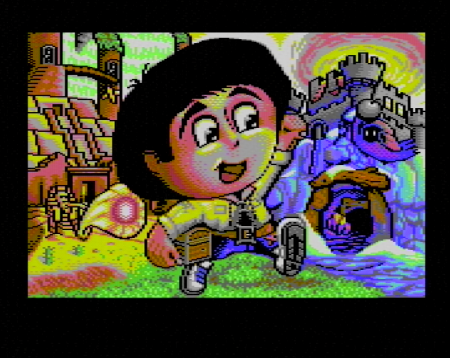
| System | Composite NTSC | Composite PAL | S-Video NTSC | S-Video PAL |
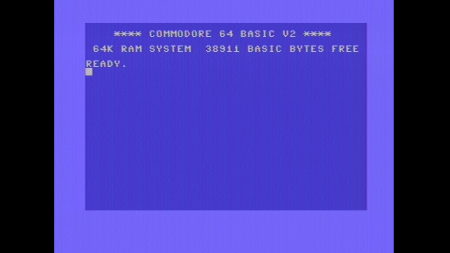
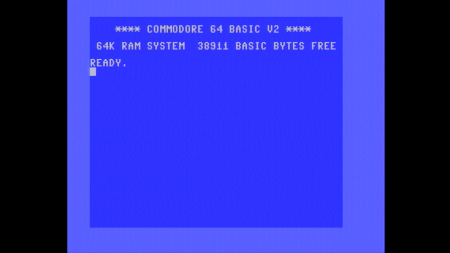
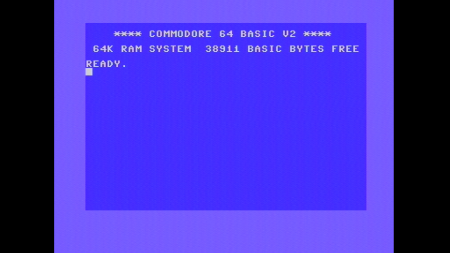
| Commodore 64 | 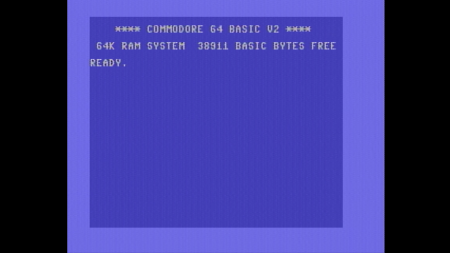 |
 |
 |
 |
| Commodore 64 | 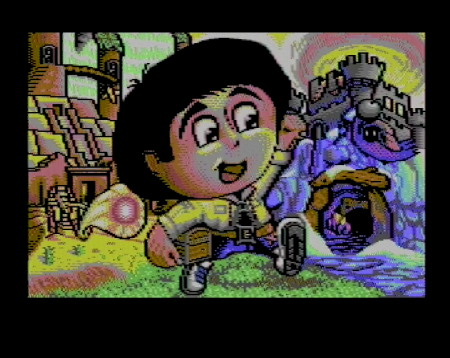 |
 | ||
Miscellaneous Systems | ||||
|---|---|---|---|---|
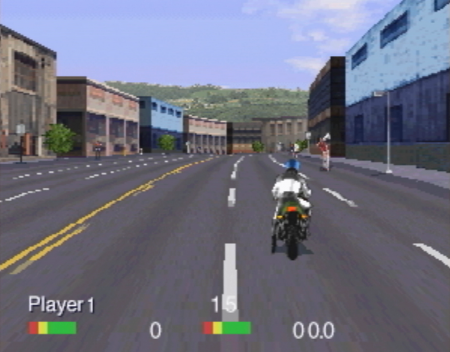
| System | Composite | S-Video | RGB | |
| 3DO Interactive Multiplayer | 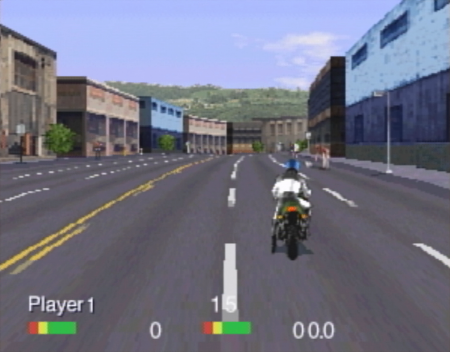 |
 |
RGB Unsupported | Component Unsupported |
| Phillips CDi (PAL) Model: CDi220/60 |
 |
S-Video Unavailable on PAL CDi's |
 |
N/A |
Side-By-Sides | |
|---|---|
| Saturn | 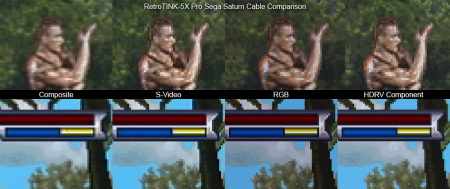 |
| Dreamcast | 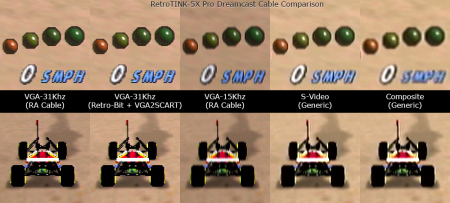 |
| Genesis | 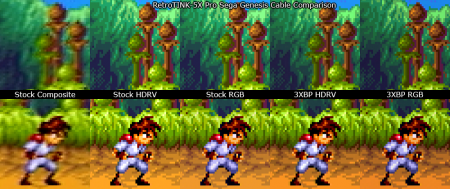 |
| Xbox | 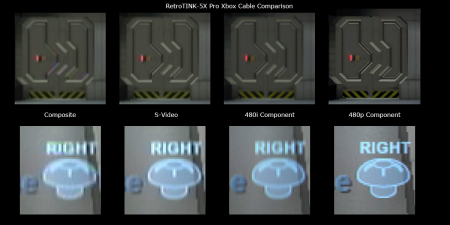 |
| Nintendo 64 | 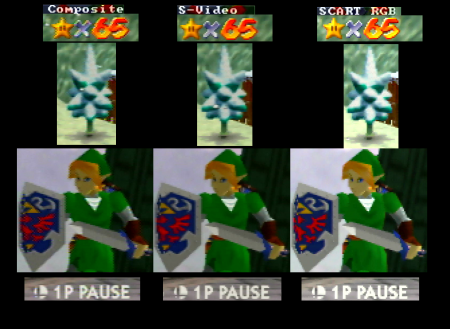 |
Advanced Features
1080p Output Modes
The RetroTINK-5X Pro offers four 1080p output modes in the Output menu: 1080p (Fill), 1080p (Over) and 1080p (Under). These modes interpret the input video signal in different ways, and understanding their function will help get the most out of the RetroTINK-5X Pro. Note that Scaling and Crop adjustments are still required in many cases to position the image and crop out unwanted video artifacts. The example Super Mario Bros. images were captured with stock generic settings with minor alignment and cropping adjustments.
| 1080p (Fill) | |
|---|---|
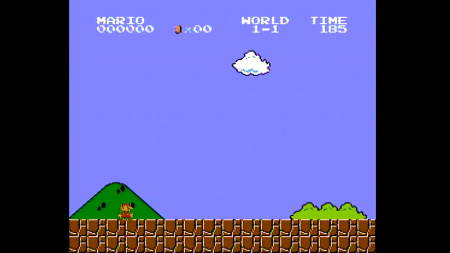 |
In 1080p (Fill) output mode, the video source will be enlarged to fit the vertical boundaries of the 1080p screen.
|
| 1080p (Over) | |
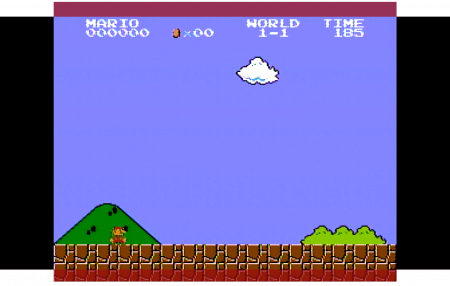 |
In 1080p (Over) mode, a 240p signal will be multiplied five times and 480i / 480p are multiplied 2.5 (2.5x) times. The output will slightly exceed the vertical edges of the 1080p frame and be cropped at the top and bottom.
Many retro games accommodate this cropping, as they were intended to be played on CRTs that typically concealed the edges of the picture in the overscan \ bezel area (note how the HUD in Super Mario Bros. is still visible in the picture on the left). Other titles don't utilize the full vertical height, and thus won't have any graphics cropped in the 1080p (Over) mode, making this mode an ideal choice for those games.
|
| 1080p (Under) | |
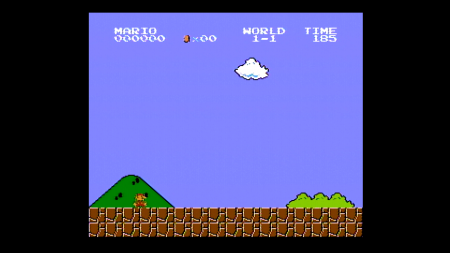 |
Selects the 1080p (Under) output mode. In this mode, a 240p signal will be multiplied four times and 480i / 480p are multiplied twice. The video output will be centered on the screen with a black border. This ensures that every pixel from a 240p signal will appear on your screen and appear very sharp, but will result in more unused space, including above and below the picture.
|
Video Modes
An important element to unlocking the advanced features of the RetroTINK-5X Pro is knowing the specific video mode your console is outputting. This isn't always easy - video modes can change depending on your cable type, game selection, console menu options or even settings within the game. In some cases, video modes will change in-game, often between in-game menus and gameplay (see Triple Buffer vs Frame Lock And Gen Lock for more information on the 'Chrono Cross' problem). Thankfully, the RetroTINK-5X Pro handles the hard work and adjusts seamlessly behind the scenes to process nearly anything your video game console can throw at it. However, understanding your console's video modes can open up advanced tuning options to dial in your console and video preferences.
A Video Mode, simplified, is the number of vertical picture lines a console is generating, followed by either a p or an i, or Progressive and Interlaced respectively - e.g., 480p. For this section, the differences between Interlaced and Progressive will be the focus. (For a complete list of compatible input video modes, see the Input Source section of the wiki.)
Interlaced Signals
Interlaced video is a video standard that dates back to the dawn of broadcast television, and was mainly a technology used on standard definition CRT displays. With interlaced video, the image is drawn on the screen from top to bottom in two consecutive passes. The first pass draws the image in the even spaces, and the second pass fills the image in the odd spaces. This process happens quickly to create a smooth persistence of motion. This "tik-tok" method of filling in the screen allowed early engineers to get more out of the limited bandwidth of TV broadcast signals.
While interlaced video is still used in certain situations, modern display technology doesn't process video in the same way, and interlaced video has to be converted into a progressive image before it can be drawn. The process of turning an interlaced video signal into a progressive one is known as deinterlacing. While Motion Adaptive Deinterlacing is the most sophisticated and is the default deinterlacer on the RetroTINK-5X Pro, there are situations where other deinterlacing methods can create desirable effects, such as Bob and the corresponding Bob Scanline Modes. More about the The RetroTINK-5X Pro's deinterlacing options and examples are outlined in the Interpolation/De-interlacing section of the wiki.
Progressive Signals
Unlike interlaced video, progressive video modes are drawn to the screen in one pass, and thus do not require deinterlacing to be drawn on modern displays. Common progressive modes found in retro consoles include 240p, 480p, and 720p. Because they do not require additional processing, they are typically seen as a higher quality signal (often described as sharper or cleaner) and in most cases are preferred over interlaced options. Progressive video modes can also be processed using the RetroTINK-5X Pro's Pre-Scaling functions for additional resolution-dividing and scanline effects.
NTSC and PAL
oof placeholder
Determining Video Modes
Below is a table of common consoles and their supported video modes. Note that some consoles can be modified or use software to support video modes beyond what is shown here. However, this should serve as a good "rule of thumb" for what video modes and cables are required to get a good experience using them with the RetroTINK-5X Pro. More information for specific consoles can be found in the Console Specific Configurations section.
Video Modes Table
| Console Video Modes (Without Modification) | 240p (NTSC) / 288p (PAL) | 480i (NTSC) / 576i (PAL) | 480p | HD(720p+) | Notes/Other |
|---|---|---|---|---|---|
| Nintendo Entertainment System (NES) | Composite* | - | - | - | Mono audio output. |
| Sega Master System | Composite*, RGB* | - | - | - | *Multiout only available on model 1 and French Master System II, mono audio on multiout. French Master System consoles have RGB but no composite. |
| Sega Genesis / Mega Drive | Composite, S-Video*, RGB | Composite, S-Video*, RGB | - | - | Model 1 has mono audio (use headphone output for stereo), Model 3 has mono audio. S-Video is only available on the Wondermega consoles. |
| TurboGrafx-16 / PC Engine | Composite*, RGB* | - | - | - | *Original white PC Engine and TG-16 are RF only; TG-16 and all standalone PC Engine consoles require an expansion device for RGB output without modding |
| Neo Geo AES | Composite, RGB | - | - | - | Mono output on DIN |
| Neo Geo CD / CDZ | Composite, S-Video, RGB | - | - | - | Composite and mono audio are on the DIN connector |
| Super Nintendo / Super Famicom | Composite, S-Video*, RGB | Composite, S-Video*, RGB* | - | - | *S-Video and RGB are not available on "SNES Jr" models without modding. |
| Phillips CDi | Composite, S-Video*, RGB* | Composite, S-Video*, RGB* | *S-Video and RGB only available on certain models. | ||
| 3DO Interactive Multiplayer | Composite, S-Video | Composite, S-Video | - | - | - |
| Atari Jaguar | Composite, S-Video, RGB | Composite, S-Video, RGB | - | - | - |
| Pioneer LaserActive | Composite | Composite | - | - | - |
| Sony PlayStation 1 | Composite, S-Video, RGB | Composite, S-Video, RGB | - | - | - |
| Sega Saturn | Composite, S-Video, RGB | Composite, S-Video, RGB | - | - | |
| Nintendo 64 | Composite, S-Video* | Composite, S-Video* | - | - | *Not supported on all PAL models. |
| Sega Dreamcast | Composite, S-Video, RGB | Composite, S-Video, RGB | VGA* | - | *Not all games support VGA output. |
| Sony PlayStation 2 | Composite, S-Video, RGB, Component | Composite, S-Video, RGB, Component | RGsB, Component | RGsB, Component | - |
| Microsoft Xbox | Composite, S-Video | Composite, S-Video, RGsB | Component | Component | - |
| Nintendo GameCube | Composite, S-Video*, RGB*² | Composite, S-Video*, RGB*², Component | Component, RGB*² | Component | *S-Video only available on NTSC consoles, *²PAL models only |
| Microsoft Xbox 360 | - | Composite, S-Video, RGB, Component | Component, VGA, HDMI | Component, VGA, HDMI | - |
| Sony PSP | Composite, S-Video, Component | Composite, S-Video, Component | Component | - | PSP-1000 models do not support video output. |
| Nintendo Wii | Composite, S-Video, RGB* | Composite, S-Video, RGB*, Component | Component,RGB* | - | *PAL software only |
| Sony PlayStation 3 | - | Composite, S-Video | Component, VGA, HDMI | Component, VGA, HDMI | - |
| Nintendo Wii U | - | Composite, S-Video, RGB*, Component | Component, HDMI | Component, HDMI | *PAL software only |
Downscaling
Downscaling is a feature of the RetroTINK-5X Pro to output certain resolutions the same or lower than the source input. Specifically, 240p, 480i, 480p and 720p inputs can be output as 240p or 480i. Common use cases include converting modern resolution video games to be compatible with standard definition displays, and for non-deinterlaced 480i VHS capture. Typically, a second transcoder is used to take the HDMI output of the RetroTINK-5X Pro and convert it to an analog signal the SD-compatible display accepts.
All HDMI-capable consoles offer a 720p mode as of 2022, however you may need yet another transcoder to convert the signal to Component, since the 5X does not have an HDMI input. Certain "HD" consoles do allow for Component output, including the PlayStation 3 and most Xbox 360 models.
Enabling the "Ds Pass-Thru" setting will configure the RetroTINK-5X Pro to automatically change the output to follow the source input. For example, if a 480i input was detected, the output would be 480i. If The "Ds Pass-Thru" toggle was set to "off" (default), the 480i input would be processed and output at whatever resolution was set in the "Output Resolution" menu.
- The video above is My Life in Gaming's video covering 240p downscaling using the GBS 8200 with the GBS-Control custom firmware. The knowledge and experiences learned there will generally apply to the 5X as well, including trying to fit a 16:9 image into a 4:3 window, and how high-resolution games and pixelart games may not scale down pleasantly to 240p.
Triple Buffer vs Frame Lock And Gen Lock
Older video game consoles didn't always have perfect video timings. CRTs typically had no problems working with these variances, but these "imprecise" consoles can sometimes have trouble working with modern TVs and capture devices that conform to a more rigid standard. Some games, such as Silent Hill or Chrono Cross on the PlayStation 1, will alternate between 240p or 480i video modes if you are in-game or in the items/pause menu, respectively. On many displays, upscalers and capture devices, this will create a long delay and a "no input detected" screen for several seconds while the device reorients to the new video mode. The issue of a device taking a gameplay-harming amount of time to change between video modes has been colloquially called the "Chrono Cross" problem.
- These modes can be accessed in the "HDMI" menu, then adjusting the "V-Sync" option.
- For PAL users, it's worth noting that the Lock to 60hz feature may also be required to remove the "Chrono Cross" problem.
- Lock to 60hz also allows capture cards to not lose picture when nothing is output at all, such as before and after the console startup.
- The TINK-5X is not able to automatically switch its H. Sampling Preset when the resolution changes. If you are using one of the non-Generic presets, we recommend using the one that matches the gameplay.
Triple Buffer
The RetroTINK-5X Pro uses "Triple Buffer" mode to effectively eliminate the "Chrono Cross" problem and create very high compatibility with displays and capture devices even for consoles with "imprecise" video. However, Triple Buffer mode comes at the expense of increased lag and occasional and minor judder. The lag varies between approximately 0.25 to 1.25 frames in this mode.
Frame Lock
For those looking for the lowest possible lag, the RetroTINK-5X Pro offers a "Frame Lock" mode. With Frame Lock enabled, the RetroTINK-5X Pro uses the console's video input as its base clock and offers a fixed lag of approx. 0.25 frames. The lowered lag comes at the cost of possibly lower compatibility with some TVs and capture cards, and not protecting devices from the "Chrono Cross" problem.
The RetroTINK-5X Pro defaults to Triple Buffer mode to ensure the highest compatibility for users. To toggle between Triple Buffer and Frame Lock, navigate to the HDMI settings and toggle the V. Sync (Vertical Sync) option.
Gen Lock
The 'Gen Lock' feature is only available with Firmware 2.73 or higher, and only on units sold after July 2021. This variance is due to a part that was substituted on account of supply shortages. Firmwares 2.73 and above will still work with older models (including newer features such as HDR), but won't display the Gen Lock feature.
Similar but unique to Frame Lock Mode, Gen Lock allows the RetroTINK-5X Pro to match the input frame rate with a regenerated clock, resulting in a signal which is more stable than Frame Lock Mode. Mainly useful for 1440p+ resolutions with SDP sources (Composite/S-Video) that previously could not sync in Frame Lock. Other benefits include removing judder and composite artifacts that show up in triple buffering, as well as dejittering the SNES for displays that may otherwise not work in Frame Lock Mode.
Variable Refresh Rate (VRR)
Certain displays support Variable Refresh Rate, allowing them to achieve a wider range of frame rates. The RetroTINK-5X can flag its output as VRR, which improves input lag for the Frame Lock and Gen Lock V-Sync modes. For certain displays this will also enable a special low latency mode, reducing the display's input lag.
Horizontal Sampling Modes
The TINK-5X uses a combination of its flexible video ADC plus polyphase scaler to produce various horizontal sampling options. The Generic 4:3 and 16:9 modes interpolate the horizontal directions to produce the correct aspect ratio at the select output resolution.
The optimal modes, listed for the various consoles, sample the horizontal direction at the same rate as the original console, allowing for an even sharper picture.
Note that not all presets may be available for a given signal. The list of available Presets is determined by an internal matrix of input/output combinations. For example, the HiRes 858 Preset may not be available with 480p input.
Here are the currently included "Optimal Timing" presets:
| Preset | Description |
|---|---|
| Generic 4:3 | Scales the video using a 4:3 aspect ratio. Good generic choice for 4:3. |
| Generic 16:9 | Scales the video using a 16:9 aspect ratio. Good generic choice for native 16:9 games or for stretching anamorphic 16:9 content to fill the screen. |
| SNES/PCE 256 | For SNES or PC Engine/TurboGrafx-16 games that use a 256 horizontal resolution. |
| Gen/Sat 320 | For Genesis/Mega Drive games that use a 320 horizontal resolution. |
| PS1 320 | For PlayStation 1 games that use a 320 horizontal resolution. |
| N64 320 | For Nintendo 64 games that use a 320 horizontal resolution. |
| NEOGEO 320 | For Neo Geo games that use a 320 horizontal resolution. |
| Saturn 352 | For Sega Saturn games that use a 352 horizontal resolution. |
| PS1 384 | For PlayStation 1 games that use a 384 horizontal resolution. |
| HiRes 512 | An optimal sampling mode for games that use a 512 horizontal resolution, including (but not limited to) specific PlayStation 1 and SNES games. |
| HiRes 858 | HiRes 858 is a sampling mode that is optimized for later-generation 480i analog sources, including (but not limited to) DVD playback, Dreamcast, Xbox, GameCube, Wii, Xbox 360, PS2, PS3 and Wii U. |
| GBI Optimal | An optimal sampling mode for use with GameCubes running Extrem's Game Boy Interface software. GBI Optimal is only available when a 360p input is detected |
| DTV-A \ DTV-B | Optimal sampling mode for 480p sources. DTV-A and DTV-B are closely related, choose A or B depending on what looks best to your eyes. DTV-A \ DTV-B is only available when a 480p input is detected . |
| DTV 858 (3:2) | A 3:2 aspect ratio variant of the DTV 858 optimal mode. Consoles that use a 3:2 aspect ratio and 480p include the Sega Dreamcast. DTV 858 (3:2) is only available when a 480p input is detected and the output resolution is set to 2560x1440p. |
| DTV 858 (4x) | An integer 4x scaled DTV sampling mode. DTV 858 (4x) is only available when a 480p input is detected and the output resolution is set to 2560x1440p. |
Post Processing Filters
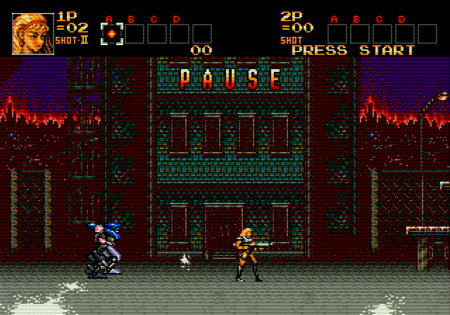
The RetroTINK-5X Pro features customizable post processing filters designed to simulate the look of certain CRT and LCD displays. Below is a list of the current featured presets, as well as examples captured from the same video source for comparison and reference. To view the post-processing effects example images with the best clarity, click once to view the images enlarged, and click the enlarged image again to view them in your browser without scaling.
| Preset | Off | Slot Mask | A. Grille -1 | BVM |
|---|---|---|---|---|
| Description | 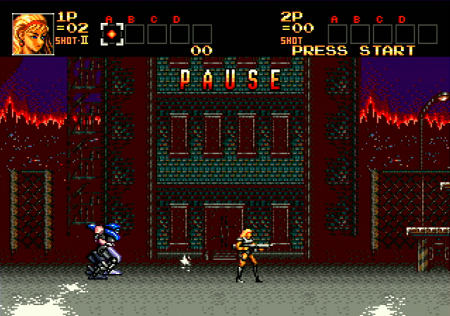 |
 |
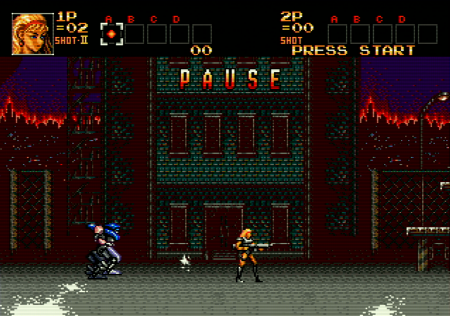 |
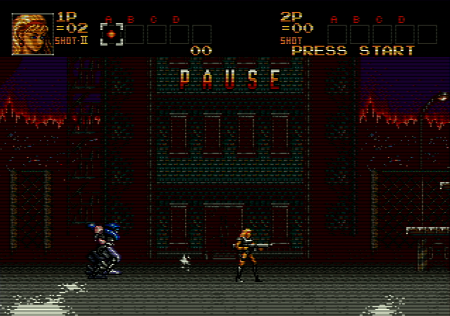 |
| Preset | PVM-600 | FV310 | Consumer-1 | Consumer-2 |
| Description | 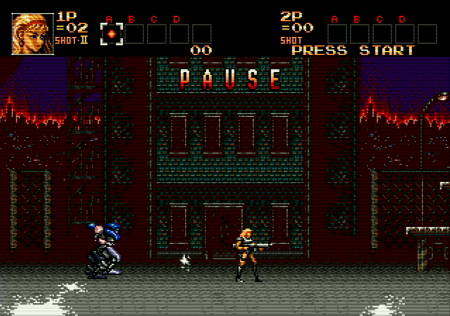 |
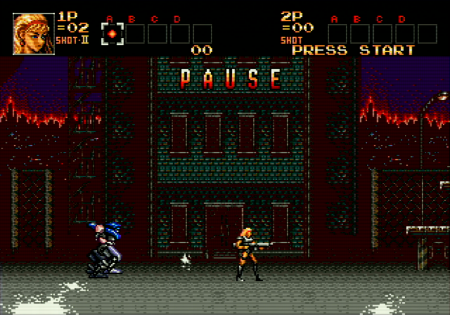 |
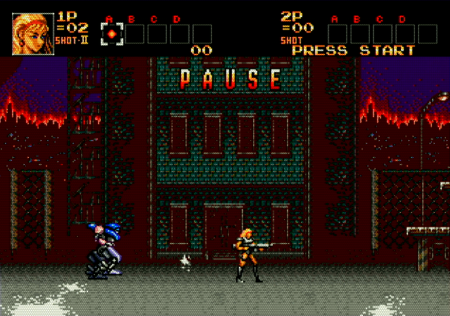 |
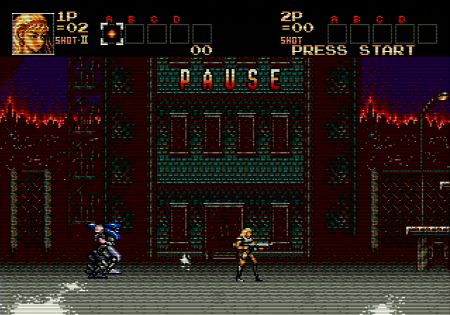 |
| Preset | LCD (Optimal Horizontal Sampling) |
LCD (Generic Horizontal Sampling) | ||
| Description | 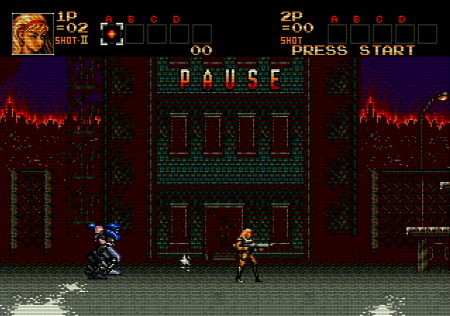 |
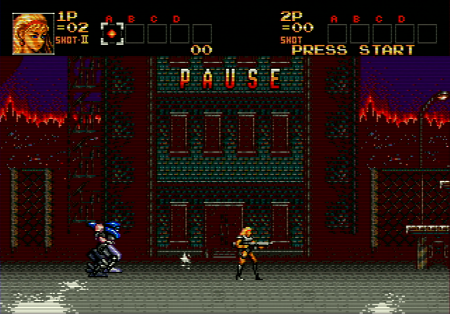 |
Video ADC Calibration
The RetroTINK-5X Pro includes the option to manually calibrate its ADC brightness levels for Standard Definition sources, and brightness / color balance controls for RGB and YPbPr Sources. With manual fine-tuning, the RetroTINK-5X Pro's ADC can better conform to a console's specific analog signal levels, and potentially yield deeper blacks, brighter whites, improve color reproduction and eliminate potential clipping (loss of information) in the digitization process. This can result in a more vivid picture that closely resembles pure digital output, like with emulators or HDMI mods.
While some games include brightness scales, such as many Capcom games on PlayStation 1 and Nintendo 64, many of them are only black and white and may not be pure black or white. The most versatile tool to calibrate the RetroTINK-5X Pro's Video ADC to your console's signal is the 240p Test Suite by Artemio, which can be used for the NES family, Sega Genesis / CD, the PC Engine / Turbo Grafx-16 family, Sega Dreamcast, Wii and GameCube. More information and downloads for the 240p Test Suite can be found here: https://junkerhq.net/xrgb/index.php/240p_test_suite.
- Note that the numerical values shown in the examples below are not transferable to your console. This is because the exact brightness can vary between systems, even if they are the exact same model. The purpose of manual calibration is to find the correct values for your console's signal!
Calibrating ADC-2
Because the RetroTINK-5X Pro operates internally using YPbPr, both RGB and YPbPr sources will be adjusted using Y, Pb and Pr gain and offset values. Reminder that only RGB and YPbPr sources and be calibrated using the Video ADC-2 menu. SD sources (Composite, S-video, and YPbPr(SDP)) can be calibrated in the SDTV Decoder menu. The following example uses EBU Color Bars (100%) from the 240P Test Suite.
The goal of YPbPr calibration is to synchronize the settings of the RetroTINK 5X-Pro's ADC and the maximum and minimum values for each of your console's luma (Y), difference between blue and luma (Pb), and difference between red and luma (Pr) signals.
- It's important that you follow the steps in order, otherwise your calibration will not be correct!
- Calibration is stored per resolution. Ensure that you have enabled and set the correct resolution for your desired calibration in 240p Test Suite.
- When calibrating using a 480p source make sure you set the 240p Test Suite to 480p under "Video:", then go to options and turn "480p Scanline Intensity:" down to 0%.
- On 480p sources, if after doing the full calibration process your colors still look off, such as a hue shift in dark areas, open up the Video ADC menu and turn EDTV LPF to ON, and start the calibration over from the beginning.
The calibration examples below use "EBU Color Bars" test pattern, set to 100% levels, but you can also use SMPTE (100%) color bars.
Step 1- Pr Calibration
Open the EBU Color Bars (100%) on your console, and navigate to the RetroTINK-5X Pro's ADC-2 Menu. The first setting selected should be "Pr Gain". You will notice the color bars have become desaturated/grayscale.
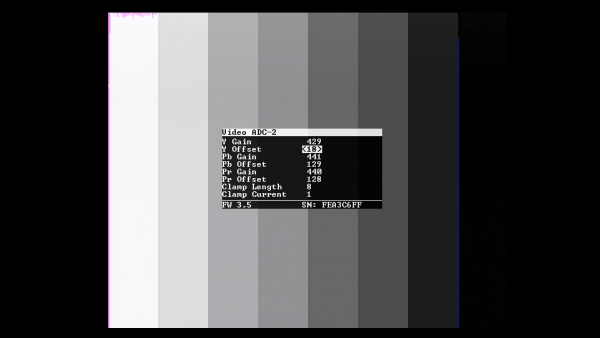
This is because the visual indicator for the high and low signal clipping points will be the colors blue and magenta respectively. The goal is to have both blue and magenta clip at the same time, without making their column completely solid, as doing so could potentially clip video information outside the range of the ADC.
- First, adjust Pr Gain setting until either magenta or blue beginning enveloping their respective columns (red and cyan).
- If only magenta is clipping, reduce Pr Offset
- If only blue is clipping, increase Pr Offset
- After adjusting Pr Offset adjust Pr Gain again and see if both clip at the same time
If the two colors will not clip at the same time, you can adjust the Clamp Length to a value between 8-12 and try again. Please note that increasing Clamp Length increases visual noise.
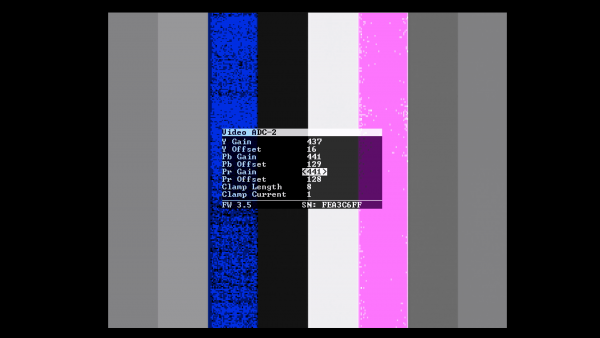
Step 2 - Pb / Y (Luma) Calibration
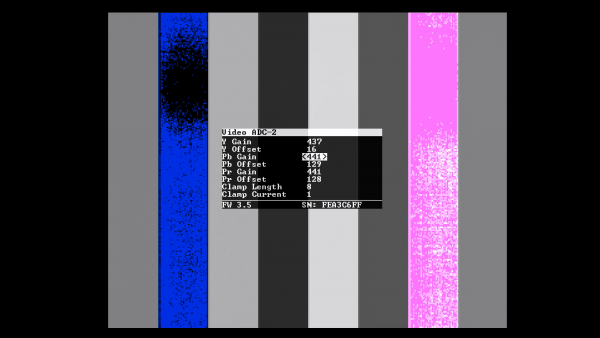
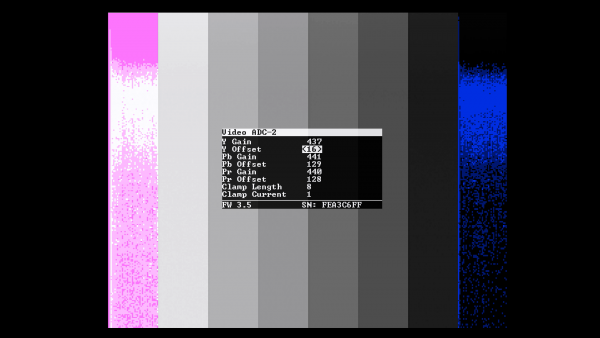
Adjusting Pb and Y values is more straightforward than Pr. Note that Pr adjustments should be made before Pb and Luma adjustments as clamp length will change all other adjustments. The ideal levels occur when blue and magenta indicators appear at the same time per value, using the gain and offset controls.
Correct Pb adjustments should cause the blue and yellow columns clip simultaneously:
Correct Y adjustments should cause the black and white columns to clip simultaneously:
Calibrating SDTV Decoder
How to calibrate the video levels on the composite or S-video input of a retrotink 5x Pro using a 100% color bar test pattern:
This calibration should be performed separately for each source console, as each one will have slightly different video levels.
- Dial in brightness. Some consoles may have somewhat inconsistent black levels, so some creative interpretation is required. this can be done directly in the SDTV decoder window.
- Dial in contrast. this currently requires flipping back and forth between the SDTV menu to change the setting and the ADC-2 menu to see how it looks
- Dial in chroma(saturation). this currently requires flipping back and forth between the menus. it is likely that one axis will be more saturated than the other, in which case, aim for a happy medium
- Set to "blue only" in the hdmi menu.
- Go to SDTV menu and adjust phase until the 4 columns are as seamless as possible.
- Disable "Blue Only".
- Recheck chroma/saturation, as this can change a fair bit after dialing in phase.
If you cannot properly distinguish the discontinuities in the blue columns from Step 5, your television or monitors' saturation/white level is set too high, try reducing it slightly.
Inverse Telecine and 2:2 Modes
placeholder Inverse Telecine - New inverse telecine mode allows for 3:2 pulldown video content to play back in reconstructed 24 fps. This helps applicable video content play with its intended cinematic framerate. 2:2 Deinterlacing 2:2 deinterlacing mode rebuilds progressive video output from 480i games that run at reliable/stable 30 fps, which can effectively convert 480i into 480p, increasing visual resolution/clarity. Especially useful for PlayStation 2 where much of the library is 480i only.
HDR
"Inject HDR" can be used with compatible displays to treat the RetroTINK-5X Pro's HDMI output as "HDR enabled-content." This allows extended range of the +Gamma Boost value in the Post Processing menu to compensate for the loss of image brightness when using Scanline and/or CRT Mask filters, as well as the display's Black Frame Insertion feature. Without "Inject HDR" enabled, +Gamma Boost operates at a range of -10 to +10. With "Inject HDR" enabled, the range is increased to -10 to +20.
- To enable HDR, navigate to the [HDMI] selection from the RetroTINK-5X Pro GUI and set "Inject HDR:" to either "HLG" or "HDR10".
- HDR is intended to be used with the 5X's scanline presets found in the "Post Proc." menu.
- Note that HLG will look very de-saturated at first; you must go to the [Post Proc.] menu and adjust "Color Boost" to 0.
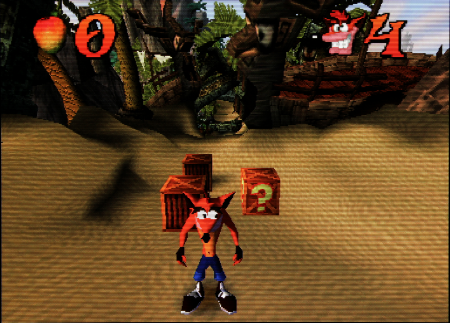
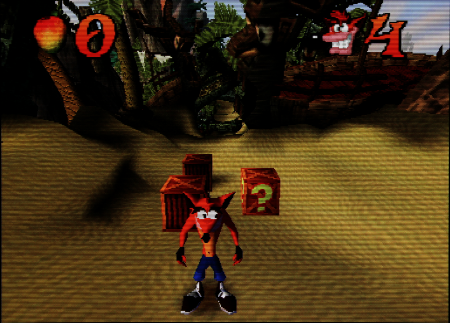
HLG and HDR10 are different formats of HDR, and from the RetroTINK-5X will appear different from each other. HDR10 is more luminous, and with scanlines can help mimic the brightness of a real CRT, but can appear garish without scanlines. HLG isn't as luminous, but is more pleasing without scanlines. The CRT look can be mimicked even further if your display is capable of Black Frame Insertion (BFI).
Note that HDR isn't well represented in screenshots, and that the effect is more pronounced when viewed in person on an HDR display.
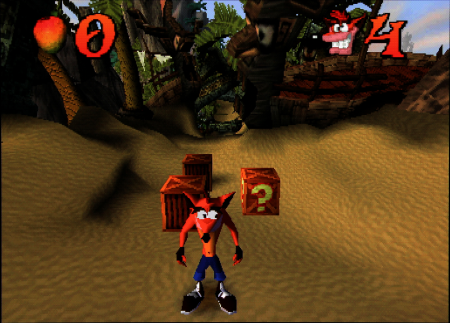
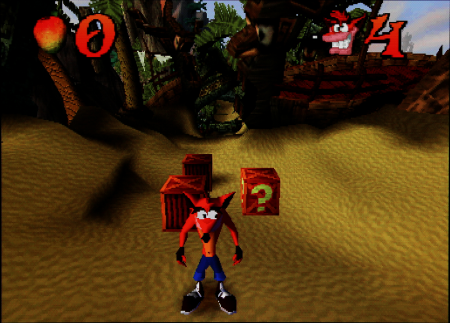
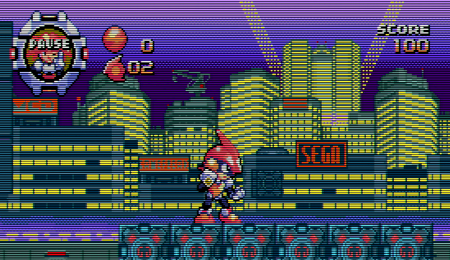
In the table below, all photos have had their exposure set for HDR10 with PVM-600 scanlines, to demonstrate the brightness differences between the various examples. Since they're photos of a screen, the contrast is not representative of looking at them with the human eye. The TV used was an LG CX 55".
| HDR Comparisons - Off-Screen Photos | |||
|---|---|---|---|
| HDR10 | HLG | SDR | |
| PVM-600 Scanlines | 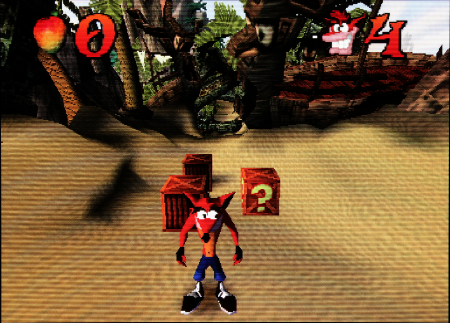 |
 |
 |
| No Scanlines | 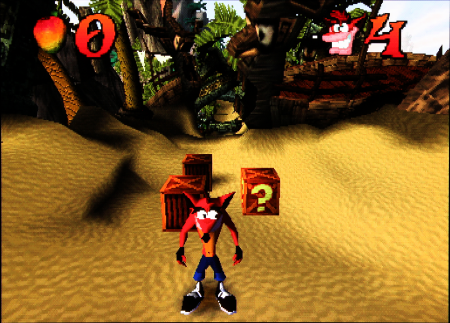 |
 |
 |
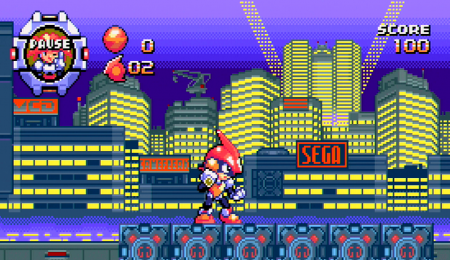
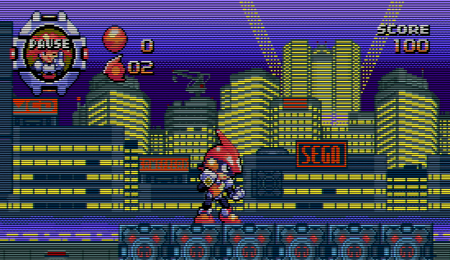
This second table shows what the HDR modes look like via direct capture.
| HDR Comparison Examples - Direct Captures | ||
|---|---|---|
 |
 |
 |
Pre-Scaling and Bob Scanline Modes
Pre-Scaling
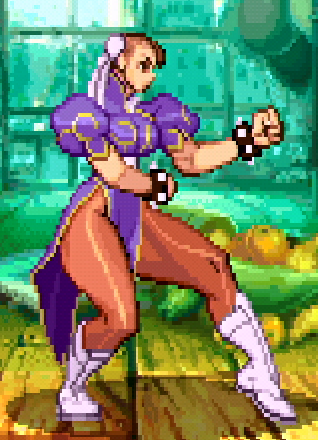
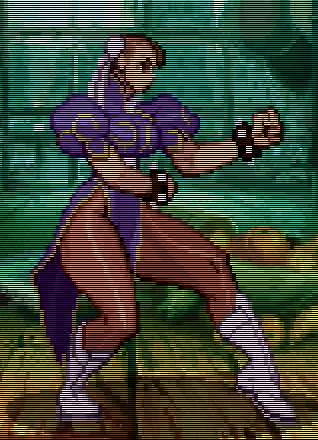
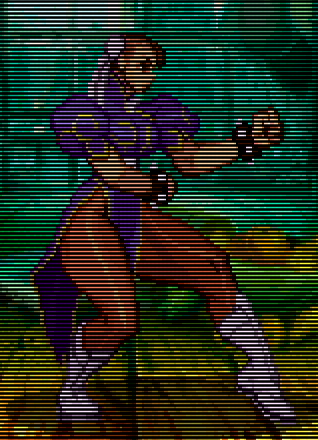
The RetroTINK-5X Pro includes the ability to "Pre-Scale" progressive video content, or discard scanline intervals, at one-half or one-third increments of the source input. This discards vertical lines resulting in a loss of resolution and visual information, and isn't always a desirable effect. However, this loss in resolution is useful in some circumstances, such as more accurate scanline rendering for 240p visual content output from consoles that run at higher resolutions (such as the Dreamcast or Wii). The following example is from Street Fighter 3: Third Strike for the Dreamcast. The Dreamcast is outputting 480p, but the assets of the game are 240p graphics being doubled in software. The RetroTINK-5X Pro can throw away half the redundant visual data before applying post-processing effects, resulting in a more "arcade CRT authentic" scanline size and effect.
More information can be found at the Post-Processing Filters, Post-Processing, and Interpolation/Deinterlacing sections.
| No Scanline Effects | Scanline Post-Processing with No Pre-Scale | Scanline Post-Processing with 1/2 Pre-Scale |
|---|---|---|
|
|
|
| This example was achieved by setting the Scanline to Gaussian and Scanline Str. to 50 in the Post-Processing section, and setting Prescale to 1/2 in the Interpolation/Deinterlacing section. | ||
Bob Scanline Modes
Much like pre-scaling for progressive content, Bob Scanline Modes gives you additional control for how scanlines are applied with 480i interlaced content. To use the various Bob Scanline options, the Deinterlacer must be set to "Bob" in the Interpolation / Deinterlacing menu, and scanlines should be enabled in the Post-Processing menu (any preferred combination of "+Scanline Beam" and "+Scanline Str." settings).
The "Post-Deint." or Post Deinterlace option applies scanlines after the 480i source has been deinterlaced to 480p. This gives the appearance of thinner scanlines.
"Pre-Deint. or "Pre-Deinterlace" treats the 480i source as 240p, so the applied scanlines are thicker. This is especially appropriate for situations where a 240p graphical asset game is being displayed in a 480i video mode.
The "CRT Simulate" setting functions similarly to Pre-Deinterlace, but shifts the odd and even scanlines every frame to reproduce how a CRT display would draw the image.
For more information on deinterlacing methods, please see the Interpolation/De-interlacing.
Below are some examples from Mega Man Anniversary Collection on the PlayStation 2. It is an example of a game that renders 240p assets through 480i video output. This is not typically a desirable combination for the best video quality, but using Bob Scanline modes and scanline Post Processing filters can help improve the visual experience of the game.
| Motion Adaptive (default) | Bob + Pre-Deint. | Bob + Post-Deint. |
|---|---|---|
| https://consolemods.org/wiki/File:480i-default-motion-adaptive.webm | https://consolemods.org/wiki/File:480i-bob-pre-deint.webm | https://consolemods.org/wiki/File:480i-bob-post-deint.webm |
| Bob + CRT Simulate | Bob + Pre-Deint. + Scanlines | Bob + CRT Sim. + Scanlines |
| https://consolemods.org/wiki/File:480i-bob-crt-simulate.webm | https://consolemods.org/wiki/File:480i-bob-pre-deint-scanlines.webm | https://consolemods.org/wiki/File:480i-bob-crt-simulate-scanlines.webm |
Saving and Loading Profiles
The RetroTINK-5X Pro includes 10 slots to save your custom settings. To save your settings, navigate to the [Save Profile] section from the Main Menu. Selecting one of the Save Profile slots (1-10) will save any current changes made to the RetroTINK-5X Pro system into the chosen slot.
As of firmware 2.98, selecting a slot to save a profile will bring up a secondary window allowing you to name your profile with an on-screen keyboard. The saved values can then be loaded from the Load Profile menu, or a slot be set to load on boot from the On-Screen Display/Startup Profile selection.
The Load Profile menu also allows you to go to the Default Profile; this isn't visible in the Save Profile menu to prevent the user from accidentally overwriting it. You can also load the Default Profile by quickly pressing the Back button on the remote six times.
Chroma Subsampling
Chroma subsampling is a technique used in video that reduces the data size of video information. It does this by compressing chroma (the color tone) separately from luma (the brightness) of a given pixel. This method takes advantage of the human eye’s ability to detect luma at a higher sensitivity as compared to chroma, and is a common practice in video reproduction to save on video bandwidth while minimizing degradation in quality.
A more detailed explanation of chroma subsampling can be found here.
The RetroTINK 5X operates using a YCbCr 4:2:2 chroma subsampling encoding. However, with sources up to 480p, a color fidelity comparable to YCbCr 4:4:4 is achieved through sampling the incoming video data at up to 3 times that of “traditional” capturing techniques - the ‘oversampled’ image is interpolated to produce much higher color accuracy than 4:2:2 alone.
With 720p and 1080i content, however, it isn’t possible to capture enough sample data for the “pseudo-4:4:4” technique to work, revealing color compression artifacts of the Tink’s baseline YCbCr 4:2:2 encoding. While there is nothing inherently “wrong” with using 720p and 1080i input content captured by the Tink, some users regard the 4:2:2 compression as suboptimal and may wish to find alternative methods of upscaling 720p and 1080i content.
Console Specific Configurations
This section goes over the specific settings and configurations you may want to consider for specific platforms, including their quirks such as the Nintendo 64's additional blur filters, or counteracting the 3DO's 480i output. Please keep in mind that the RetroTINK-5X Pro still provides a great experience without diving into any of this so that you can Just Play The Damn GameTM.
This section in particular delves into what is known as "Optimized Sampling". This process further refines the picture to gain the sharpest pixels possible by dialing in to the specific resolution the game is currently outputting. This comes at the expense of freely resizing the picture like in the Generic 4:3 and Generic 16:9 modes: doing this with Optimized Sampling will result in undesired results. This, combined with the pixel aspect ratios many retro games expected to be viewed on, means that Optimized Sampling is frequently at the mercy of integer-based scales. If that all sounds complicated, stick to the Generic 4:3 / 16:9 modes so you can resize to your heart's content.
The Optimized Sampling Settings in this section are transcribed from Wobbling Pixels' YouTube channel, where he creates excellent video guides to dial in optimal settings for various retro gaming consoles and configurations.
NES / Famicom
The Famicom (or Family Computer) is the original Japanese version of Nintendo's landmark console, while the NES (or Nintendo Entertainment System) was released in all other regions. All Famicom / NES systems will be marked as such at the front, so simply read that to tell which one yours is (particularly useful regarding the top-loading redesigns).
The NES / Famicom can only output either Composite video or RF (with one rare exception). Use the list below to tell which one your system outputs:
- Composite signals are supported by the RetroTINK-5X: insert the yellow cable into the green plug, then go to the "Input" menu and select "Composite".
- Original "Front-loading" NES.
- Top-loading "AV Famicom" with the rounded power switch and flat cartridge slot.
- Sharp's "Twin Famicom".
- Sharp's "Famicom Titler" (also capable of S-Video).
- RF signals are not normally supported by the RetroTINK-5X. For a workaround, visit the RF Consoles section below.
- Original Famicom w. hard-wired controllers.
- Revised "Top-loading" NES with a rounded cartridge slot and power switch.
- The RF Modulator output from the original "Front-loading" NES, which has softer sound compared to the the sharper Composite output.
Because these systems can only output Composite or RF, there's very limited room for the 5X to improve it. Here's our suggestions:
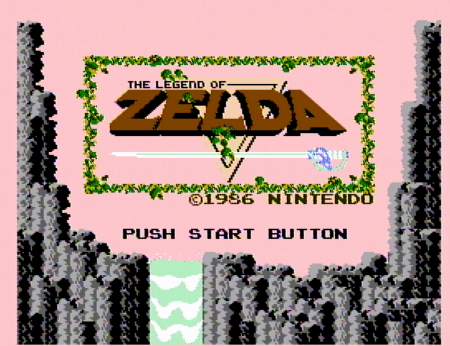
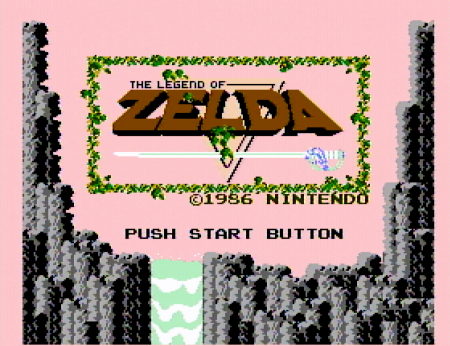
- Optimal sampling settings are the same as with the SNES / Super Famicom, so you can use the table provided in that section below. Because of Composite's low quality, it's subjective whether sharper look is better or not (see table below for examples).
- NES signals also tend to have some vertical jitter. This can be reduced by going to the "Interp./Deint." menu and setting "Vertical Filter" to "Soft".
- Certain titles would often have large parts of the screen that go unused, barely visible on a CRT but prominent on modern displays. To mask them out, go to the "Scaling/Crop" menu and use the Crop settings to adjust the Start and Ends of H Crop and V Crop.
| NES Composite Video Generic Vs Optimal Sampling Comparison | |
|---|---|
 |
 |
SNES / Super Famicom
| SNES / Super Famicom Optimal Settings | ||
|---|---|---|
| 1920x1080p (Fill) Output - NTSC | ||
| H. Sampling | Preset | SNES/PCE 256 |
| ADC Samp./Line | 1705 | |
| H (Interp) Size | +0% pix (1705) | |
| Allow Interlace | Disabled | |
| Scaling/Crop | H Position | +0 (176) |
| V Position | +3 (17) | |
| V Size | -3% (1047) | |
| 1920x1080p (Over) Output - NTSC | ||
| H. Sampling | Preset | SNES/PCE 256 |
| ADC Samp./Line | 2046 | |
| H (Interp) Size | +0% pix (2046) | |